Dying Light 2 gives players plenty of opportunities to earn XP. With two skill trees to level up, it isn’t hard to decide where you want to invest your time. You’ll earn plenty of passive XP just by playing the game, but how do you grind the most XP and level up fast in Dying Light? Should you stick to main quests or side quests? What about activities and parkour challenges? Here are some general tips and tricks to level up fast in Dying Light 2.
- Dying Light 2 brings back zombie-killing mayhem — and humanity
- The best zombie games of all time
- The best upcoming PS5 games
Combat vs. parkour
Unlike other popular RPGs, Dying Light 2 doesn’t inundate players with 100 branching skill trees. You’re either combat or parkour-focused initially, eventually evening out by the mid-game. By the end, you’ll have unlocked every perk in Dying Light 2 without favoring one side over the other. Of course, you could sink all your Inhibitor upgrades into HP to build a zombie-killing tank, but that defeats the game’s purpose, now doesn’t it?
You’ll earn combat XP by fighting enemies, plain and simple. The more dropkicks, air kicks, and vault kicks you execute, the more combat XP you’ll earn. On the other hand, you’ll earn parkour XP as you fly around Villedor like SpiderMan and use parkour combat moves to take down enemies. So other than earning passive XP, how can players focus on one school to level up fast in Dying Light 2?
Play activities
Outside of the main story, activities are the most rewarding missions in Dying Light 2. They stretch from random events to full-on GRE facility raids, coming with plenty of valuable rewards and XP points. Let’s start small and work our way to the big ones.
Random events are the blue squares that pop up on your map through exploration. They’ll involve a group of bandits surrounding a chest or a thief looting a dead body. At night, you’ll find survivors in need of immunity boosters, which reward you with other boosters like electricity and rage. These events reward you with hundreds of XP points towards both combat and parkour, not to mention the passive XP you’ll earn by doing them.
You can find “bigger” activities in your journal under the activities tab. These include windmills, power stations, GRE Quarantine Buildings, anomalies, and safe zones, each rewarding you with different amounts of XP. For example, GRE Quarantine Buildings give you equal combat and parkour XP depending on the level. Low-level buildings give you 1,000 XP for both, while higher-level buildings give you 2500 XP. You’ll also find inhibitors in these buildings, along with plenty of zombies to kill. They’re great level-grinding missions to play.
Bandit camps, anomalies, and metro stations reward you with thousands of combat XP, depending on the level. On the other hand, windmills, night runner hideouts, and radio towers reward you with thousands of parkour XP.
Side quests

Side quests are every RPG player’s best friend. In Dying Light 2, you’ll recognize side quests by the white exclamation marks appearing on the map. Approach the NPC and talk to them to start the quest. Some of these quests can get dialogue-heavy, so mash the skip button and answer with yellow-highlighted responses. Once you’ve accepted the quest, hover over it to get the more essential details in your journal.
Some side quests branch in different directions depending on the choices you make. These are denoted by two arrows pointing left and right where the rewards would be listed. Otherwise, you’ll know what you’re earning for completing each mission. For example, the sidequest pictured above, “Rats in the House,” gives us 750 combat XP, 2,250 parkour XP, and a valuable bottle of Old World Whiskey. This would be an excellent quest to play if we’re looking to earn some parkour skills before the next story mission.
Parkour challenges
Parkour challenges are for those looking to earn parkour XP exclusively. However, once you reach gold, you can’t earn more XP from the challenge. You’ll find parkour challenges all over the map, so keep an eye out for question marks denoting undiscovered locations. It might be a parkour challenge if it’s up on a rooftop.
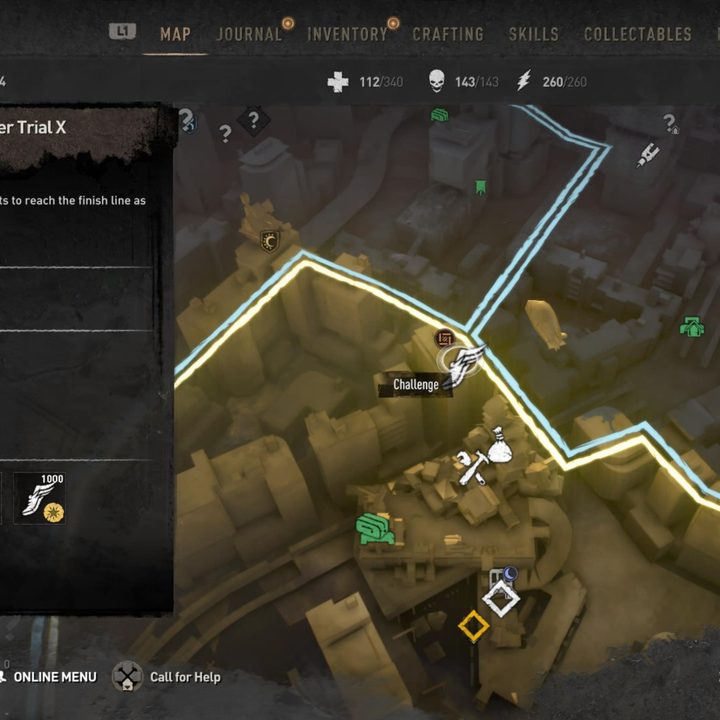
Depending on the level and time requirement, these challenges can be a time sink. In the image above, the Nightrunner Trial X parkour challenge has a time-to-beat of four minutes and forty seconds. Factor in the practice you’ll need to beat that time, and you’re looking at a 20-minute endeavor. For 1,000 parkour XP, the long ones aren’t worth it. You’re better off playing sidequests.
However, the shorter parkour challenges (under two minutes) reward you with 750 parkour XP for a fraction of the time. They’re much easier to learn and eventually beat, with some of them requiring no effort or practice at all. Wait until you’ve leveled up a few essential parkour skills to bang out parkour challenges. Everything gets easier once you unlock the grappling hook.
Nighttime exploration
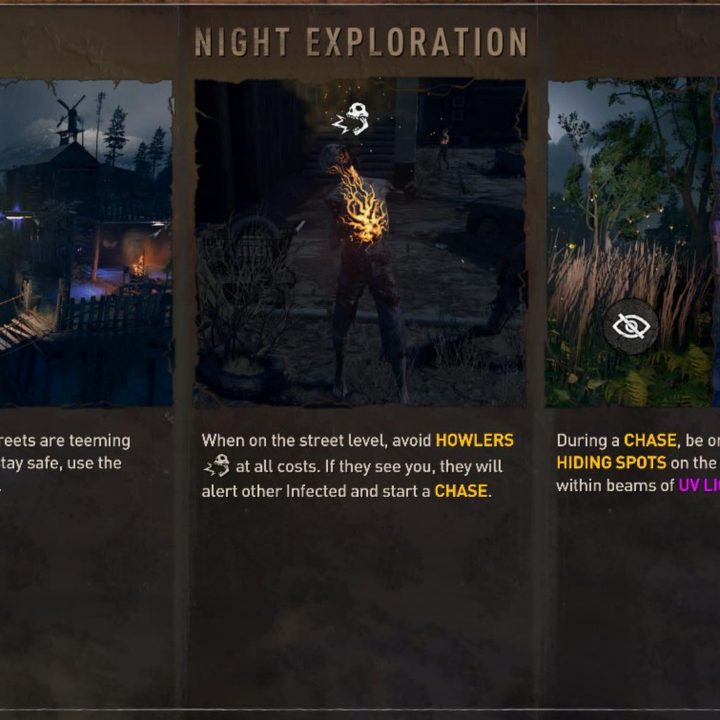
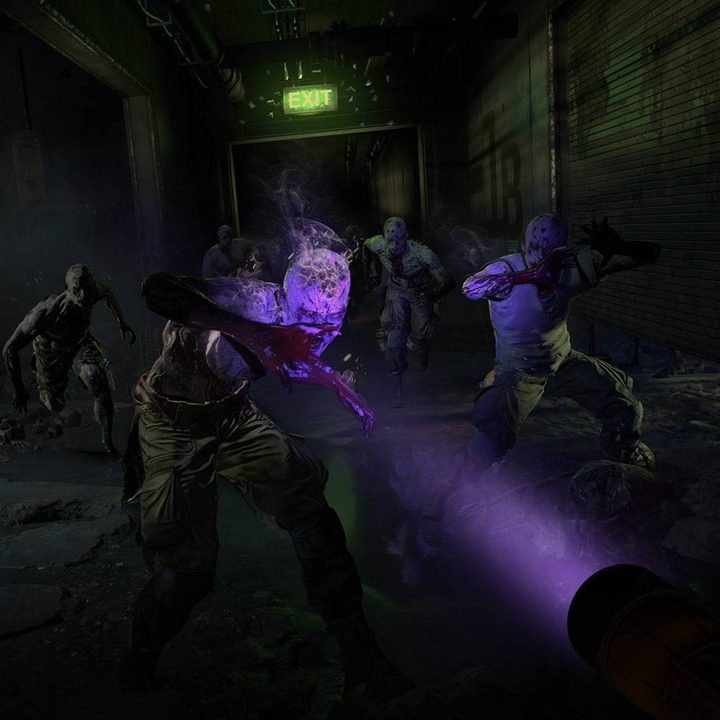
You’ll earn bonus XP at night, just like in the first Dying Light. Since nighttime in Dying Light 2 isn’t nearly as dangerous, venturing out in the dark is a great way to earn passive XP while completing side quests and random activities. Make sure you have plenty of immunity boosters on you (which you should if you’ve been rescuing prisoners from groups of bandits and renegades).
Most of the GRE quests can only be completed at night, thus increasing the amount of XP you’ll earn. As long as you avoid the Howlers, you’ll be fine. We don’t find the bonus XP as rewarding as the original Dying Light. However, nighttime is still an effective way to level up fast in Dying Light 2.
Main quests

Ultimately, sticking to the main story is one of the best ways to level up fast in Dying Light 2. The rewards earned from completing steps in the main quest keep you on pace with the rest of the game. We recommend grinding to the “Water Tower” quest and then focusing on sidequests and activities to level up in Old Villedor.
From there, progress the story until you unlock the paraglider and grappling hook. Then enjoy your time flying and swinging around the city.