Keys and Resident Evil games are like peanut butter and jelly. If you’re not fighting zombies, you’re looking for a key to get you to the next room — where you will fight more zombies. While there are plenty of mandatory keys in the Resident Evil 4 remake, there are also a set of extra keys that you can completely miss. These Small Keys are used to unlock locked drawers you come across, as opposed to doors, and hold some very valuable treasures. Considering how precious money is in this game, the more treasures you can find and sell to your Merchant friend, the better off you’ll be. Small keys aren’t in your direct path often, and once you leave an area, you can’t go back to collect them later in most cases. We’ll help you become the master of unlocking by showing you where to snag all the Small Keys in Resident Evil 4, as well as where to use them.
Where to find all Small Keys
Before getting into the locations of Small Keys, note that these keys are not exclusive to a single drawer. Any Small Key can be used to open any drawer, so feel free to spend them as soon as you find a drawer with a key in hand. However, once you leave an area in Resident Evil 4, there’s no going back. That means if you left any keys or drawers behind, you won’t be able to open them unless you start another playthrough or wait until you begin a new game. There are eight Small Keys to get, and they are all found within the first two zones of the game, but won’t show up on your map. Locked drawers won’t either by default, but if you buy the Treasure Map from the Merchant, the drawers will be put on your map. Here’s how to track all the keys down, and where the nearest locked drawer is in the order you can first encounter them.
The first key you can get is in Chapter 2 in the Valley. After meeting the Merchant, you will be sent into the Valley to find a key to open the gate opposite the Merchant. After clearing out the enemies, drop down to the lowest level on the south end and enter the shack. Inside, take a right and look for a case on the shelf. Loot it, and pick up the first Small Key. The nearest locked drawer is back in the Factory past the Merchant. Go into the room where you retrieved Leon’s equipment after it was taken from him and use the key on the desk drawer.

Also in Chapter 2, as part of the main mission, you will go inside the Village Chief’s Manor. Staying on the ground floor, go to the southwest side of the building and snag this key resting on a pile of papers next to the couch. You will need to complete the puzzles here to progress to the next chapter to get to the locked drawer. Once Chapter 3 begins, you can head straight back to the village from the start of the game and into the center house on the north side of the “street” to unlock a drawer.
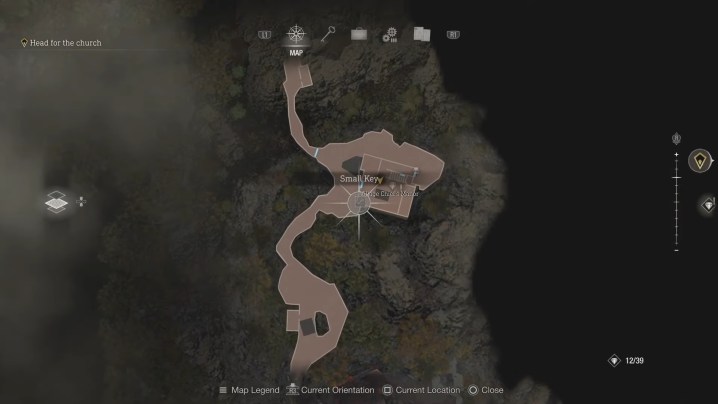
In the Fish Farm Village, in the same building you need to visit to obtain gas for the boat in, go outside, and head southwest. There will be a smaller wooden building with some drawers you can loot for the key. Take it back to the Merchant’s shop next to the dock, jump down to the lower level and go to the right. There’s a hidden drawer here you can unlock

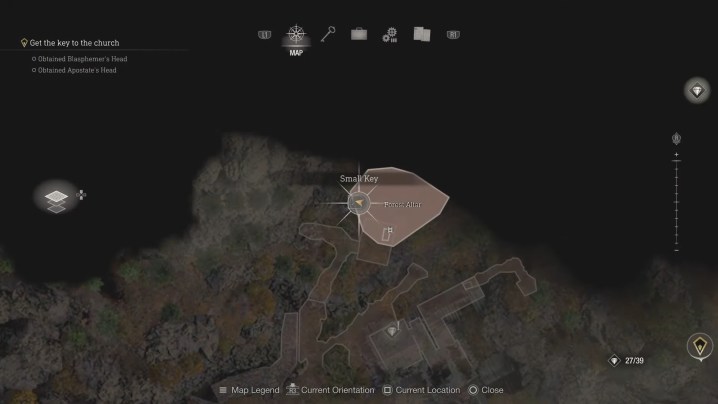
Move ahead into Chapter 4, where you gain access to explore the lake with your boat. You want to boat on over to the Lakeside Settlement, and then go all the way north through a gate you can open with your Insignia Key. This will lead to the Forest Altar after you climb up the ladder near the corpse. The Small Key is sitting on a wagon to the north. The nearest drawers to unlock are very close in the Lakeside Settlement. Go into the largest building and look along the wall to your left for the locked drawers.
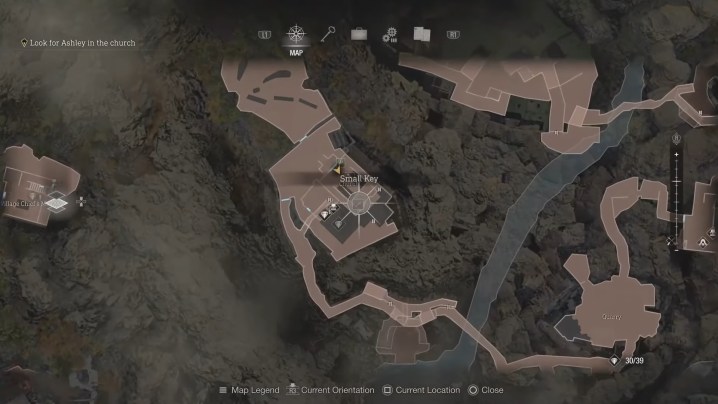
After you’ve entered the Church, the next Small Key is very hard to miss. Simply pick it up off the table just beside the main altar. Take the key outside again and around to the southwest to the small building with the typewriter in it that you probably already visited and noticed a locked drawer.
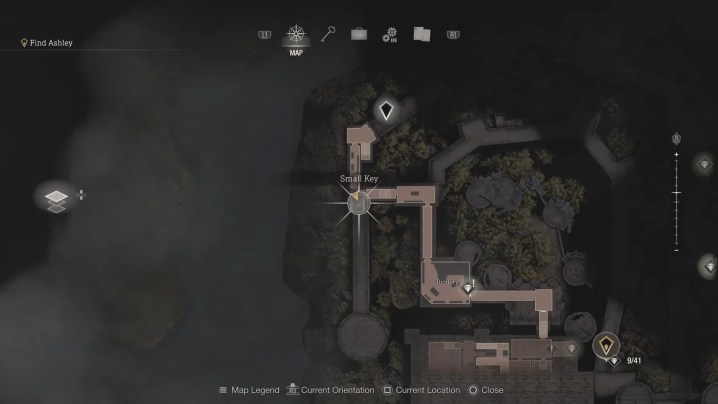
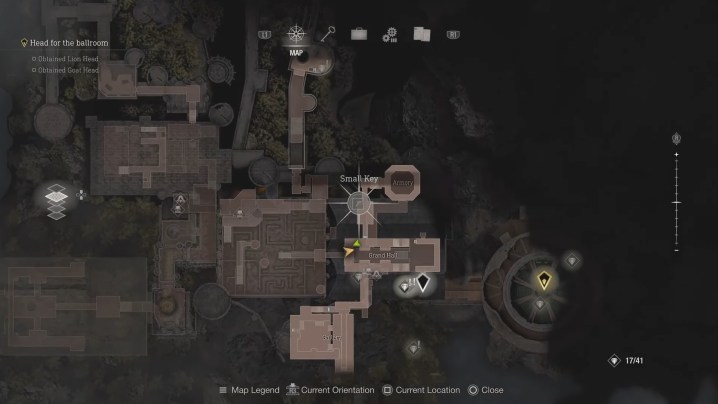
Your next Small Key won’t show up until Chapter 8 when you’ve entered the Castle. Once you’ve solved the puzzle in the Bindery area, you will walk through a long, narrow corridor, and up some stairs, where you will get jump-scared. Once that happens, look to the left at the dead end. The Small Key is on a box below a window. Backtrack to the Bindery’s entrance and, instead of drawers like normal, use the key on the suit of armor.
Once you reach the Grand Hall in Chapter 9, go on the second floor on the west side and head north through a wooden door. Inside this small room is a drawer you can steal this key from. Head back the way you came into the Audience Chamber and look along the north wall to find the locked drawer.
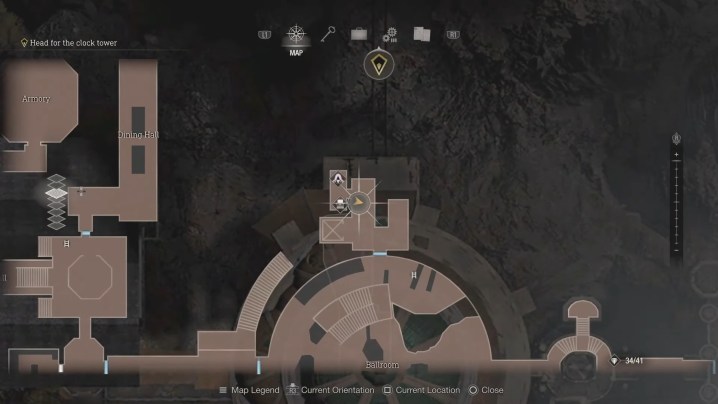
The final key can be picked up and used in Chapter 12 in the Ballroom, which you already visited in Chapter 10. This time, you can reach the key by going to the right side of the train you rode in on, on the north side of the circular area, and pop open the briefcase holding the key. The final drawer is unfortunately fairly far back in the Castle Battlements. Head through the Ballroom, Grand Hall, and Courtyard to reach it and enter the first tower on your right. The drawers are hidden behind a wall on the right.
Editors' Recommendations
- All Fallout 4 cheats and console commands
- All safe locations in Like a Dragon: Infinite Wealth
- All Lunchbox locations in Alan Wake 2
- All Word of Power locations in Alan Wake 2
- All nursery rhyme solutions in Alan Wake 2


