
Resident Evil 4 Shooting Gallery guide: locations, rewards, and tips

The fact that Resident Evil 4 remake retains the original’s ability to mix horror with campy fun is one of its greatest aspects. One moment you will be gripping your controller for dear life as a swarm of bloodthirsty villagers relentlessly pursue you, and the next Leon’s making quips and performing suplexes. There was one small fun diversion in the original game that has been expanded and improved for the remake, which is the optional Shooting Gallery. This time there are multiple of these safe spaces to hone your aim, but also a fully developed system of challenges, scores, and, best of all, rewards. If you want to take a breather from all the horrors that await you in Resident Evil 4 remake, here’s where you can find all the Shooting Galleries, what you can win, and some helpful tips.

Shooting Gallery locations

Leon starting a shooting gallery challenge.

There are a total of five locations across all 16 Chapters of Resident Evil 4 remake, and they all are within the safety of a Merchant zone. Each one, except the last, will introduce a new set of three challenges, but all previous challenges from past Shooting Galleries will be present in the later ones. That means you could technically wait and only visit the final one to take on all the challenges there. Here’s where you can find each individual Shooting Gallery in order of appearance:

  • Just after passing through the Quarry in the cave with the Merchant.
  • In the Grand Hall Merchant area in the Castle.
  • After the Verdugo fight and you take the elevator up, you will immediately come across this Merchant spot.
  • On the Island, after finishing the terminal puzzles and you meet up with Ashley again, the Merchant is just beyond a gate.
  • Right before the game’s point of no return in the Specimen Storage building.

Shooting Gallery rewards

Leon collecting a teddy bear charm.

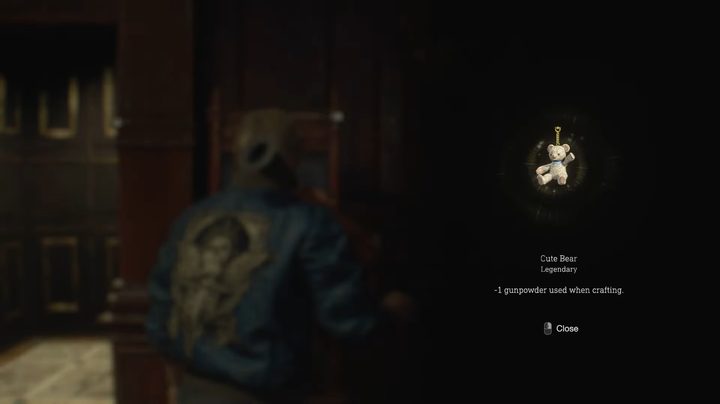
If you get a high enough score in any of the Shooting Gallery challenges, you will earn yourself either silver or gold tokens. These are not valuable on their own but instead exchanged with a machine to get a random Charm. You need to insert three tokens into the machine, and hope you get a good one! Charms are the only rewards here, so don’t expect any extra guns or items.

Shooting Gallery tips

Leon getting bonus time in the shooting gallery.

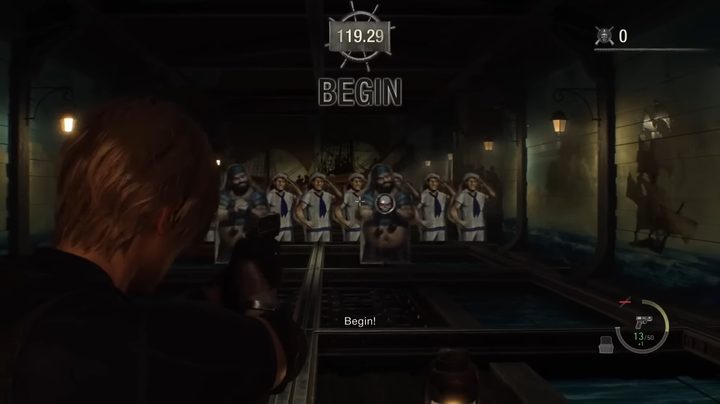
The Shooting Gallery has some interesting mechanics to it. You begin each one by choosing the challenge. Again, each range comes with three challenges, and each challenge will give you a different weapon to use in it, but sometimes you get two. You have infinite ammo, so no need to worry about wasting shots. As you would guess, the game consists of targets popping up — in the shape of pirates — that you need to shoot before they go off-screen again while avoiding hitting the sailor targets. Each pirate hit will add to your score, while hitting a sailor subtracts from your score. Note that some pirates will hold a skull that is worth bonus points if you hit it.

Your final score comes down to these factors: the number of targets hit, skulls hit, and time left after finishing the challenge. You can also unlock bonus rounds in each of the Shooting Gallery locations by meeting their specific requirements. Bonus rounds give you some extra time to rack up a bunch of points on more targets. Here’s how to unlock each of the bonus rounds in the different galleries.:

  • First Shooting Gallery: Destroy all pirates.
  • Second Shooting Gallery: Destroy all pirates with 20 seconds remaining
  • Third Shooting Gallery: Destroy all pirates in 10 shots or less.
  • Fourth Shooting Gallery: Destroy all pirates, and, in challenge 4A use less than 20 shots.

Editors' Recommendations

Jesse Lennox
Jesse Lennox loves writing, games, and complaining about not having time to write and play games. He knows the names of more…
Resident Evil 4: how to deface Ramon’s portrait
Leon looks at a portrait

Resident Evil 4 has a couple of requests worth taking on to help you trade for some sweet loot, but "The Disgrace of the Salazar Family" is perhaps the most satisfying. The note to start this quirky sidequest can be found hanging right by the gondola at the beginning of Chapter 12, and it asks you to deface the portrait of Ramon Salazar in the throne room of the castle. It's an odd request for a survival horror game, but if we're being frank, the little jerk has it coming. We'll tell you where to find his portrait and how to deface it.
How to find and deface Ramon's portrait
Ramon's portrait is found in the throne room of the castle, which means you'll need to do a bit of backtracking through some areas you've previously visited. You'll also run into a handful of challenging foes as you pass through the areas leading back to the throne room, so be prepared to put up a fight.

When you finally reach the throne room, you'll find Ramon's portrait hanging on the left wall of the room – a much smaller portrait compared to the others found on the back wall. Your first instinct may be to start slashing away at it with your knife or shooting bullets into his smug face, but the way to complete this request is actually a little more fun and juvenile than that.

Read more
Resident Evil 4: how to solve the Cave Shrine puzzles
A series of symbols in a circle.

There are a lot more optional -- and mandatory -- moments of exploration available to plyers in the Resident Evil 4 remake. One of the best examples comes in Chapter 4 when you are given the ability to move about the lake freely on your boat. Whether you found it by accident or got stuck while going along the main path, you will eventually have to solve two Cave Shrine puzzles in order to get your hands on the Church Key you need to move the story forward. If you found the altar the key is held on, you are likely at a loss as to where to go or what to do. There aren't a ton of places around the lake you can visit, but you can save a lot of time by letting us navigate you to the correct spots and lead you through these Cave Shrine puzzles in Resident Evil 4.
How to find and solve the Small Cave Shrine

The first location you're going to is at the far northeast end of the lake and is called the Small Cave Shrine. Make your way inside and you will come across a panel with a circle of buttons with unique symbols. Your goal here is to figure out which symbols to press, and in what order, to unlock the way to the key item you need.

Read more
Resident Evil 4 lock codes: how to solve the Village Chief’s Manor combination lock puzzles
Leon Kennedy walking in the Resident Evil 4 remake.

In the world of Resident Evil 4, it isn't just the existence of viruses and parasites that turn normal people into crazed zombies that differentiates it from our own reality. In this ream, most homes and buildings don't just simply lock their doors, but secure them using obscure puzzles, such as the one you will find early on when you reach the Village Chief's Manor. This small home has two major roadblocks preventing you from moving on and pursuing your goal of finding the president's daughter. While there is a clue to the first puzzle, it is still somewhat cryptic and easy to miss, while the second is much less clear on what you're even being asked to do. Don't let these early puzzles stump you for too long -- use our help in solving the Village Chief's Manor puzzles in Resident Evil 4.
How to solve the cabinet lock puzzle

After entering the manor and dealing with a lone enemy in the bathroom, the first puzzle you need to solve is on the ground floor. Around the back of the house, down the hall with a Red Herb, is a large cabinet. The lock has three symbols you need to correctly align to open, and those symbols include things such as wheat, animals, babies, and birds. You won't be able to guess this one, so instead, you need to go up to the second floor and examine a book on a table in the hallway. This document, called "Illuminados 4:3, spells out the solution. The important part is the middle paragraph with the highlighted text that reads: "The old farmer, his finest crop./ The Slight swineherd, his stoutest pig./ The beggarly grandam, her own beloved babe."

Read more