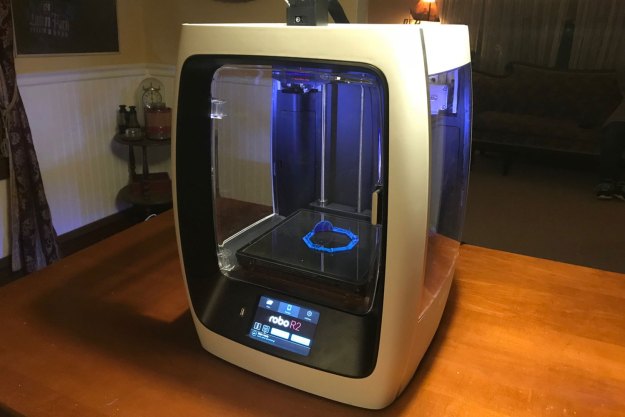
“The C2’s excellent user interface warmed our heart, but its unheated print bed gave us cold feet”
- Great print performance
- User-friendly interface
- Sturdy, sleek design
- No heated bed
- Requires frequent maintenance
We won’t mince words when we say Robo’s 3D printers are some of our favorites among a sea of mid-range models. What’s not to love about the company? It started as a Kickstarter project in 2012 among a group of San Diego State University students, and is now one of the largest 3D printer manufacturers in the United States.
As a follow-up to the company’s breakout R1 printer, the C2 is part of company’s ongoing effort to make 3D printing accessible to everyone through intuitive interface designs, reliable printing, quality results, and a price that the average consumer can afford. On the first three points, the C2 generally met our expectations – although the price may be a bit too much for some. Here’s what we thought of it after a couple months of intensive testing.
Features and specs
Compared to most mid-range printers, the C2 boasts a build area that’s on the larger end of the spectrum, measuring in at five inches long, five inches wide, and six inches tall. That’s certainly not a huge envelope by any means, but its spacious enough to accommodate most of the objects you’ll find on Thingiverse and other online object repositories.
The only downside? The printer’s build platform isn’t heated. While this does cut down on the amount of electricity the machine uses during printing, it also makes the C2 more prone to warping and poor adhesion, which boosts the chances that you’ll end up with a failed print and have to start over again.
It’s a big improvement over the utilitarian design of the R1 – the company’s first product.
Luckily, you won’t have to fiddle with calibrating the bed though – it’s equipped with auto-leveling functionality, which makes keeping the printer in good working order a breeze.
Last but not least, you interact with the C2 via a big, bright, 3.5-inch touchscreen located on the bottom of the printer. The user interface is intuitive, and includes wizards to walk even beginners through typical maintenance processes.
All things considered, this printer offers a pretty decent range of features for its $800 price.
Setup and configuration
Good news for the less mechanical: the C2 comes all but fully assembled. All you’ll need to do is attach the print bed, attach the spool holder, affix the filament guide tube to the machine, and feed some plastic filament through. This is all somewhat standard fare when it comes to 3D printer setup – but Robo makes it especially simple with a top-notch walkthrough wizard.
Even if you’re completely new to 3D printing, you should have no problem getting the C2 up and going within about 20 minutes. We left the setup to someone completely unfamiliar with the technology, and they still managed to get the machine fired up without much trouble. Setup isn’t always this easy, so we appreciate the company’s efforts here.
One quick tip, though: While Robo’s directions recommend you complete Wi-Fi setup after performing a test print, we recommend you go through the Wi-Fi connection process first. It’ll make your life easier, and there’s really no reason to do it at the end anyway.
Build quality and design
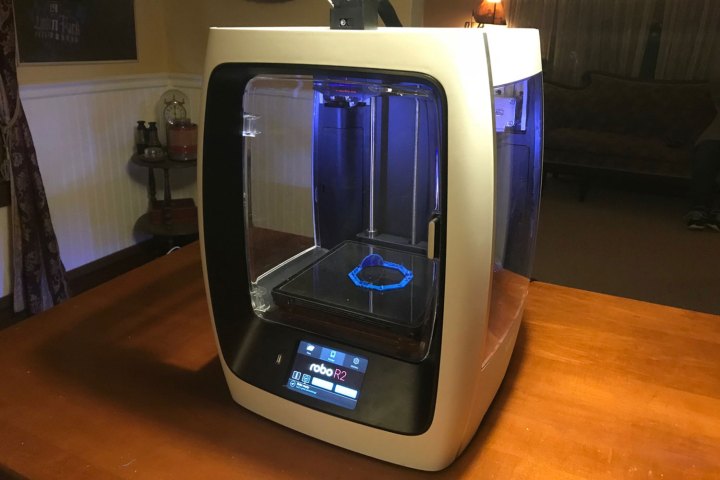
Robo gets high marks for the C2’s design. It’s a big improvement over the utilitarian design of the R1 – the company’s first product. While a 3D printer might never be something you’ll want as a showpiece in your living room, Robo at least has a design here that looks svelte on a tabletop.
The touchscreen on the C2 is one of our favorite features.
The C2’s beauty isn’t just skin deep, either; the machine’s construction feels sturdy as well. Weighing it at just over 20 pounds, it’s not a particularly heavy printer, but it’s still weighty and robust enough to resist shaking and shuddering while the print nozzle moves around at high speed. This ultimately leads to more accurate and consistent print results, but we’ll get into all that fun stuff in a moment.
By and large, the printer’s design is a win – though it does have a few shortcomings that we simply can’t overlook. The most egregious of these is the C2’s aforementioned unheated print bed, which forces you to use adhesive pads that need to be changed regularly to ensure adhesion. With this kind of setup, there’s no way to know when the adhesion will fail, so you’ll need to get in the habit of changing the pads regularly every so often.
It’s also limited to a single extruder, which is a bit of a disappointment considering the fact that an increasing number of printers around the C2’s $800 price point now include dual extruder setups. To be fair, does give you the option to add a second extruder or even swap extruder modules out – but this is all sold separately.
User interface and software
The touchscreen on the C2 is one of our favorite features. Just about all the major features and functions you need to access can be found there. We did find the smaller screen a bit difficult to use, however — especially when it came time to enter in our Wi-Fi password (the keyboard was just too small). Despite this minor gripe, the actual interface itself is one of the most user-friendly of any printer we’ve ever tested.
If what you’re after is a workhorse that doesn’t require a ton of upkeep, this likely isn’t the printer for you.
As for desktop software, the C2 is designed to work with a customized version of Cura. Cura is simultaneously one of the most feature-rich and intuitive slicer programs available today, so the software isn’t difficult to use. Unfortunately you’ll need to set everything up manually, but again, Robo’s well-written directions save the day. As long as you know how to read and follow instructions, you’ll be fine.
If you’re patient enough, we highly recommend taking the additional step of installing the Octoprint plugin so that you can print directly from Cura. It’s a fair bit of work to get set up, but we think the convenience is worth the one-time trouble.
Print performance
To get a sense of how well the C2 performs, we ran it through our standard suite of test prints, along with a few random objects just to mix things up. This includes the infamous 3DBenchy torture test tugboat, and the CTRL-V benchmark – both of which are designed to highlight a printer’s strengths and weaknesses.
Across all our prints, we results were admirable for a printer in this price range. Fine details came through wonderfully (especially at higher resolutions), and the C2 experienced minimal issues with tricky features like unsupported spans and overhangs. Objects were also very consistent from layer to layer. The printer suffered from almost no z-axis wobble – something that can likely be attributed to Robo’s sturdy construction.
On the whole, the C2 boasts solid print performance, but unfortunately, its otherwise admirable print jobs were too often marred by the machine’s one and only shortcoming: the unheated print bed.
Its admirable print jobs were often marred by its only shortcoming: the unheated print bed.
Because the printer’s build surface doesn’t heat up, it’s difficult to get prints to properly adhere to it – and more importantly, stay anchored until the object is complete. We found ourselves replacing the painters tape-like adhesive pads about every half dozen prints or so, because if we didn’t, the prints would lift off the build plate and screw everything up. Even when printing with rafts (support structures designed to boost bed adhesion), we weren’t always confident that the C2 would successfully complete a given print job.
In other words, while this printer prints beautifully under optimal conditions, it’s definitely not the most reliable machine we’ve ever tested.
Maintainance, reparability and upgradability
Maintenance with Robo 3D printers is extremely easy, thanks in large part to the aforementioned walkthrough wizards. No matter what goes wrong or what parameter you need to adjust, Robo’s onboard software makes it a breeze.
Software updates can be delivered to the C2 wirelessly, or can be loaded onto a USB stick and installed by opening them directly on the printer. The USB stick option is nice because you can also print directly from it too – just in case you don’t want to (or can’t) connect the printer to a Wi-Fi network.
For hardware issues, the C2 seems easy to repair (at least for the basic stuff) since, for the most part, all of its most crucial components are easy to access. Luckily, we didn’t run into any hardware trouble during our testing, but we’re confident that if we had, we could’ve fixed it ourselves. Robo provides ample troubleshooting and repair documentation on its website.
Warranty information
The Robo C2 comes with a one-year limited warranty, with replacement part service.
Our Take
Simply put, we loved the C2. It’s a great-looking and well performing printer right out of the box, and the machine’s intuitive and user-friendly interface makes it a great choice for 3D printing novices. That said, it’s definitely not perfect. Robo’s decision to leave out the crucial heated bed feature might have kept the price low, but also resulted in a printer that’s less reliable and more high-maintenance than some of its competitors.
Is there a better alternative?
At $800 dollars, the Robo C2 does provide a lot of bang for your buck – but because the 3D printing scene is so competitive right now, there are a lot of printers out there that offer similar features for a lower price.
There are a lot of printers out there that offer similar features for a lower price.
For $700, you can get your hands on Monoprice’s Maker Ultimate printer: A machine that boasts a bigger build area (7.8 x 7.8 x 6.8 inches), a heated bed, and auto-leveling functionality. That said, Monoprice’s user interface isn’t nearly as polished or approachable, and doesn’t have a touchscreen.
Another contender that’s worth mentioning is Robo’s earlier printer: the Robo R1+. The company doesn’t produce them anymore, but you can find them for sale online fairly easily. The R1+ doesn’t have any of the C2’s fancy new connectivity options or slick user interface – but it does have a heated bed and a larger build area. Depending on where you find one for sale, you can snag one of these puppies for around $500-$700.
If you’re not afraid of doing a bit more assembly, you can also get your hands on a Prusa i3 MK2 kit for about 700 bucks. Born out of the open-source RepRap project, the i3’s design was developed over years and years of testing, tuning, and perfecting from thousands of different 3D printing enthusiasts — so it’s a pretty solid little machine. It’s bigger, smarter, and more capable than the Robo C2, but you’ll have to build it yourself.
How long will it last?
We have no doubt that the C2 will give you years of trouble free service. But as we said, expect to be constantly tweaking to ensure quality prints: it’s just the reality with how relatively new 3D printing technology is. From what we understand, Robo plans to service these printers well into the foreseeable future with software and firmware updates, and considering the fact that the company still offers parts for its previous generation printers, we don’t see why it wouldn’t do so for the C2.
Should you buy it?
If you’re completely new to 3D printing and want something that’s extremely simple and approachable to use, then yes — The C2 is one of the most user-friendly machines you’ll find in the sub-$1,000 price range, and you should buy it.
If you’re more concerned with reliability and print performance, we’d recommend looking elsewhere. The fact that this printer doesn’t have a heated bed makes it less reliable than others we’ve tried. If what you’re after is a workhorse that doesn’t require a ton of upkeep, this likely isn’t the printer for you.
Editors' Recommendations
- The 6 best desktop PCs for 3D rendering in 2024
- What is a 3D printer, and how much do they cost?
- AMD might be about to launch the most powerful laptop of 2023
- AMD’s upcoming Ryzen 5 5600X3D could completely dethrone Intel in budget builds
- Some Ryzen CPUs are burning up. Here’s what you can do to save yours


