How to lock cells in Excel

Locking cells in a Microsoft Excel spreadsheet is a super useful thing to know how to do. It’s used to protect a certain segment or an entire worksheet from being modified by anyone other than the spreadsheet’s creator.

For example, if you’re an employer and you create a spreadsheet with multiple drop-down lists for applicants, locking cells will prevent recipients of that form from tampering with any of the data.

Here’s a guide on how to lock cells in Excel.

Difficulty

Easy

Duration

5 minutes

What You Need

  • Microsoft Excel

  • PC

Locking individual or multiple cells

Step 1: An Excel spreadsheet is already locked by Microsoft. Therefore, to lock individual or multiple cells, you’ll have to unlock the spreadsheet first. To do this, click the Green Diagonal button on the top-left side of the first cell.

The button to select all cells within a spreadsheet on Microsoft Excel.
Image used with permission by copyright holder

Step 2: Right-click your mouse and select the Format Cells option from the menu.

The Format Cells button in Microsoft Excel.
Image used with permission by copyright holder

Step 3: Select the Protection tab and unselect the Locked button. Click OK.
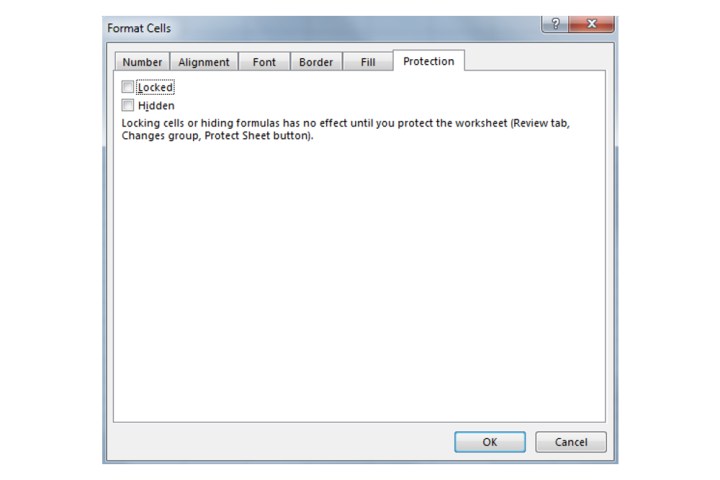
The Locked button found within the Protection tab in Microsoft Excel.
Image used with permission by copyright holder

Step 4: Now choose what cells you want to lock by clicking on them. You can select a single cell, multiple cells, a row, or an entire column.

Step 5: Within the selected cell or cells, right-click and choose Format Cells.

Step 6: Navigate to the Protection tab again, select the Locked box, and then click OK.
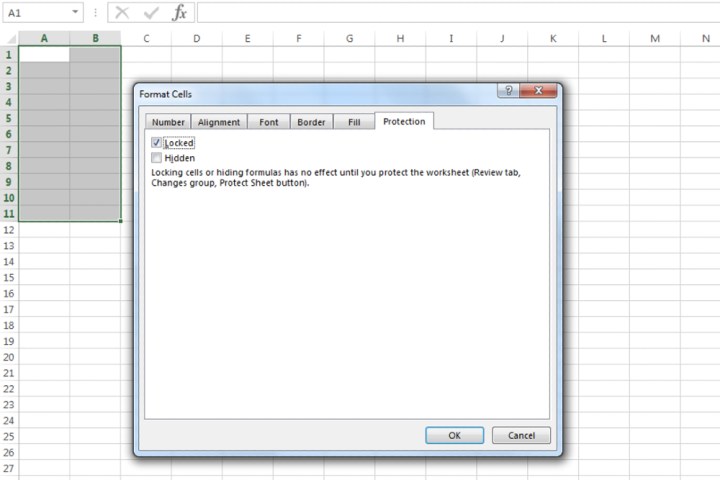
Locking specific cells in Microsoft Excel by using the Locked box.
Image used with permission by copyright holder

Step 7: In order to confirm the locking of cells, click the Review tab. Now click the Protect Sheet option.
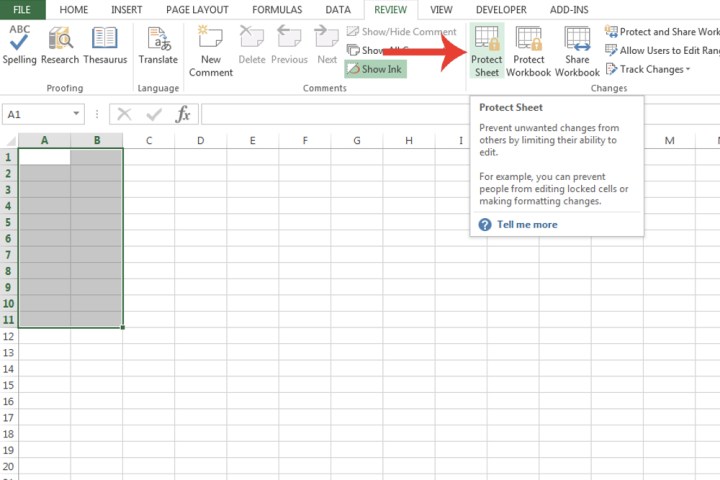
The Protect Sheet button in Microsoft Excel used for confirming the locking of cells.
Image used with permission by copyright holder

Step 8: Choose what sort of protection you want from all the options shown. By default, the Select Locked Cells and Select Unlocked Cells fields are already ticked. You can also input a password for further protection. Click OK.

The cells you’ve chosen will now be locked.
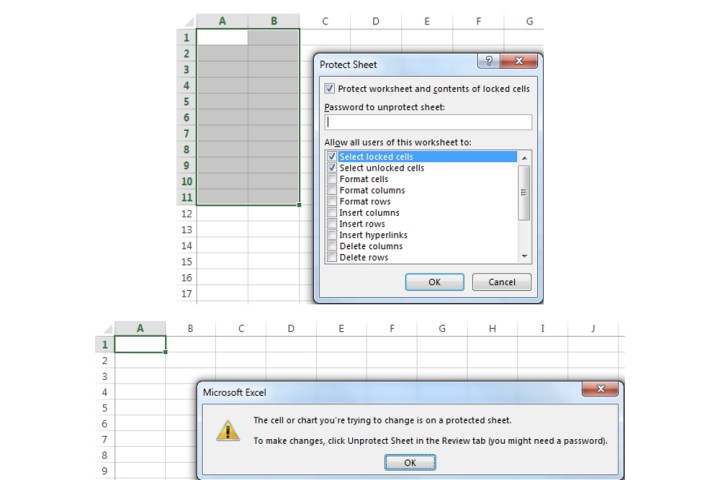
The Protect Sheet window where it lists all the configuration options connected to locking cells.
Image used with permission by copyright holder

Locking an entire spreadsheet

Step 1: At the bottom of Microsoft Excel, right-click the spreadsheet you want to lock.

Step 2: Select the Protect Sheet option. As explained in step 8, customize the different types of protection you want to apply to the spreadsheet, then click OK. As we mentioned in step 1, Microsoft already locks an Excel spreadsheet, so you won’t need to take the steps to do so yourself.
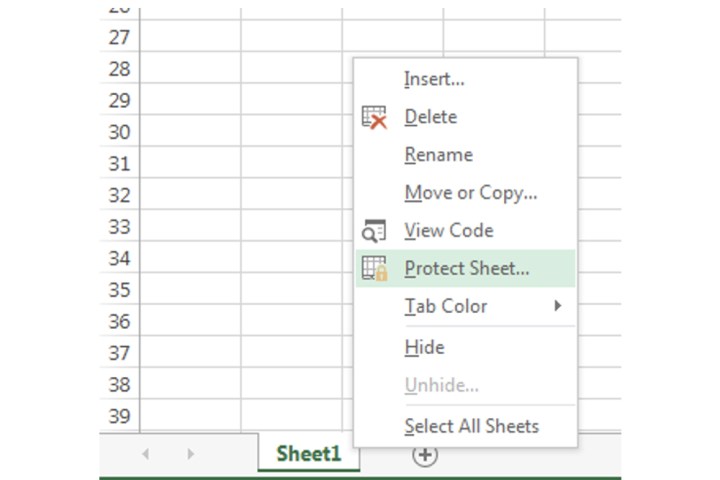
A shortcut to access the Protect Sheet option for locking an entire spreadsheet in Microsoft Excel.
Image used with permission by copyright holder

Editors' Recommendations

Zak Islam
Former Digital Trends Contributor
Zak Islam was a freelance writer at Digital Trends covering the latest news in the technology world, particularly the…
How to alphabetize data in an Excel spreadsheet
A Microsoft Excel icon in the dock on a Macbook.

Manually organizing data in Microsoft Excel is a real pain. That's why we don't recommend doing it. One simple task, learning how to alphabetize in Excel, is not necessarily as intuitive as we would like. Here's how to get things sorted in a logical, alphabetical order.

Read more
How to delete a file from Google Drive on desktop and mobile
Google Drive in Chrome on a MacBook.

Google Drive is an excellent cloud storage solution that can be accessed from numerous devices. Whether you do most of your Google Drive uploading or downloading from a PC, Chromebook, or mobile device, there’s going to come a time when you’ll need to delete a file (or two). Fortunately, the deletion process couldn’t be more straightforward. We’ve also put together this helpful guide to show you how to trash your Drive content a couple of different ways.

Read more
How to delete files on a Chromebook
HP Dragonfly Pro Chromebook top down view showing keyboard and touchpad.

Your Chromebook has quickly become your everyday computer. Using it for just about everything, including web browsing, word processing, gaming, and social media, we bet there’s going to come a time when you need to delete some files from your PC. Doing so will not only allow you to store more media locally, but it should also help to improve the performance of your go-to Chromebook device.

Read more