One of the best features of the Steam Deck is its varied controls, from face buttons, to joysticks, to touch controls. But there's never a substitute for a full size keyboard and mouse, and fortunately, you can connect them straight to the Steam Deck. It supports wired and wireless connections, although you'll need a USB hub if you want to use a USB connection.
Here’s what you’ll need to enable a keyboard and mouse on the Deck, plus which settings to keep an eye on to help get the performance you have in mind.
How to connect a wireless keyboard or mouse to the Steam Deck
Step 1: Use a compatible wireless keyboard and mouse. Fortunately, the Steam Deck comes with unrestricted Bluetooth 5.0 support, which means it can work with all kinds of Bluetooth devices. If you want to pick up a new Bluetooth keyboard or mouse, we have your back with our guides to the best wireless keyboards and the best wireless mice.
Step 2: Make sure your keyboard and mouse are fully charged, turned on, and ready to pair with your Steam Deck for the first time. If either of them have pairing buttons or similar features, make sure they’re ready to go.

Step 3: You don’t need to switch to desktop mode to use a keyboard or mouse. Simply select the QAM button – the “…” button on the bottom right of the Deck. This pops up the right-side menu. Here, navigate down to the cog icon, where you’ll find the Quick settings menu.
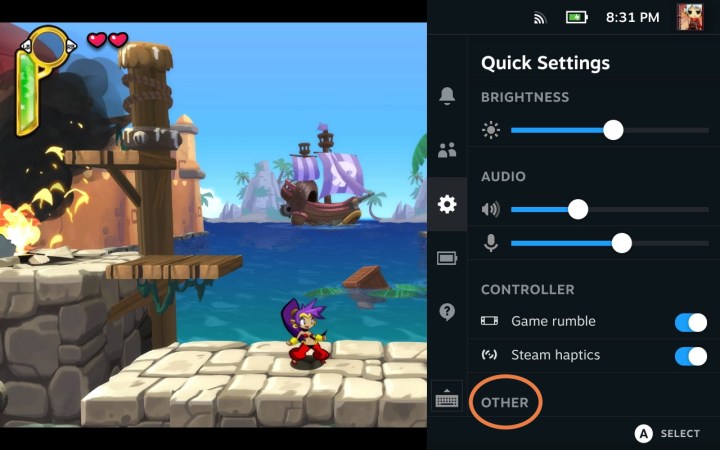
Step 4: At the bottom of Quick settings, select the Other option. This should open a small Bluetooth menu. Make sure Bluetooth is enabled here – it may not be turned on by default.
Step 5: Exit out of the QAM menu, and select the primary Steam button to open up the options menu. Go down to Settings and select it.

Step 6: Select Bluetooth from the left-side menu. In the right-side screen, you’ll see all your current Bluetooth options. Look at the section called Available to pair. Keep your keyboard and mouse close by. If they have pairing buttons, now’s the time to hit them.
When you see your keyboard and mouse appear in Available to pair, select them, and wait for your Steam Deck to pair, then connect. It may take several seconds for each device.
Step 7: If you want to play a game with a keyboard and mouse, you should also check your controller layout. The Steam Deck tries to switch to an external device layout when it senses connected devices, but this doesn’t always work right for a keyboard and mouse.
Find the game you want to play on the Steam Deck, and select the Controller icon on the right side of the title. This will open controller settings, where you can check your current layout. Select the Right-pointing arrow on the current layout to check available layout options. If you see a keyboard and mouse layout available, switch to that.
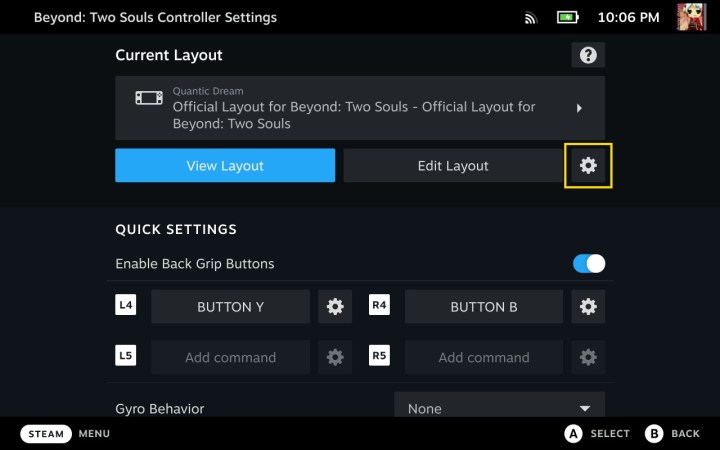
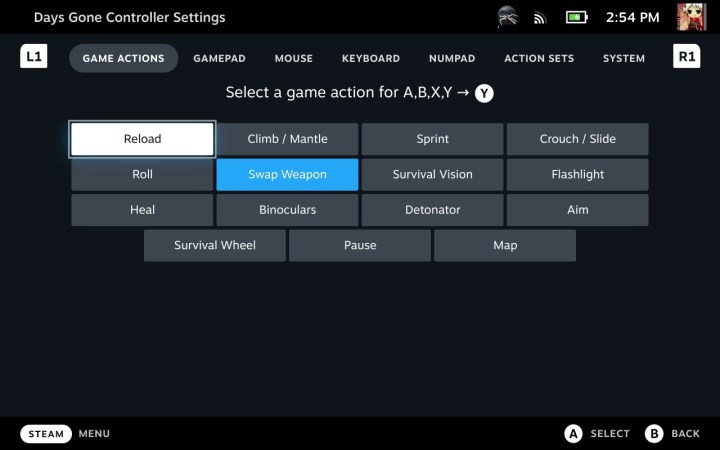
Step 8: If there’s no template for a keyboard and mouse, you can always make your own by choosing a new layout, going to Edit, and going to the Mouse and Keyboard sections at the top of the menu, where you can set your own commands and more. Keyboard and mouse controls won’t function the same across every game, but this kind of customization can help. Just make sure your Deck doesn’t switch back to a different layout the next time you start the game – reorder the priority of your layouts if you need to.
Step 9: Note: If you are already in Desktop mode, then all these options will work straight from the Desktop menu in the bottom right of the screen, where you’ll find a Bluetooth button. It’s just often easier to set up your keyboard and mouse before heading to the Desktop mode.
How to connect a wired keyboard and mouse to the Steam Deck
Although you'll need the Steam Deck Dock or a USB hub to connect a keyboard and a mouse to the Steam Deck, it's very straightforward.
Step 1: Plug your Steam Deck into the Steam Deck Dock, or connect a compatible USB-C hub.
Step 2: Connect your keyboard and/or mouse to the Steam Deck Dock or the USB Hub using their USB cable. If you don't have the right USB connection, you should be able to use a USB adapter.
Step 3: Your keyboard and mouse should be detected by the Steam Deck and should now work as intended.
If there are specific games you want to play on the Steam Deck with a keyboard and mouse, make sure to check their compatibility first.
Editors' Recommendations
- How to customize mouse gestures on Mac
- How to change mouse DPI on Windows and Mac
- Is this Razer’s Steam Deck killer?
- How to disable laptop keyboard in Windows
- How to customize controls on the Steam Deck