Knowing how to record a Microsoft Teams meeting can save you so much time that's often spent asking for people to repeat instructions or remind you of what they said. Organizations may also want to record troubleshooting meetings for later analysis, compliance requirements, or to recall significant decisions that were made. Microsoft Teams understands this and has made the recording process simple to use – if it’s set up properly.
Let’s go over what you need to record a meeting in Teams, how to find recordings when the meeting is done, and everything else you should know about the process.
How to record a meeting in Microsoft Teams
Step 1: Make sure you have the right permissions. There are a number of permissions needed to start and stop a recording in a meeting. First, the user will need a subscription like Office 365 Enterprise, Business Premium, or Business Essentials.
If you're working as part of an organization, your IT administrator may need to enable recordings for the organization. Some organizations default to disabling recordings except in certain situations. If you're working independently, then it should be enabled by default.
Only certain users can record meetings when they join. That includes both meeting organizers and those who have part of the organizer’s organization on Microsoft Teams. Those who are part of different organizations and guests will not be able to record.
Step 2: Log into Microsoft Teams and join a meeting. Arrange for one person to start and stop the recording if necessary – you cannot make multiple recordings of a meeting at the same time.
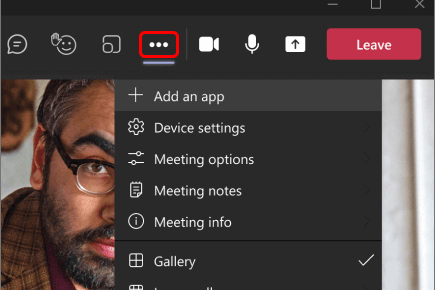
Step 3: In the meeting, look at the menu at the top of the window, and select the More actions option (the three-dot ellipses icon).
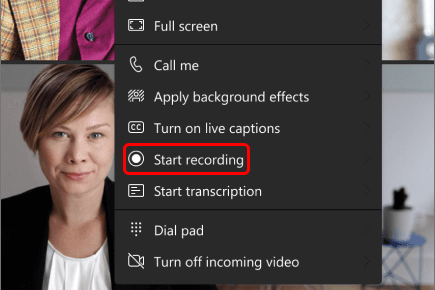
Step 4: Select Start recording in the drop-down menu. Some organizations have a recording policy that you will now need to accept before the recording can start, although this isn’t common. All those who have joined the meeting will receive a notification that the meeting is now being recorded.
Step 5: Turning on recording will also turn on transcriptions, unless transcriptions have specifically been blocked by an administrator. Transcriptions can be viewed in real time and are saved alongside the video when the recording ends. Transcriptions are important if the recording is being made for compliance or legal reasons, among other uses. Live transcriptions can be stopped at any time in the More actions menu.

Step 6: When it’s time to stop recording, go to the More actions menu again, and select Stop recording. The recording will now be processed, which can take a little time, so it may not be immediately available to view.

Playing a recorded meeting
When Microsoft Teams records a meeting, it is saved to SharePoint. If it was not a channel meeting, it is saved to OneDrive. Visit these locations to find the file of the meeting. A link to the recording will also appear on the channel or chat where the meeting took place, and it will be available in the Files tab of the channel, too.
You can share the file either directly with someone else on Teams or copy it and paste it into a variety of other platforms, depending on what’s easiest.
Important note: Microsoft Teams recordings often have a built-in expiration date, after which the meeting will not be available (plus a grace period for the owner of the record). This can be disabled by IT. The expiration date will show up in Teams along with the link to the meeting, as well as in the Details section of Show actions in the recording file. Those recording the meeting can typically customize the expiration date. It’s important to make sure the video is shared or used before the expiration date. If the recording was made for compliance purposes, expiration dates should be disabled or the files should be saved permanently in another way.
Recording Meetings extras
There are some other considerations to make when recording a meeting in Teams:
Recordings will automatically stop when everyone has left the meeting. However, recording will not stop if the person who began it leaves – that means someone else may need to stop it manually at the right time.
Sometimes regional rules can impact recording settings. For example, local regulations may require that everyone give their permission to be recorded before beginning.
Guests and external attendees will not be able to view the recording unless someone shares it directly with them.
The video of the meeting can only show up to four video streams at once. You cannot switch to other streams when viewing a recording.
Compliance requirements may overrule some of the settings that we’ve discussed above.
If you're looking to set up a meeting with some colleagues, consider making a new team first.
Editors' Recommendations
- Microsoft finally kills this legacy Windows app — for good this time
- How to build a table of contents in Microsoft Word
- How to double space in Microsoft Word
- The most common Microsoft Teams problems and how to fix them
- How to factory reset Windows 10 or Windows 11


