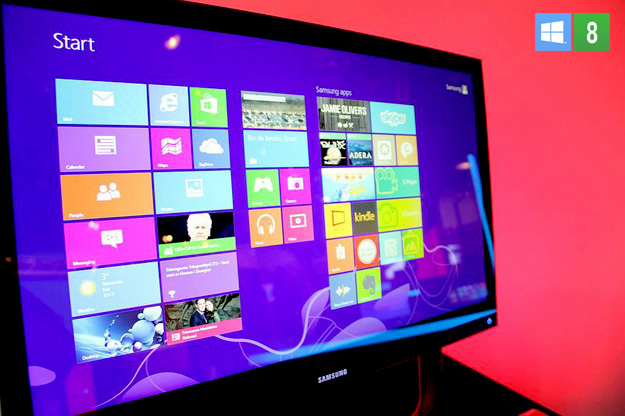
 Windows 8 isn’t just Microsoft’s newest operating system. It’s the most ambitious move the company has made in years. If you remember the 2008 ads that touted “Hi, I’m a Mac. And I’m a PC,” you’ll understand how Microsoft executives have been working hard to overcome stereotypes of Windows as a stodgy, safe, old-fashioned system. But will the app-centric Windows 8 really become the new market standard?
Earlier in the week, we covered both the best of Windows 8 and the most annoying Windows 8 features. There are certainly both pros and cons to installing Windows 8 straight out of the gate, but the only way to know for sure if it’s right for you is to give it a whirl. After all, let’s be honest: are you really going to be satisfied without forming your own opinion? Additionally, if you’re lucky enough to own a touchscreen laptop or a hybrid machine, you’ll want to jump on all the shiny new touch capabilities that Windows 8 has to offer.
Updating Windows 8 from an Earlier Version of Windows
If you’re already running Windows XP, Windows Vista, or Windows 7 on your computer, upgrading to Windows 8 is a breeze. Even more than that, it’s a great deal: For those who bought a Windows 7 PC after June 2, 2012, the Windows 8 upgrade will only cost you $14.99. As of the release date of October 26 through the end of January 2013, an upgrade runs only $39.99. When an operating system costs less than many popular video games, it’s clear that the manufacturers want to jumpstart early sales. In fact, the Microsoft website boasts a tool called Upgrade Assistant designed to streamline the entire installation process. One minute you’re wondering how to get your hands on Windows 8, and the next it’s already up and running. If you want to get Windows 8 the old-fashioned way, you can have the discs shipped to you. However, for the lowest price point, you’ll need to opt for a digital download. Requesting physical disks to be mailed to you increases the upgrade price to $69.99. Never fear, though: you’ll have a chance to make your own physical disc during the installation process. So for those interested in downloading the software, follow these few easy steps:
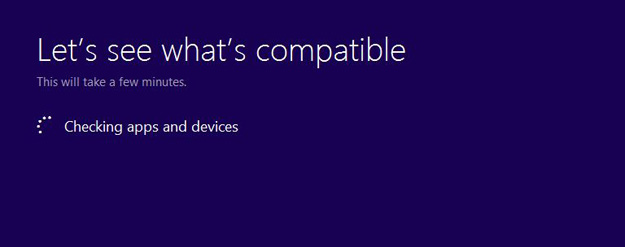
1. Download and run the Upgrade Assistant.
This free, effortless tool from Microsoft assesses whether your computer meets the system requirements for Windows 8. In addition, it checks out everything associated with your machine, from hardware, such as printers, to software, such as apps. If anything’s not going to run correctly on Windows 8, the compatibility report will give you fair warning so you can decide before you buy.
 2. Buy a copy of Windows 8.
Once your computer passes the spec test, you’ll need to decide if you actually want to shell out for the actual product. Keep in mind that there are several versions of Windows 8. Windows 8 Pro, the upgrade version on sale for $39.99 that we mentioned above, includes remote desktop capabilities and something called Hyper-V, which makes it possible to run other operating systems within Windows 8. Just to make things confusing, there’s also Windows RT, but there’s no need to worry about that; Windows RT comes preinstalled on select tablets and PCs, like the Surface Tablet that we recently had some hands-on time with. When you’re ready to buy, head to the Windows site.
3. Run the Windows 8 installer.
If you’ve chosen a digital download, you’ll wind up with a disc image, or “.iso” file. From here, you can either burn the image to a DVD (right-click on the image and choose “Burn disc image”) or mount the image via virtual drive using a program such as Daemon Tools. If you’ve ordered physical discs, all you have to do is pop them in the drive. From here, simply follow the prompts of the installation wizard. Don’t forget the product key! Digital downloaders will find their valid key under the link they used to download their disc image in the first place.
The installation process also includes a chance to make a copy of Windows 8 on a USB drive or DVD. We always recommend making a backup in case you need to reinstall for some reason.
Installing Windows 8 from Scratch
Conversely, if you’re not upgrading from Windows XP, Windows Vista, or Windows 7, Microsoft has made it strangely difficult to perform a clean install of Windows 8. You’ll need to buy a copy of Windows 8 from a third-party retailer, and physical discs are your only option — so if you don’t have an optical drive with a DVD-reader, or an external drive, you’re out of luck for now. That said, here are the steps you’ll want to follow:
1. Make sure your machine meets the Windows 8 system requirements.
These specs should be relatively easy for newer machines, but it’s always a good idea to check.
2. Buy a copy of Windows 8.
This step isn’t nearly as friendly to your pocketbook if you’re installing from scratch rather than simply upgrading. The normal retail version of Windows 8 Pro is rumored to run $199. However, Newegg.com currently has Windows 8 Pro for $139; just select between 32-bit and 34-bit.
 3. Back up existing data.
If you’re performing a clean install of Windows 8 rather than simply upgrading a previous version, keep in mind that the installation process will wipe your hard drive of all previous data. Make sure to back up all your documents, music, photos, and movies beforehand.
4. Run the Windows 8 installer.
Place the Windows 8 disc into your optical drive and restart your computer. During the boot-up process, keep an eagle eye out for a message reading “Press any key to boot from CD or DVD.” You’ll need to hit a key at this time to start up the Windows 8 DVD. If you miss it, don’t worry, just restart and try again.
If you’re successful, you’ll see a flash screen with the Windows 8 icon, and then a series of options to choose from before starting installation. Again, you’ll need a valid product key. When asked what type of installation you want, choose “Custom: Install Windows Only,” which allows for a clean install. If you’re overwriting a previous operating system, you’ll need to delete previous data (make sure you’ve backed up first!). After a waiting process of about 10 to 20 minutes and an automatic reboot, you’ll find yourself in the normal installation wizard. Follow the prompts and you’re done!
[Image Credit: Microsoft Sweden]
Editors' Recommendations
- How to connect Bluetooth headphones to PC
- How to check how much RAM you have on Windows and Mac
- How to create a bibliography in Word on Windows and Mac
- How to build a table of contents in Microsoft Word
- How to alphabetize data in an Excel spreadsheet