Venturing into the realm of PC building can be tricky as you're confronted with a wide range of choices when selecting the right CPU, RAM, motherboard, graphics card, and other components. It's important to settle on your form factor first, though. For space-saving fanatics, we're going to guide you through the process of building your own mini-ITX PC.
We already have a detailed guide on building your own full-sized PC, and we highly recommend that you go through it to get a sense of how to get things in place. Building a mini-ITX PC is similar to a standard-sized PC, but there are some very specific considerations due to its compact size. For instance, you need a mini-ITX motherboard, which may come with limited set of features. You may also need to go for an SFX or SFX-L power supply, which is smaller than a standard size ATX power supply. Other things to consider include cable management, which needs special attention as it is quite complicated, and checking your thermals to ensure that all the internal components are cooled properly.
Gathering PC parts
Choosing the right set of parts for your PC is crucial, and it gets even more challenging when you are building a mini-ITX PC. Not only do you have limited options to choose from, but they can also be more expensive due to factors related to design, manufacturing complexity, and niche demand. However, the fundamental parts are just about the same and the only thing you need to be careful about is that you pick the right size. Here are all the parts you are going to need to build a mini-ITX PC:
- Mini-ITX case (check out our list of the best mini-ITX cases)
- CPU
- CPU cooler
- Mini-ITX motherboard
- RAM
- Storage (almost always an SSD)
- Power supply (SFX/SFX-L, depending on the case)
- Graphics card
It is best to first pick your case as everything is going to fit inside of it. Depending on the compatibility and support, you can then buy rest of the parts. Certain mini-ITX cases allow you to install full-size components like an ATX power supply, or even a dual-fan liquid cooler for the CPU. Always go through each and every specification, including the measurements, to make sure that everything fits without any issues. For instance, it is best to go for low-profile RAM to avoid clearance issues, and to avoid 3.5-inch hard drives (and in some cases 2.5-inch drives) as mini-ITX cases usually don't have the provision to install one.
You can also refer PCPartPicker while choosing your components as it can help solve compatibility issues.
Getting started
Once you have purchased all of your parts, it is time to start assembling them together. Make sure you have a clean working space and avoid any static electricity risks by using a simple antistatic wrist strap. It is best to avoid having any carpets around your workspace or any other material that could hold a static charge. Start with opening all the panels of your case to ensure easy access.
There might be certain cables or connectors preinstalled, which you should remove unless they are attached permanently to your case. If you are not sure about removing any of the panels or cables, go through the user manual of the case provided by the manufacturer.
Installing the CPU
Before you install anything in your case, you should first prepare your motherboard. This is necessary to avoid any hassles of reaching in and plugging in cables or additional components like the CPU, RAM and storage. Let us begin by first installing the processor:
Step 1: Remove the motherboard from its packaging and place it on a clean, flat surface like a wooden desk or rubberized mat. Avoid any sort of metal surfaces.
Step 2: Locate the CPU socket, which should be covered by a plastic lid. Next to it should a be a retention arm -- gently push it down out of the groove and lift it back up to open the socket. The plastic lid should be free and can be removed. Make sure you don't loose the the lid as you might need it in the event of replacement or repairs.

Step 3: Carefully take the processor out of its packaging for installation, holding it by the sides and avoiding touching the bottom. It can only be installed one way so look for the notches or a golden triangle on the corner and match it with the socket on your motherboard. Gently place it in the socket and ensure none of the pins get damaged or bent. Older CPUs came with pins, but that has changed, and now the pins are on the motherboard socket rather than the processor itself.
Step 4: Give the processor a little nudge once seated to check if it has been placed correctly. Next, close the retention arm to secure the processor into the socket.
Installing RAM
Memory module installation is pretty straightforward and is comparatively one of the easiest part of building a PC.
Step 1: Open the clasps on both ends (or the single one, in case your motherboard has one clasp locked in place) and make sure that you line up the RAM module so that the notch in the middle matches the notch on your RAM stick.

Step 2: Using the grooves from the clasps to line it up, push in the memory until the locks snap into place. Do not apply too much force as you could end up breaking the RAM or the slots on your motherboard. This can potentially also damage your system as a whole. You shouldn't have to force the RAM down.
Step 3: Repeat the above step for the second RAM module, referring to your motherboard manual to ensure you're using the correct slots.
Installing M.2 storage
M.2 storage is a wise choice if you are building a PC in 2023, especially in a mini-ITX case. It doesn't have any moving parts, it doesn't have any cables, and most importantly, it offers excellent speeds, especially if you opt for the latest PCIe Gen 4 or Gen 5 SSDs. Here's how you can install your M.2-based storage.
Step 1: Locate the M.2 storage slot on your motherboard. It should be placed right below the CPU, right above the PCIe slots.
Step 2: In case you can't find it, look for the label or refer your motherboard's user manual. There is also a possibility that it is placed under a heat sink cover. Just undo the screws and remove the heat sink to reveal the M.2 slot.

Step 3: Next, remove the retaining screw and slot in your SSD, which should go in at an angle. Gently push it down from the rear and screw it into place.
Step 4: If required, remove the peel on the inside of your heat sink cover and reinstall it over the M.2 SSD you just installed. If your SSD came with a pre-applied heat sink, you can continue using that.
Installing the motherboard in the case
We can now finally put the motherboard inside your mini-ITX case. Unlike mATX or full-size ATX motherboards, mini-ITX motherboards have only four holes to securely mount into a case.
Step 1: If your motherboard came with a separate rear I/O shield, now is the time to snap it into place in your case. It should look like a small piece of metal with cutouts of all the different motherboard ports.
Step 2: You should find the appropriate standoff screws preinstalled in your case. Gently place the motherboard inside the case while aligning the holes on the mounting holes with the standoff on your case. Wiggle the motherboard into position and make sure all the rear I/O ports can be accessed through the shield that you installed in the previous step.
Step 3: Use the screws supplied with your motherboard and secure all four of them using a Philips head screwdriver. It is best that you install each screw and tighten only halfway until all four are in position, after which you can proceed to fully tighten them in a diagonal pattern. Make sure you don't overtighten them as there is a risk of bending and in some cases damaging the motherboard.
Installing the power supply
The power supply is a core component and should be the next part on your list that needs to be installed. Depending on your case, you may need to install the power supply at an earlier stage, so make sure you read the case manual carefully.
Step 1: Locate the bracket or position where the power supply can be mounted. A variety of mini-ITX cases require you to fully remove an installation bracket, screw in the power supply, and then install it back into the case.
Step 2: If you are using a modular power supply, it is best to attach all the necessary power cables before it is mounted in the case. If you don't have a modular power supply, all the necessary cables should be preinstalled.
Step 3: Next, connect all the power cables to your motherboard, including the 24-pin motherboard power cable, the 8-pin CPU power cable, and necessary 8-pin power cables for your GPU.
Installing the CPU cooler
Installing a CPU cooler varies based on the specific cooler being used. Consult the manual or support website provided by your cooler manufacturer for the right set of instructions. Here are some general instructions that are applicable to most coolers:
Step 1: Every CPU cooler installation requires thermal paste. This is a thick, grease-like silver substance that is necessary for proper thermal conductivity between the CPU package and the cooler. Every cooler manufacturer either offers a small amount in a tube/syringe or pre-applies it onto the cooling plate of the cooler. If it is supplied separately, apply a small amount (almost the size of a pea) onto the CPU.
Step 2: Depending on your cooler's assembly, you may need to install a bracket on the side of the motherboard. Carefully follow the instructions as given by your cooler manufacturer and install any necessary brackets or screws.
Step 3: Position the CPU cooler atop the processor and apply gentle pressure. Align any retaining brackets or bolts with the corresponding CPU cooler mounting holes on the motherboard.
Step 4: Fasten the retaining screws or brackets to firmly secure the cooler in its position. Make sure that you screw them in a couple of turns at a time in a diagonal pattern so that you don't put too much pressure on one side of the CPU.
Step 5: For coolers that come with a separate fan, attach it now and install the three-pin or four-pin connecter onto your motherboard. There should be some connector pins labeled "CPU Cooler" on the motherboard, usually near the top.
In case you are installing an AIO liquid cooler, mount the radiator at the appropriate position in the case and attach the fan's header to the correct port. You will also have to attach the pump header, which some motherboards have specific ports for with the label "CPU Pump."
Installing the GPU
A variety of processors come with built-in graphics chips, so you don't necessarily need an additional graphics card. But if you plan to game or require powerful graphics performance for video rendering, then a dedicated graphics card is required. Here's how to install the GPU.
Step 1: Not every mini-ITX case will have a universal mounting position for a dedicated graphics card. Glance over the manual for your case once again to understand how to properly install the graphics card. Certain cases will have a PCIe riser cable, which is just an extension for the motherboard's PCIe x16 slot.

Step 2: Remove the GPU from the protective packaging and remove any protective peel or PCIe slot covers.
Step 3: Unlock the PCIe slot. Slot the graphics card into the PCIe slot on the motherboard or riser cable until you hear the lock click back into place. The GPU can go only one way, so don't worry about installing it the wrong way.
Step 4: Secure the graphics card with the appropriate screws at the back of the case.
Installing additional hard drives and SSDs
Mini-ITX cases usually do not offer enough space to fit multiple hard drives or SSDs. But if your case does have the option, you should now proceed to install them.
Step 1: Take your hard drive/SSD and mount them into the correct place as pointed out in your case installation manual.
Step 2: Attach the SATA power cable from your power supply to the hard drive/SSD. This should be a long, flat connector.
Step 3: Plug in the SATA data cable to the hard drive/SSD while the other end should go into a similar slot on your motherboard labeled "SATA." This cable should be provided with your motherboard.
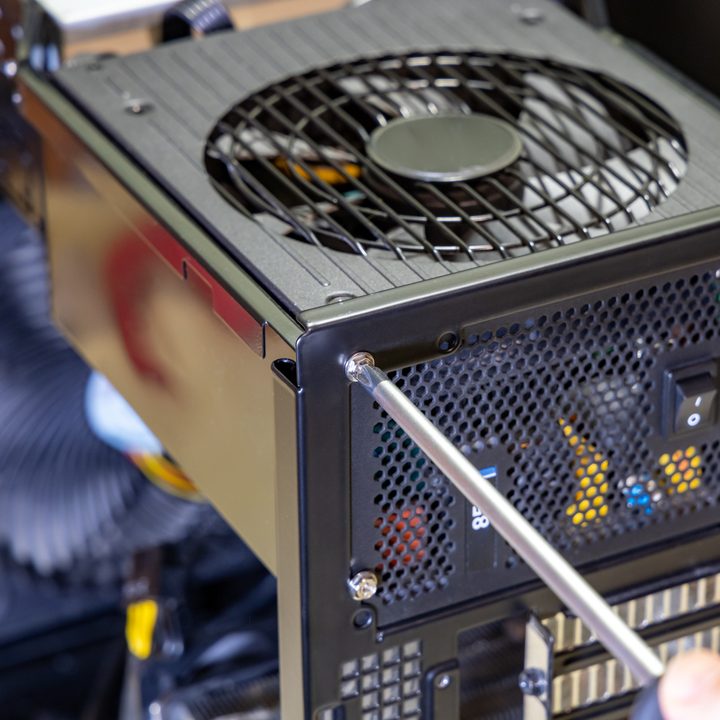
Installing additional fans
Additional cooling fans can help in maintaining the thermals of your mini-ITX PC. While your options might be limited, we personally recommend adding some to keep the internal components cool.
Step 1: Look for the fan mounting location on your case and check the size that it can support.
Step 2: Use an appropriately sized fan and install it using the four screws provided with the cooling fan. Do note the airflow pattern of your fan, which is usually marked on the fan itself. If there are no markings, as a rule of thumb, the rear of the fan is usually where the sticker is placed, which is also where the air flows out.
Step 3: Plug the three-pin or four-pin fan power cable onto the motherboard. It should be labeled as "case fan" or "chassis fan."
Cable management
Ensure all your cables are connected properly, including the ones required for the front panel for USB, audio, and power/reset switches. Once all of that it is done, it is time to clean up the mess and sort out the cables. Route extra cables behind the motherboard or along channels provided in your case. You can use cable ties or velcro straps to fasten the power supply cables to improve airflow inside the case. If you have very limited space, it is recommended that you purchase custom-length power supply cables that can help reduce the clutter.
Powering up
Connect the power cord to the power supply and remember to switch it on from the rear. Attach all necessary peripherals, including keyboard, mouse and monitor. Press the power button on your PC to boot the system. If your system doesn't boot properly, switch off the power supply and carefully recheck all your connections. Confirm that the wall socket is turned on as well. If you require additional assistance, you can refer to our PC Troubleshooting guide.
Step 1: If everything is in order, you should see the post screen or manufacturer logo on the monitor. After successfully booting up the system, the next step is to install Windows. If you're uncertain about the process, here's a brief guide on how to download and install Windows.
Step 2: Once you have installed Windows, you should proceed to install all necessary drivers, although most of them are supported by both Windows 10 and 11. You should also head over to the Update and security menu under Settings to install any necessary Windows updates and patches.
Step 3: For those who have a discrete graphics card, it is necessary to download the graphics drivers from either the AMD website for Radeon drivers or the Nvidia website for GeForce drivers.