iPods might seem like technological dinosaurs today, but it wasn’t that long ago that they were the top-selling music players. You might have spent a lot of money on iTunes purchasing all your favorite songs, but even though the iPod is almost extinct, that music doesn’t have to go to waste.
Believe it or not, transferring music from an iPod to a computer is probably easier than you think it is.
Preparation: Check your devices and connect your Apple device

Take a minute to check all your software and get your songs ready. On a PC, you’ll need to install iTunes; on a Mac running MacOS Catalina or later, you’re going to be using Apple Music. Make sure that the latest updates have been installed (if nothing else, this adds some quality of life changes that will make the other steps easier). Likewise, if possible, make sure that your mobile device is also updated. For older iPod models and iPod Touch devices, updates may have stopped some time ago, in which case you don’t have to worry about it.
When you are ready, connect your Apple device to your computer. A typical USB port should work fine for this purpose. There have been some reports of certain USB 3.0 ports not working well with older iPods, so if you run into trouble with a USB 3.0 port, you may want to try plugging into a USB 2.0 port instead.
Again, plugging in your Apple device is likely to bring up some prompts for syncing and enabling certain features. Say no to all of these. Essentially, you don’t want iTunes to make any decisions on its own, especially when it comes to wiping out your song libraries.
Option 1: Use Sync Library
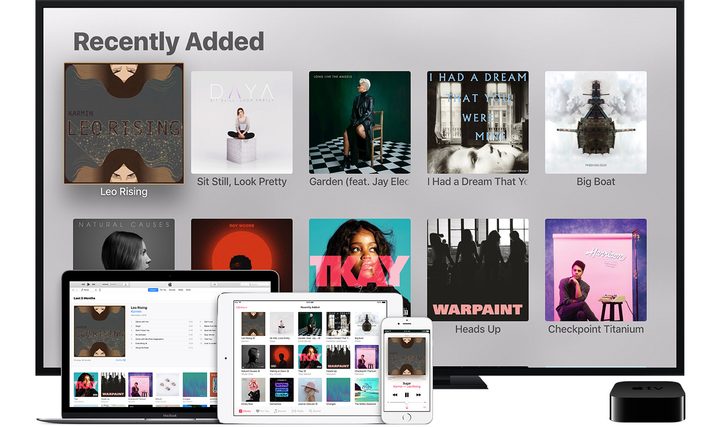
iCloud keeps getting more capabilities, and one useful feature Apple was careful to include is the ability to manage your music via the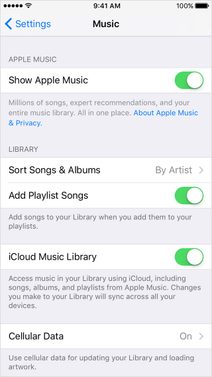 cloud. The big advantage of this method is that it’s easy: You probably already have all the downloads you need, and moving songs can be a largely automatic process. The downside is that this method only applies to newer Apple devices with Apple Music. If you have an old iPod (especially a model before the iPod Touch) then iCloud probably won’t be able to help you. In this case, move down to our second option. If you have a newer model, follow these steps. Note that your device doesn’t have to be plugged in for this process, so it still works even if you can’t plug your device into your computer.
Step 1: If you subscribe to Apple Music, Sync Library is enabled by default. This lines up all your music across any devices you’re signed in on. If at any point you’ve disabled it, you can re-enable it with the following steps. In your iPod’s Settings app, go to the Music section and turn on Sync Library; on your Mac, open the Music app, then click Music > Preferences and enable it under the General tab. If you don’t subscribe to Apple Music, you won’t see these options.
Option 2: Restore past purchases
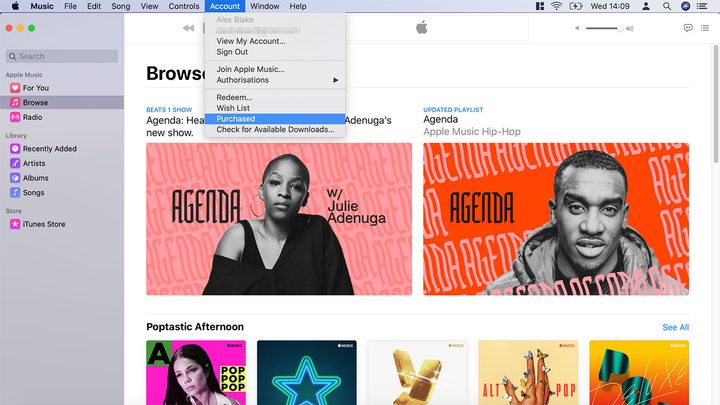
Step 1: If you don’t subscribe to Apple Music or want to access music you’ve bought from the iTunes Store, you can re-download past purchases onto your PC or Mac. The process is the same on both platforms: on your desktop iTunes or Apple Music app, select click Account > Purchased. This will open up a window of all the songs you have ever purchased on your account.
Step 2: In the new window, in the upper portion, you will see an option to select songs that are Not in My Library. Choose this option to see all the songs that aren’t currently on your device.

Step 3: Download all available albums by selecting the cloud-shaped icon in the upper-right corner of the album. Note that this will take up some bandwidth, so a good wireless connection is suggested. After the downloads are complete, those songs will now be in your device’s music library.
Note: As you probably noticed, this method only works on songs that you have purchased with your current iTunes account. If the songs were purchased from another account, you may have to do some account shuffling to get your songs on iTunes. It’s less usual for an Apple device to have songs that weren’t downloaded from an iTunes account at all, but it can happen. In this case, you should try option 3 instead. You can also get refunds on iTunes purchases if necessary.
Option 3: Use iMazing
There are a number of different apps available to help manage music between Apple devices and iTunes. Our favorite is iMazing, an app that manages all sorts of media, including songs. It’s compatible with both Mac and PC, and you can even use it instead of the iTunes or Apple Music library for organization. Here’s what to do.
Step 1: Navigate to this page and download the free version of iMazing. The paid-for version is $45 and includes upgrades along with extra features, but if you aren’t planning on using iMazing as your music library (something to consider), it probably isn’t necessary.
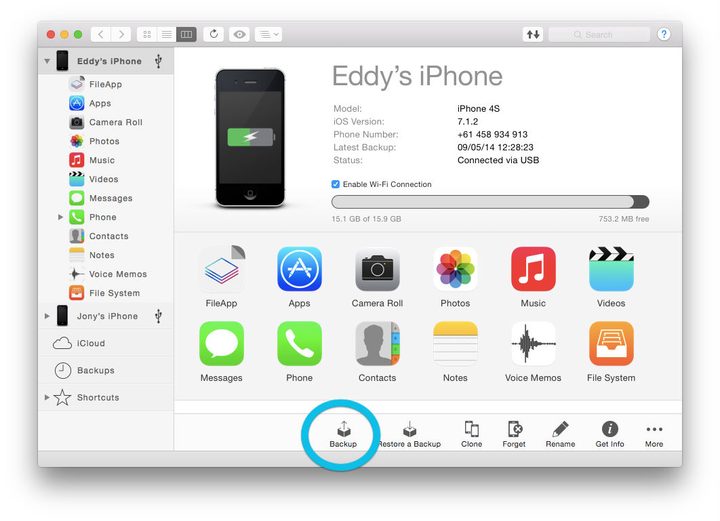
Step 2: Open up iMazing — the interface will look familiar if you use iTunes or Apple Music a lot. iMazing should automatically identify your iPod or other Apple device connected to your computer, and bring up its name in the left-hand sidebar menu. If it doesn’t, unplug and reconnect your iPod to get things going.
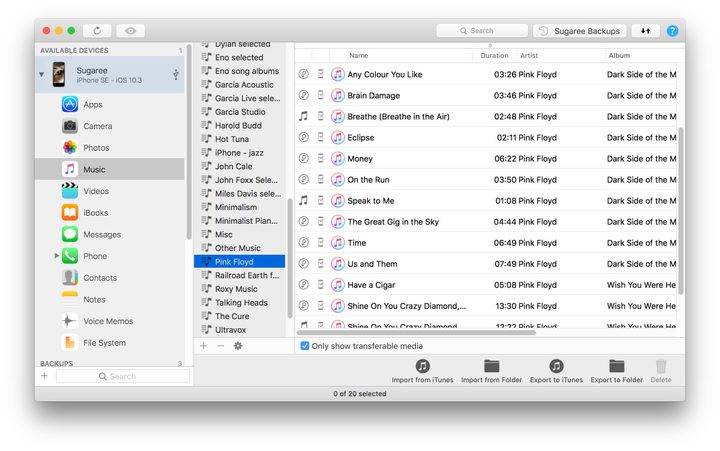
Step 3: Select your device from the sidebar. This should identify the content on the device in a drop-down menu. Select Music from that menu.
Step 4: At the bottom of the iMazing window you will see several icons for iTunes-related actions you can take. You want to select the option that says Export to iTunes.
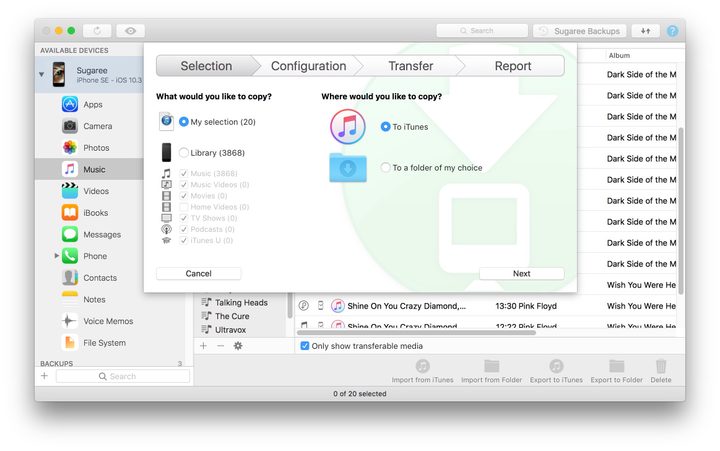
Step 5: Once clicked, you should see a pop-up window that allows you to select transfer options. You can choose to export your entire library or only export music (selecting the music-only option is a good idea if you have other content on the device).
Apple has transitioned newer devices to Apple Music, so it is unlikely that you will be sticking with iTunes on your computer. Instead, choose to export your music to a separate folder, then select the next button.
The next step will allow you to choose what data to export. You can safely export all song data unless you are trying to conserve space or streamline your music library. In that case, iTunes allows users to filter certain types of music like ‘skips’ when exporting music.
Step 6: Continuing clicking Next until you reach the Transfer section. At that point, confirm you are ready to start— and then your job is done. The iMazing software will pick up and complete what remains of the music transfer.

Note: This iMazing method should work for older iPods like third or fourth-generation devices, but some of the steps may look a bit different. For example, to extract your songs initially, you might have to select Export to a Folder. Then use iTunes or Apple music to import after you’ve exported. If you need to convert audio files to MP3 files for other devices, we can walk you through it.
It’s true that iPods are outdated at this point, especially with all the streaming options for music listening now. You don’t need a separate device just for music as long as you have access to a smartphone now. You no longer need a different device for much of anything; smartphones are music players, cameras, messaging systems, navigation devices, and more.
Don’t forget to transfer your iPod’s music library to your computer before you retire and recycle it. It only takes a handful of steps and a few minutes to hold on to your favorite songs.