Sometimes, whether you’re chatting with friends or posting on social media, words just aren’t enough — you need a GIF to fully convey your feelings. If there’s a moment from a YouTube video that you want to snip into a GIF, the good news is that you don’t need complex software to so it. There are now a bunch of ways to make a GIF from a YouTube video right in your browser.
If you want to use desktop software like Photoshop to make a GIF, then you’ll need to download the YouTube video first before you can start making a GIF. However, if you don’t want to go through that bother then there are several ways you can make a GIF right in your browser, without the need to download anything. That’s ideal if you’re working with a low-specced laptop or on a phone, as all the processing to make the GIF is done in the cloud rather than on your machine. With these options you can make quick and fun GIFs from YouTube videos in just a few minutes.
Use GIFs.com for great customization
Step 1: Find the YouTube video that you want to turn into a GIF (perhaps a NASA archive?) and copy its URL.

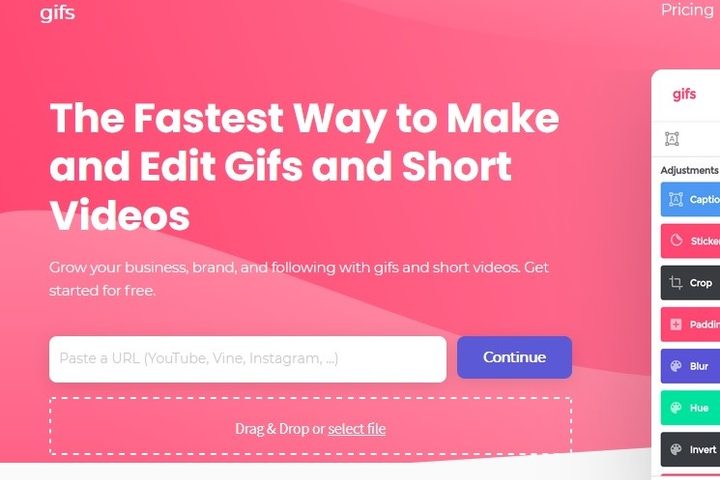
Step 2: Navigate to GIFs.com. Paste your chosen YouTube URL into the white box on the left side of the page (double-check that you copied the whole link so this will work). It should automatically detect it. You can also upload your own videos to the site by clicking the Drag & Drop or Select File button.
Step 3: If your image features an ad in the lower-left corner, be sure to click the X to make it disappear (otherwise, it will appear in your GIF). Then, click the timeline below the image and select the start and end times for your animated GIF. A blue bar indicates the period that will be used.
You can make it as long or as short as you like, but remember that the longer the animation, the bigger the file size. Some places where you want to share the GIF might put a limit on the size. Twitter, for example, has a GIF limit of 5MB on mobile devices and 15MB on desktop — although 15MB is considered very, very large for a GIF.
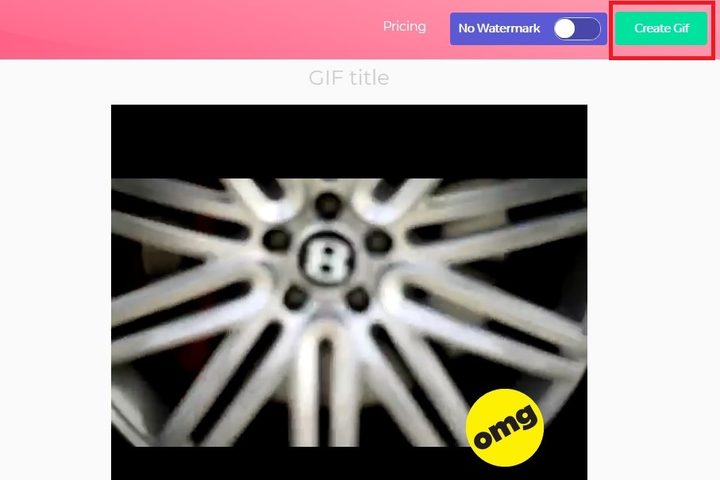
Next, add a caption or a sticker if you want. You can also crop the image, as well as add other effects like blurring or padding that may fit your new meme or just make the image easier to watch. When you’re satisfied, click Create Gif in the top-right corner.
It may take some time to create the image, especially if you’re creating a long GIF, so be patient.
Step 4: The next page asks that you confirm the GIF’s title, as well as select any tags you want it to have. Click Next when you’re done setting your preferences.

Step 5: The final page will give you options for downloading, embedding, or sharing your newly created GIF. You’re also given a preview to see what it looks like. If you would like to remove the watermark in the corner, you can, but it will mean signing up for the premium service, which starts at $2 a month, and it’s not something you need to do for casual GIF creation. To download your GIFs, hit the Download button and choose your preferred GIF size from the drop-down menu that appears.
Use Giphy for high-speed results
Another popular online GIF-making service is Giphy. It supports YouTube and Vimeo links, as well as manually created GIFs from photos. It also has a host of different options for customizing your GIF, including adding captions and other elements to make it just how you want.
Step 1: Copy the YouTube URL of the video you want to make a GIF from and navigate to Giphy.com’s GIF maker.
Step 2: Paste your YouTube URL into the input box at the base of the page. You will be prompted to log in to a Giphy account and won’t be able to make GIFs on this site without it.
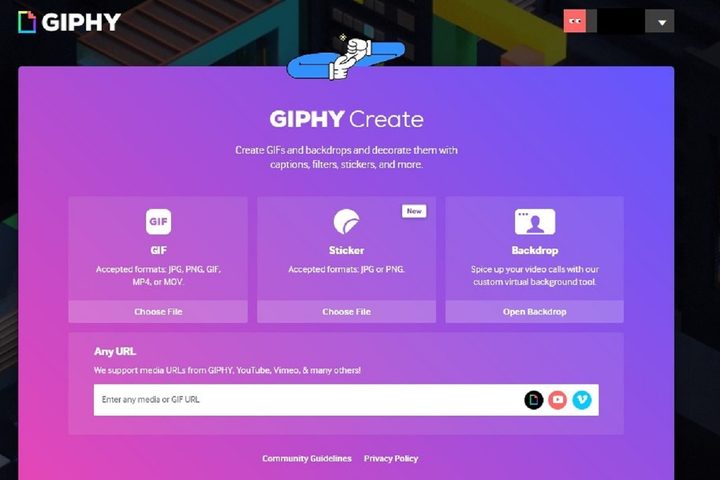
Step 3: Choose the start time and duration of your GIF and click the Continue to Decorate button.
Step 4: Add a caption if you wish, as well as any stickers or drawn overlays. When satisfied, click the Continue to Upload button.
Step 5: You can also add tags or determine whether or not your GIF is public to others. Once you’ve set your preferences, click the Upload to GIPHY button to create and publish it. Wait for the GIF to be created. If it’s long, it may take a few minutes.
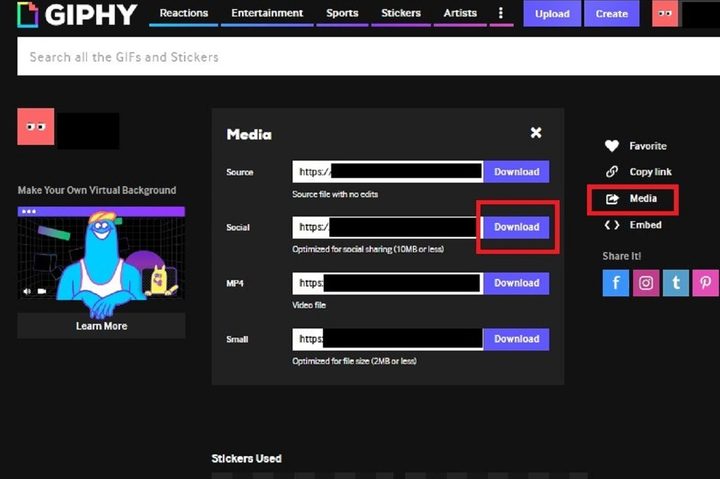
Step 6: You can now use the available links to download your new GIF, copy a link to it, embed it on a website, and more! To download it to your computer, click on Media and then choose your preferred version of it by clicking on your desired version’s corresponding Download button.
You worked hard to create this awesome GIF, so the next natural step is to share it on social media for all your friends and family to enjoy. Sometimes things can get a little funky when it comes to sharing various media, so check out our articles on posting GIFs on Instagram and uploading them to Facebook if you run into difficulties.
Use GifRun for the quickest and easiest option
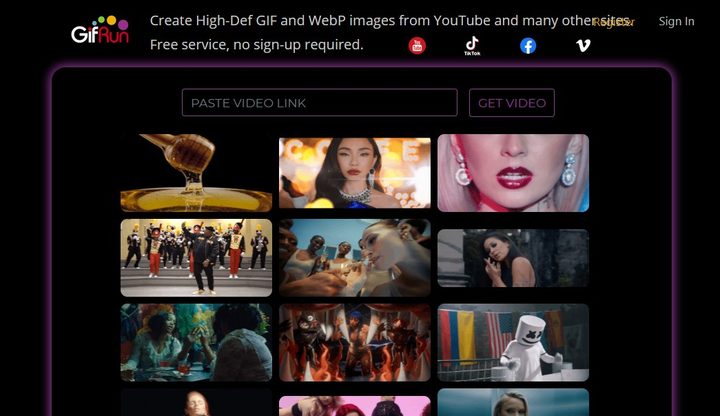
If you want something extremely simple that doesn’t require logging in, choosing settings, or uploading anything, then you can try GifRun. This free service works through the web interface and simply asks you to paste in a video link. You can paste in a YouTube or Vimeo link, and use it for videos hosted on many other websites as well.
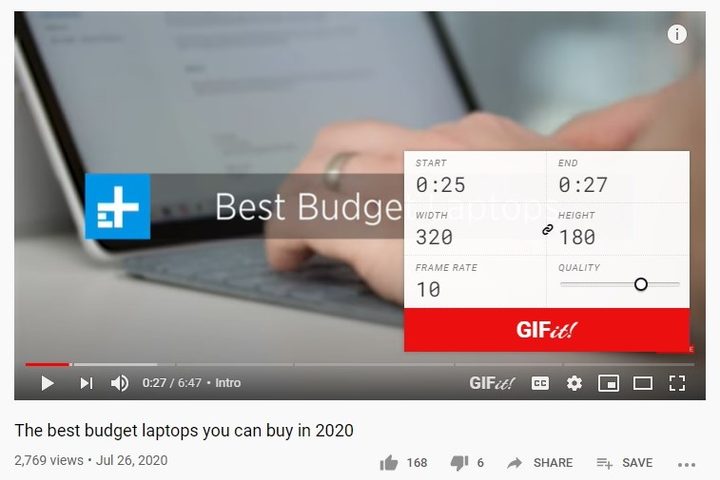
Once you’ve pasted your link you’ll be automatically redirected to the Make GIF page. Here you’ll see the source video on the left, with a slider that lets you select how many seconds long you want your GIF to be. You can use the play, forward, and back buttons to navigate to the point in the YouTube video that you want to GIF.
Then just move over to the right-hand panel and hit the “Create GIF” button to make your GIF. By default, you’ll get a GIF that is 520px wide with a frame rate of 15 FPS. You can then hit the download button to save you GIF, ready for upload to whatever site you want.
The ease of use is the great advantage of this site, as it’s perfect if you don’t have experience with the technical aspects of GIF making and you just want a simple GIF. However, there are also more options available if you like to tinker with your GIFs. There are options to add Instagram-style filters to the GIF, to crop the GIF to just the part you want, or to add text.
The final GIF will have a small watermark in the bottom right saying gifrun.com, but if you’re okay with that and you just want a simple option for making quick GIFs with no technical knowledge required, this is the perfect site.
Download Gifit! for long-term work
GIPHY is excellent for making occasional GIFs, but there are better options if you want to convert videos regularly, like GIFit!. The free, downloadable extension is easy to use. Just install the app, and you’ll be making animated GIFs in no time.
With the extension, a GIFit! button will appear at the bottom of any YouTube video you watch. Click the button to make a GIF on the video you want. The app will let you specify the part of the video you want to convert to a GIF. You can also change file size and image quality. GIFit! Will do the rest.
Google Chrome is the only browser that supports GIFit! If you haven’t used Chrome yet, GIFit! is an excellent reason to start. This extension might not work with YouTube videos that “use the Flash player by force.”