
How to get the owlbear cub in Baldur’s Gate 3

A cute owlbear cub in a cave.
Larian Studios

It doesn't take long for you to begin accruing a band of companions in Baldur's Gate 3. Soon after your crash-landing, you will start picking up other survivors who also are infected by the Mind Flayer's parasite to help you hopefully find a cure, but there also are a few animal companions you can recruit to keep you company at your camp. The owlbear cub is as cute as it sounds, and while it can't help you in battle, having it to calm you down and cheer you up whenever you return to camp is worth the effort of finding it. The issue is that finding it is only part of the process of acquiring this feathery friend. Here's a full walkthrough on how to get the owlbear cub in Baldur's Gate 3.

Recommended Videos

Difficulty

Moderate

Duration

40 minutes

What You Need

  • Find the owlbear cub nest

  • Reach the Goblin Camp

A cute owlbear cub in a cave.
Larian Studios

How to get the owlbear cub

Getting the owlbear cub is essentially a quest all on its own with two main phases. The first will be to find the owlbear cub nest and meet the creature for the first time. Be warned, you can put yourself in a situation where you make it impossible to get the owlbear cub multiple times during this process, so be careful and save often.

Step 1: Visit the owlbear cub nest. This is located to the east of the Druid Grove in the forest at coordinates X: 82, Y: 451.

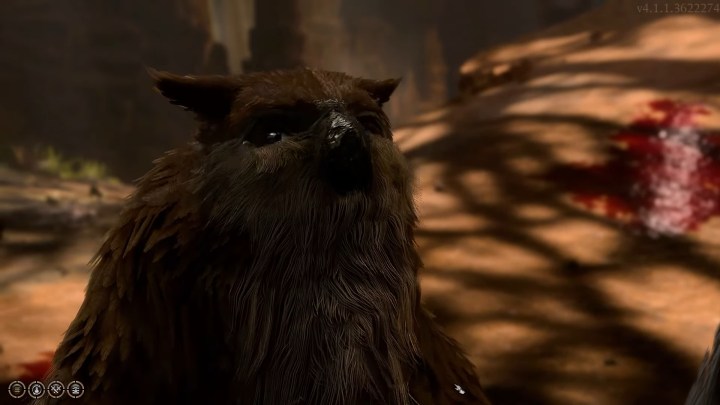
Step 2: Once inside, you will find the mother Owlbear and have two choices. You can either attack or pass any of the skill checks that appear when you approach. You will have the option of using Animal Handling, Survival, or Performance.

A owlbear eating its mother.
Larian Studios

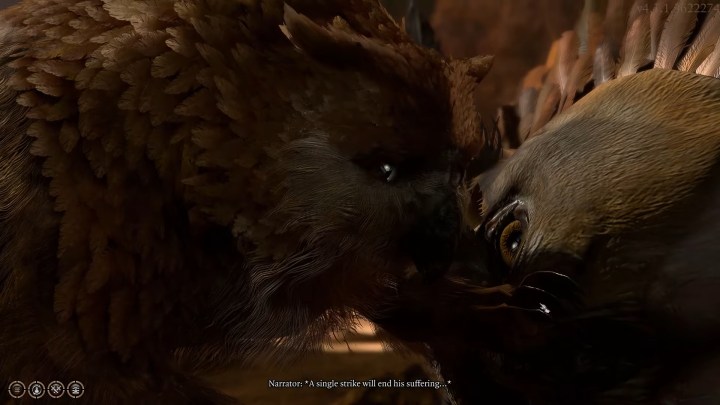
Step 3: If you choose to fight, do not hit the owlbear cub. Only target the mother and do not harm the cub.

Step 4: After defeating the mother, interact with the cub and choose not to kill it.

Step 5: If you did not fight the owlbear mother, simply leave the cave and take a long rest to pass time.

Step 6: Whichever method you took, the owlbear cub will now be at the Goblin Camp, so head there.

Step 7: Once inside, find the goblin named Krolla near the bottom left of the village and speak to her.

Step 8: Again, you now have two ways to proceed: You can participate in the Chicken-Chasing contest or refuse.

A goblin challenging you to a bet.
Larian Studios

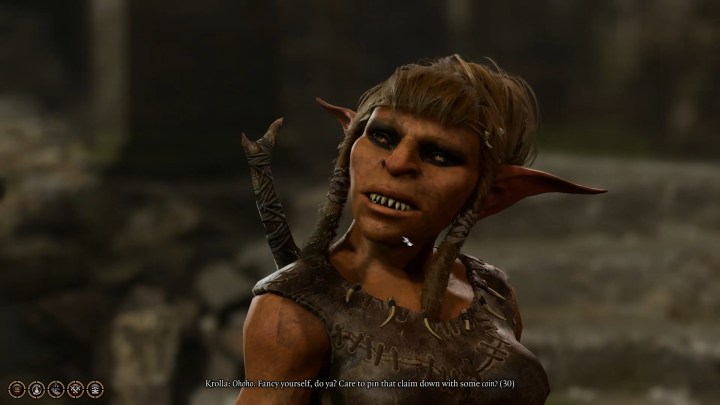
Step 9: If you play, you will need to put down at least 30 gold. If you have Animal Handling or can pass a Persuasion check, you can make it a bit easier to win.

Step 10: After leading the cub through the course and winning, speak to Krolla again to attempt to get your reward, which will not include the owlbear cub.

Step 11: Talk to Krolla a second time and demand to take the owlbear cub. You will need to Intimidate, Persuade, use Illithid wisdom, or outright buy the cub for 300 gold.

Step 12: If you refuse to participate in the game, you can skip directly to the previous step.

An owlbear cub cooing at camp.
Larian Studios

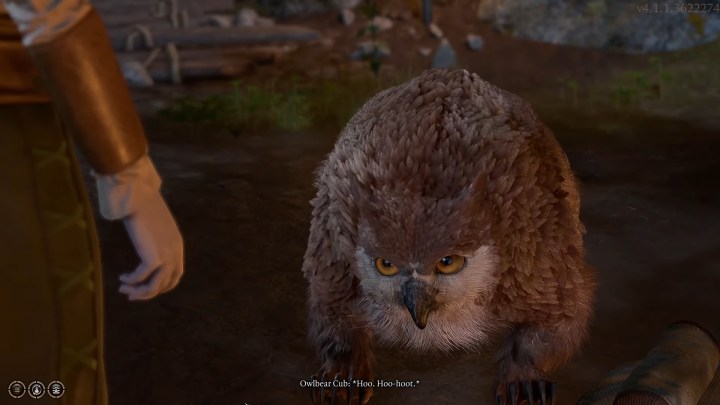
Step 13: After three long rests, the owlbear cub will appear at your camp and appear there from then on.

Jesse Lennox
Jesse Lennox has been a writer at Digital Trends for over four years and has no plans of stopping. He covers all things…
How to edit gear appearance in Monster Hunter Wilds
A hunter on a Seikret in Monster Hunter Wilds.

There are tons of resources to use for getting helpful tips and tricks in Monster Hunter Wilds for things like customizing your radial menu or using the wishlist, but it is up to you to make your hunter look good. Changing your appearance is one thing, but your armor is going to be covering the majority of your character. Some armors look great, while others are strong but might be a bit of an eyesore. Thankfully, Monster Hunter Wilds lets you completely edit your gear's appearance without forcing you to lose those stats. Here's how it works.
How to change your gear appearance


Read more
How to change appearance in Monster Hunter Wilds
One of the main characters of Monster Hunter Wilds

You could read hundreds of tips and tricks on Monster Hunter Wilds for things like customizing your radial menu or playing with friends, but you are left to your own devices when creating your character. You have a ton of options thrown at you before even setting foot in the world, let alone picking your weapon and fighting a monster, such as your face, hair, clothes, eyes, ears, and more. You could spend hours making the perfect character, but if you get a bit impatient and end up skipping over most of it so you can get to the game, you're not stuck with what you have. There are some limitations, but this is how you can change your character's appearance in Monster Hunter Wilds after starting the game.
How to change appearance

You will need to play a bit of Monster Hunter Wilds before you can access the appearance menu, but once you can visit your base camp you can freely do it as many times as you like. All you need to do is go inside, tab over to the Appearance Menu on the far right and select Change Appearance.

Read more
How to turn crossplay on or off in Monster Hunter Wilds
Two hunters ride mounts in Monster Hunter Wilds.

Try as they might, your Palico can't provide the same level of support as another human hunter in Monster Hunter Wilds. When you reach the endgame hunts, playing with friends is the best tip we can give you to overcome those deadly hunts. Monster Hunter Wilds is a cross-platform game, so there's no barrier to who you can call in for support, but sometimes you might want to limit your options. Here's how to toggle your crossplay options.

Read more