Destiny is full of weapons, and while shooting stuff with them comprises the moment-to-moment fun of the game, what keeps players coming back in the long haul is the promise of finding increasingly powerful toys all the time.
With the new Rise of Iron expansion out now, Bungie’s shooter packs a bunch of new weapons (and reworked old ones) for players to add to their arsenals. Some of them are deserving of your attention, including the new, amped-up Iron Gjallarhorn rocket launcher, some nanite-infused guns from the new expansion’s raid, and more. But while some guns, like Exotics, are obviously worth pursuing because of their rarity, more common weapons are a bit more confusing. You might have two of the same shotgun in name, but one is often superior to the other, depending on what random perks it offers. Knowing which guns are worth keeping and which should be disposed of for currency is, at best, confusing.
Luckily, if you know where to look (and when to buy), you can get the best versions of some of the strongest guns out there, offering you opportunities to get a leg up in the game’s campaign modes, or inDestiny’s competitive Crucible mode. Here’s a handy list of some of the best guns currently available in Rise of Iron (with more to come), and a rundown of how to get your hands on them.
Gjallarhorn

Everybody’s favorite insanely powerful rocket launcher with tiny heat-seeking bombs is back, after vanishing from the rotation of decent guns for a full year. Bungie knows that everybody loves Gjallarhorn, which is why this exotic launcher comes your way in a story mission that kicks off once you’ve completed the rest of the story content in Rise of Iron. To get it, finish the expansion’s story, including the new Strike, “The Wretched Eye.” That should start you a new quest that will send you to the Plaguelands on Patrol to check out an “anomaly” at Archon’s Keep. When you arrive, look for a “scan” Patrol mission icon. It should direct you to scan an anomaly inside the Archon’s Keep where you went to finish the Rise of Iron story campaign. Kill a Walker and a bunch of Fallen enemies to find the anomaly and scan it, kicking off the “Beauty in Destruction” quest line. Completing it nets you your brand new Gjallarhorn.
Khvostov

It was the first rifle every Destiny player ever used, and now it’s back, as an Exotic auto rifle that comes with a bunch of unlocked upgrades, and includes several more that let you customize its sights, its firing rate, and more. To build your new Khvostov, you’ll need need a Splicer Intel Relay — find it in the Plaguelands by killing a Hive Brood Mother wizard enemy, or other “Major” enemies in the Plaguelands. With your relay in-hand, start in the Plaguelands Patrol spawn location, and head back to the Cosmodrome proper. You can reach the Rocketyards area by heading through the building just ahead of where you start in the Plaguelands — it’s the path you took to first enter the Plaguelands in the Rise of Iron story (in reverse). Head to The Divide, the area that borders the Rocketyards, and then turn to the left and enter the Cosmodrome wall.
Push through the Wall until you come to a big snowy room where you’ll find many enemies with sniper rifles. Fight through the Fallen to the back of the room, where you’ll find a door covered by laser beams. The nearby console will take your Intel Relay and let you through the door. You’ll find yourself outside the wall, facing a “ketch,” a giant brown Fallen spaceship. Fight your way aboard and kill all the enemies there, including a tough Pilot Servitor. Once you’ve cleared it out, you’ll find a chest at the back of the ship on the right. It’ll yield the Khvostov schematic, kicking off the quest to complete it.
Thorn

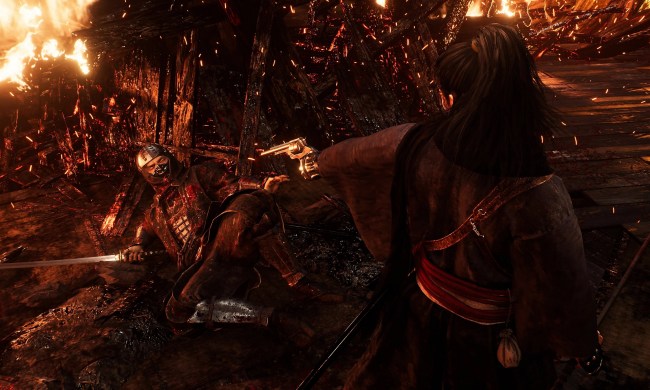
The bane of many a Crucible fighter, at least before The Taken King, was Thorn. It’s a hand cannon that injures whatever it hits over time, and that short-term additional damage now stacks up a few times as you land more shots. Thorn might not quite be as lethal as it was originally, but it’s still pretty great — and it’s a bit easier to earn than before. Thorn requires completing a lengthy quest, but you can’t just go somewhere and find it — it drops as an Exotic bounty, which makes it random. The best way to try to trigger Thorn is to keep completing bounties, as each finished one has a chance of kicking off the Thorn quest. It also seems that there’s a better chance of getting the quest from the new Rise of Iron bounties you get at the Iron Temple.
The Palindrome

Two things about The Palindrome are making it a standout hand cannon in Destiny right now, particularly in the Crucible multiplayer arena: 1. It has pretty solid range for extended lethality, and 2. It comes with a smattering of useful perks that increase its reload speed and boost its range even more. It’s also readily available to anyone who can scrounge together 150 Legendary marks from the Crucible vendor in the Tower — so if you’re keeping up with your daily activities, it’s a gun you can take home right now.
Event Horizon

Another gun available right now at the Tower’s Crucible vendor, Event Horizon is a sniper rifle that’s great for popping heads in the Crucible. The key perks on this version are Hidden Hand which give you that little bit of boosted aim assistance that makes guns extra effective, and the Shortgaze Scope, which makes it easier to see (and shoot at) more of the battlefield. The downfall of Event Horizon is its shorter magazine, which only holds three rounds, making it more of a Crucible weapon than one you take into Strikes or Raids. Still, it’s a solidly effective sniper rifle you can buy right away.
Quantiplasm

This powerful SIVA-themed shotgun includes some interesting perks that change how you’ll use the gun in ways that aren’t actually related to the gun. Using Quantiplasm increases your agility and top sprint speed, and also boosts your armor when you’re running — basically making it a great weapon for sprinting through fire to blast a troublesome enemy in the face. You’ll need to be pretty powerful to obtain Quantiplasm, however, as it only drops in the “Wrath of the Machine” raid.
Nemesis Star

If you like Destiny’s Exotic machine gun Thunderlord, you’ll like Nemesis Star. A new Exotic machine gun, it’s a solid alternative to the old lightning-spewing LMG, primarily because it fires fast, packs a punch and reloads quickly — making it great when you’re in dire straits. The gimmick of Nemesis Star is that it gets more powerful the longer you hold down the trigger, but fires more slowly over time. So the gun handles differently depending on how long you’ve fired it, starting with an abnormally high fire rate and dropping to more powerful, slower attacks. Nemesis Star’s main drawback, however, is its short range, so it’ll probably be more situational than your go-to heavy weapon. Find it in Exotic engram drops, usually earned by using Three of Coins items when beating Strike and Raid bosses, in Nightfall Strikes, or in the Crucible.
Bonekruscher

If you want a machine gun that’s going to ravage anything you point it at, Bonekruscher is for you, specifically with the set of perks currently available at the Vanguard vendor in the Tower. Its high impact will pair nicely with its Crowd Control perk, which dishes out additional damage the more kills you rack up — perfect for going on a tear against both human and alien enemies. Its other perks concern reloading, getting more bullets in the chamber faster, so you’ll be able to keep those streaks going. This is a solid buy for your heavy slot.
Trespasser

A spiffy set of perks makes this Exotic sidearm a handy little death-dealer that’s perfect in close-range, behind-enemy-lines situations. It’s a sidearm, which means none of its single shots is particularly powerful — but it fires bursts of bullets at once, giving it a big boost of power. Kill somebody, and you’ll get boosted resolution on your motion tracker, meaning it’ll be easier to hunt your next target. And reload it after a kill to get an even longer, deadlier burst on your next shot. Trespasser is also super fast for firing and reloading, and extremely stable, making it great for any kind of encounter. The only downfall: you’ll have to get it from random Exotic engram drops.
Outbreak Prime

Thanks to the collective brainpower of Destiny players all over the Internet, we now know that hidden in the Rise of Iron raid, “Wrath of the Machine” is a secret Exotic pulse rifle: Outbreak Prime. The upshot of the highly stable pulse rifle is that enemies killed by it will sometimes shoot swarms of SIVA nanomachines that’ll attack other enemies. Trouble is, activating the quest to get hold of the gun is pretty tough — it requires playing through the raid to find five monitors hidden throughout. Activating all five clears five different lasers that block a hidden path, which you can access once you beat the raid’s final boss. Inside is an Exotic chest that kicks off the quest to unlock Outbreak Prime, which we will walk you through on the next page.
Finding Outbreak Prime
It’s intense, but here’s how you tackle coming out of Wrath of the Machine on the path to very own Outbreak Prime.
Step 1) Find all the monitors in “Wrath of the Machine”
This is a lot tougher than it sounds. There are five total monitor screens scattered throughout the raid, which you’ll need to activate as you move through it toward the end. Four of them are pretty easy to find — they’re just in out-of-the-way places along the way. The last, though, required a bunch of code-breaking by Destiny fans on Reddit, and will demand teamwork from your entire squad to solve.
The monitors you’ll need to find and activate through the raid are often pretty well-hidden:
- The second time you fight Archpriest Vosiks, you’ll be in a room that has four side areas — the rooms you’ll turn into clean rooms as you avoid getting wiped by the boss’s giant SIVA attack. After winning the battle, go into the room on the left side when facing where the boss stands, toward the front of the room. In the ceiling of that room, you’ll find a vent that’s covered by a fan earlier in the fight, but will be clear once you’ve won. Hop up into the vent to find the first monitor.
- As you’re working through the jumping portion of the raid after fighting Archpriest Vosiks, but before encountering the Siege Engine, look for a path in the right wall about halfway through. It’s above the large round cylinders stuck in the wall, which you’ll need to climb in order to find the hallway that hides the monitor.
- The third monitor is in a room set in the wall over the edge after you destroy the Siege Engine. When facing where the Engine slides over the edge of the wall, go to the edge on the right side. Stand on one of the stone columns and look for chunks of square metal protruding slightly from the wall. Shoot at the panels (they might say they’re “immune” to damage) until they blow open and you’ll reveal a landing where you can jump down. Doing so will lead you down a hallway to the third monitor.
- The fourth monitor is accessible through a lengthy puzzle that takes place in two rooms: the server farm room, where you’ll kill a bunch of regular Fallen enemies, and the nearby room where a huge central pyramid is located. You’ll need two people to hang back in the server farm and the other four to head to the pyramid room. Send the server farm room people to find two screens, one on the left side of the room and the other on the right. Send the pyramid room team to spread out around the room, one for each quadrant of the square area. Each quadrant is marked with a big number on the wall: 00, 01, 02 and 03.
- The puzzle works like this: the screens in the server room dictate grid coordinates for the players in the pyramid room, telling them where to stand in order to solve a puzzle. The monitor on the left side of the server farm (when you’re facing the exit) tells you which column to stand in in each quadrant (they’re all labeled on the far wall when you face out from the pyramid); the right monitor tells you which of the cylinders around the room to stand on in the corresponding column. Trouble is, the monitors in the server farm room dictate their coordinates in binary code, so your server farm players need to be able to translate the binary they see on their screens to numbers for the pyramid team. The coordinate numbers also start with 0, instead of 1 — so if you get coordinates like Column 3, Cylinder 0, it’s actually the first cylinder in Column 3.
- First, you need the pyramid team to jump to and stand on four of the cylinders to activate the puzzle: in Quadrant 00, stand on Column 2, Cylinder 2; in Quadrant 01, stand on Column 1, Cylinder 2; in Quadrant 02, stand on Column 4, Cylinder 0; and in Quadrant 03, stand on Column 3, Cylinder 5. Be sure not to touch any of the other cylinders, and be sure to stand on the cylinders until the screens in the server farm are activated.
- Once the screens are active (you’ll receive a prompt to turn them on), have the pyramid team return to the center of the room and resume their positions. Activate the screens, and each one will spit out numbers: left for the column and right for the cylinder, starting with Quadrant 00. Relay the numbers in order to the pyramid room team; once the person for the first quadrant is in position, the cylinder will glow and you’ll hear an activate sound. That’ll kick out the next set of numbers. Repeat until each member of the pyramid team is in the right position
- If you’ve done it right, the pyramid will open, revealing a path where you can jump into and enter it. Inside is a chest and the fourth monitor.
- The last monitor becomes available after you kill Aksis in the final battle. Look over the edge near the back of the room, by the lighted pillars, for a panel that opens once you’ve finished the battle. Jump down to the panel to enter a hallway where you’ll find a pathway covered with lasers, making it impassible. If you’ve found all the other four monitors, you’ll be able to activate a fifth monitor here. That’ll deactivate the lasers and lead you to one last chest. Inside you’ll find a SIVA Engine, which will start you on the “Channeling the Corruption” quest.
Step 2) Rack up some wins with your fire team (Be the Battery step)
First off, you’ll need a three-person Fireteam to beat it — a Hunter, a Warlock and a Titan, all working on the quest together. You’ll have to finish a Nightfall Strike, three public events and three Heroic Strikes or Crucible matches, all while racking up pulse rifle kills.
Step 3) Synchronize Engines (That Light May Bind step)
After that, you’ll need to synchronize your SIVA Engines by inputting a series of commands on the items themselves. Head to Felwinter Peak, open your inventory and simultaneously enter these codes into your SIVA Engines:
- Hunter: middle, bottom, middle, middle, bottom
- Titan: bottom, middle, bottom, middle, bottom
- Warlock: bottom, top, bottom, top, bottom
That’ll activate two more nodes on the screen, which you can push once everyone enters their codes correctly, and a final one that’ll activate the next quest step.
Step 4) More fighting (Parts of the Whole step)
Head to the Plaguelands and fight as a team in the Archon’s Forge, then go defeat Sepiks Perfected (the 320 Strike will do) to complete the next step. Now it’s time for another synchronization puzzle.
Step 5) The second synchronization (Equalization Equation step)
Back at Felwinter peak, simultaneously enter these values with your team into your SIVA Engine to head on to the next step. The numbers correspond to the nodes in sequence: 1 refers to the node in the top row descending to 4 on the bottom. For classes with two possible codes, try one, and if it fails, try the other.
- Titan: 4,2,1,2,3
- Hunter: 4,1,2,3,3 or 2,4,4,1,4
- Warlock: 1,3,3,3,4 or 2,3,4,4,4
Step 6) Back to the raid (Running the Math)
Your next step after talking to Shiro again will be to re-run the Wrath of the Machine raid. Bring the same character and clear each of the three bosses. Each will drop a SIVA Control Grid you’ll need for the next step.
Step 7) Math class (An Unknowable Science)
There’s one more SIVA Engine synchronization puzzle back at Felwinter, but to figure it out, you’ll either need to do some math (each node has a number value), or use this handy SIVA Engine Puzzle Calculator. Just hover over each node to get its value and then type it into the calculator, and it’ll spit out the code you need to enter in order to synchronize your engines.
Step 8) Go get it
With all three engines synchronized, talk to Shiro to receive your SIVA-infused Exotic pulse rifle, Outbreak Prime, which comes in at a blazing 390 Light level.