There’s so much to do in The Legend of Zelda: Breath of the Wild. Since its release in 2017, players have found themselves returning to the game to collect Korok Seeds, complete Shrines, unlock hidden gear, and purchase a ton of goodies found across the various vendors of Hyrule. One vendor you might not be familiar with is Kilton, a mysterious fellow who sells spooky monster-related items.
The gear sold by Kilton is expensive and hard to acquire, but well worth it, especially if you’re a completionist. In this guide, we’ll show you what you need to know about tracking down Kilton, how to use his exclusive currency, what items he sells, and more. Here’s where to find Kilton in The Legend of Zelda: Breath of the Wild.
Recommended reading:
- The best recipes you can cook in BOTW
- How to get the motorcycle in BOTW
- The best weapons in BOTW, and where to find them
Who is Kilton and why should you find him?
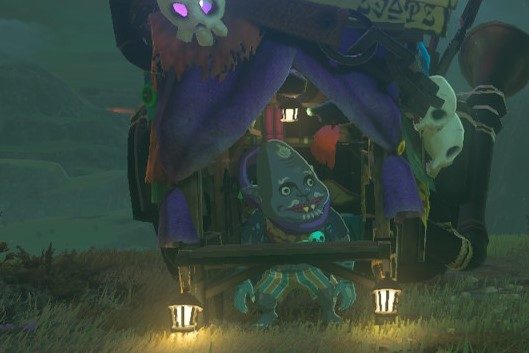
Kilton is a vendor in Breath of the Wild who runs a shop called Fang and Bone. He sells exclusive items and only appears in specific locations during certain times. The items at Fang and Bone are highly effective, making it well worth the trouble of tracking Kilton down. Though it’s important to know Fang and Bone doesn’t take rupees. Instead, you’ll need to use a separate currency known as mon, which we’ll cover in more detail below.
Where to find Kilton the first time
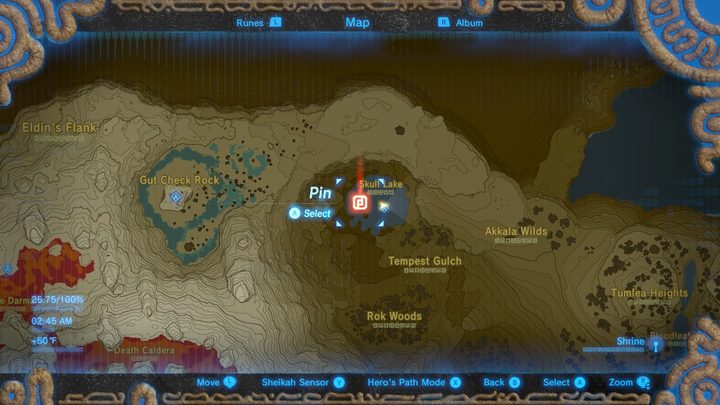
To unlock the ability to shop at Fang and Bone, you must first meet Kilton in his initial location, found on the western “eye” of Skull Lake. This area is located in the northeastern section of the map, just north of Deep Akkala. We recommend fast traveling to the Zuna Kai Shrine to reach Skull Lake quickly. The other thing you should know about Kilton and his shop is that it can only be accessed at night. If it’s not nighttime, Kilton will not spawn, so rest at a nearby inn or make a campfire to advance time.
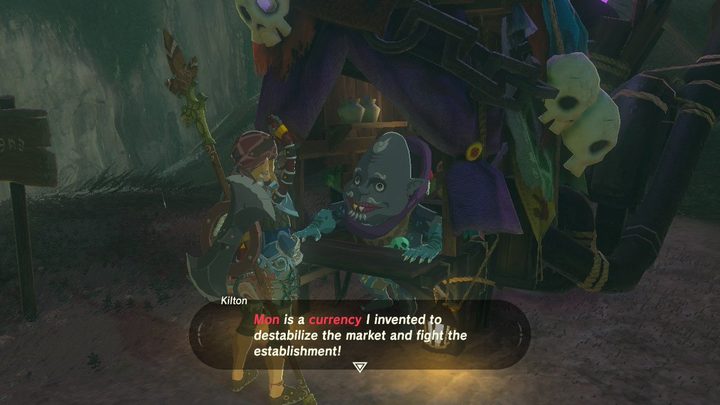
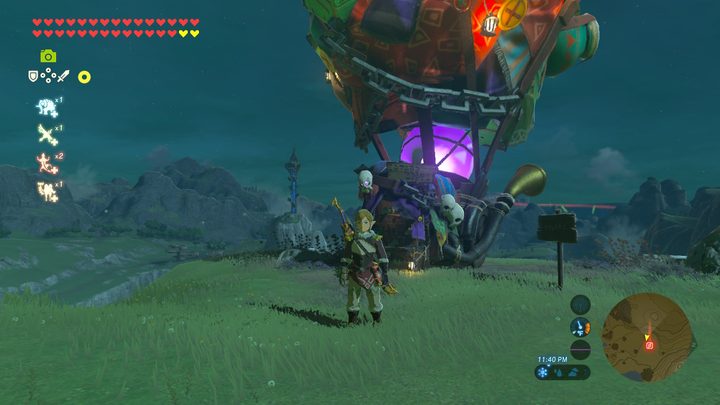
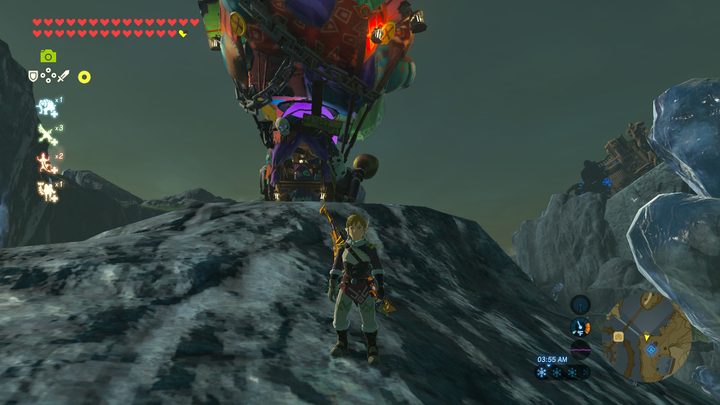
Once you arrive at the western “eye” of Skull Lake for the first time, you should see the Fang and Bone shop, as depicted by a huge purple balloon. Walk up and talk to Kilton, and he’ll tell you about the items he sells, as well as his reasons for developing his own currency. He wants to “destabilize the market and fight the establishment,” apparently.
From here, you can browse his wares, but after you leave the area, Kilton will then appear at seven different areas around the map, which we’ll cover in detail below. He will no longer appear at Skull Lake, so you must visit one of the seven locations to find his shop afterward.
All Fang and Bone locations
After your initial visit with Kilton at Skull Lake, you can find him across seven different locations around the map. Once again, make sure you visit at night, as Fang and Bone will not appear during the day. Typically, the spawn locations are near inns, so if it’s daytime, you can rest there to advance time. And most Fang and Bone spawns are found pretty close to shrines, making it quick and easy to fast travel to the nearest location.
Much like Beedle, Kilton’s shop spawns in fixed locations, so you don’t have to worry about randomness or having to track him down. Simply visit one of these locations at any time (as long as it’s at night), and you’ll find him there.
Here’s where to find the seven Fang and Bone locations across Hyrule.
Gerudo Town


The Gerudo Town location is found northwest of the main village, by a statue of a soldier with a sword. This area is in the southwest portion of the map. Make sure you equip cold-resistance gear when visiting this spot since the desert is chilly at night. Spawn in at the Daqo Chisay Shrine for easy access.
Hateno Village
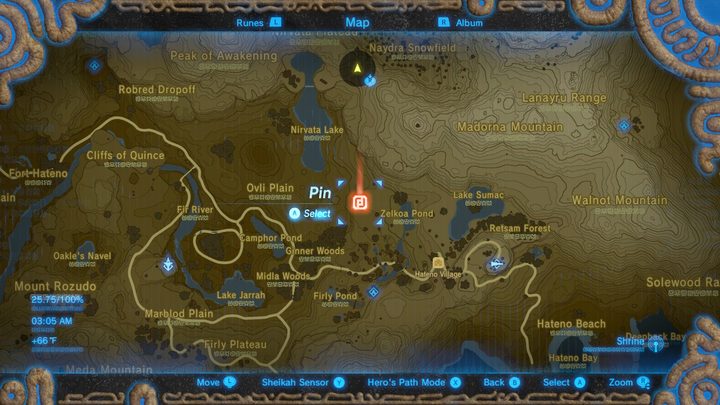
The Hateno Fang and Bone location is found in the southeastern section of the map to the northeast of East Necluda. We recommend spawning at the Myahm Agana Shrine. You’ll find the shop just west of the Zelkoa Pond.
Kakariko Village
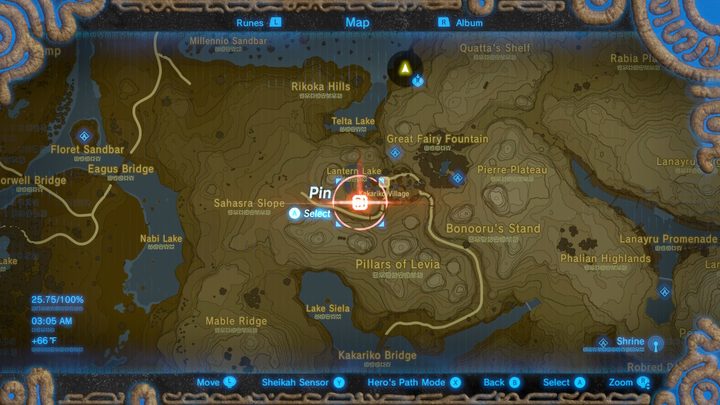

For the Kakariko Village Fang and Bone location, spawn in at the Ta’loh Naeg Shrine found to the north of the main village. This area is located to the southeast of Central Hyrule. The shop itself is found to the south of Lantern Lake on a large hill.
Lurelin Village
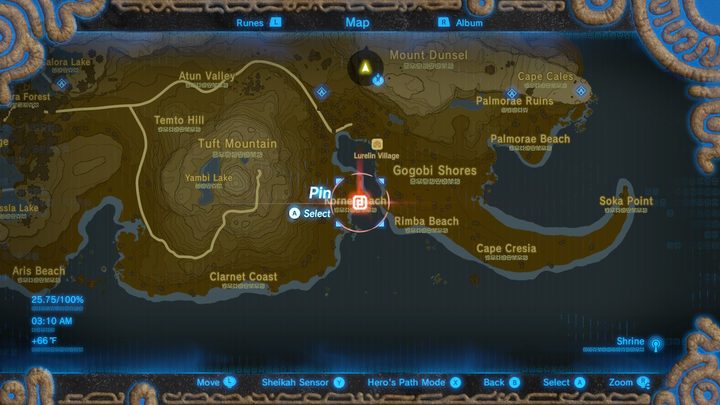
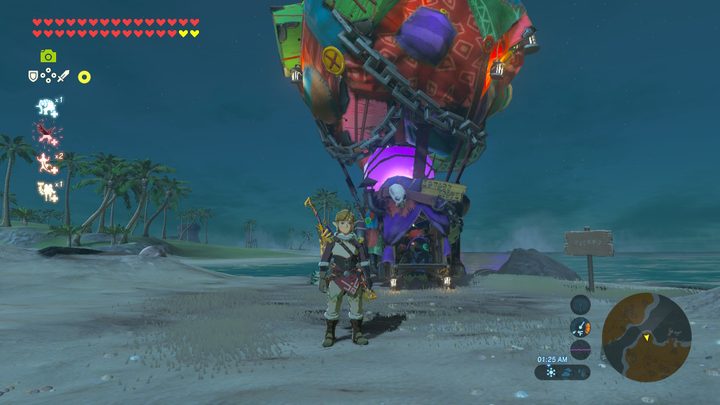
Next up, you can find a Fang and Bone shop at Lurelin Village, which is located in the southeastern portion of the map. You can easily spot it by the large peninsula that resembles a hook (or claw). Teleport to the Yah Rin Shrine and head south in the direction of the beach to find this shop.
Rito Village
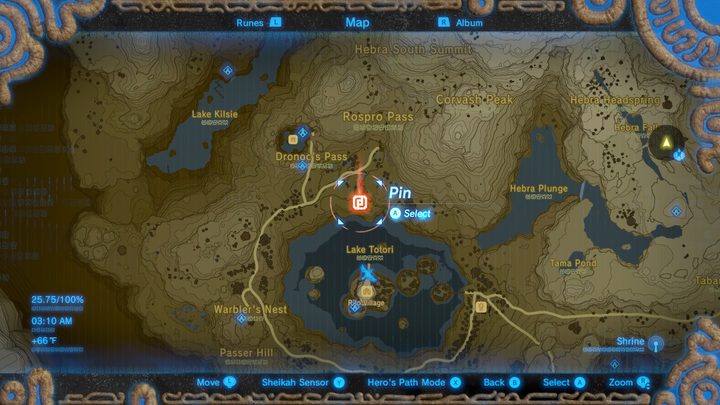
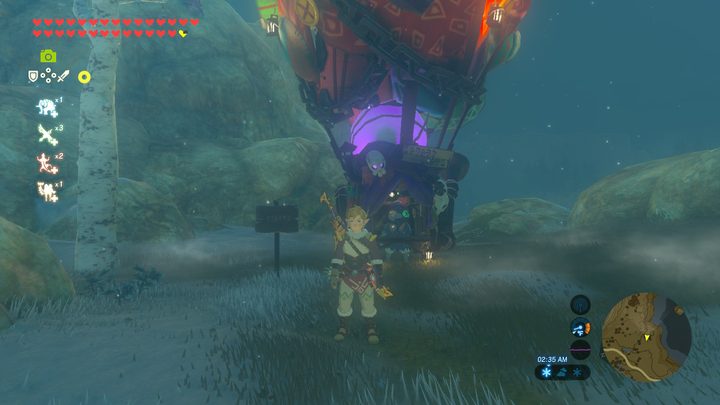
The Rito Village Fang and Bone location is found in the northwestern portion of the map by the snowy mountains. Spawn in at Sha Warvo Shrine, just north of Lake Totori, and head southeast toward the water to find the shop there. Again, bring cold-resistance gear to stay warm.
Tarrey Town
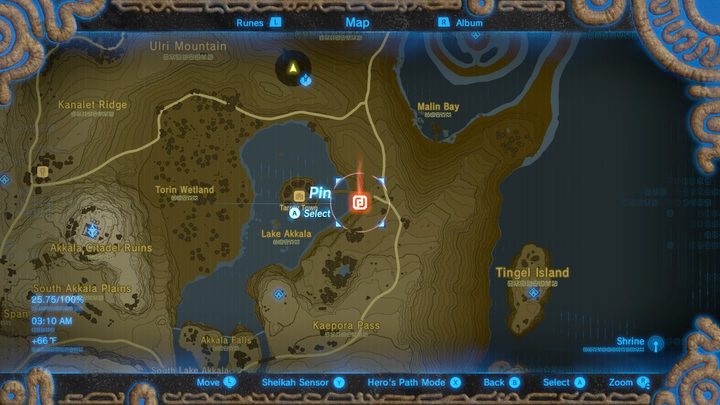
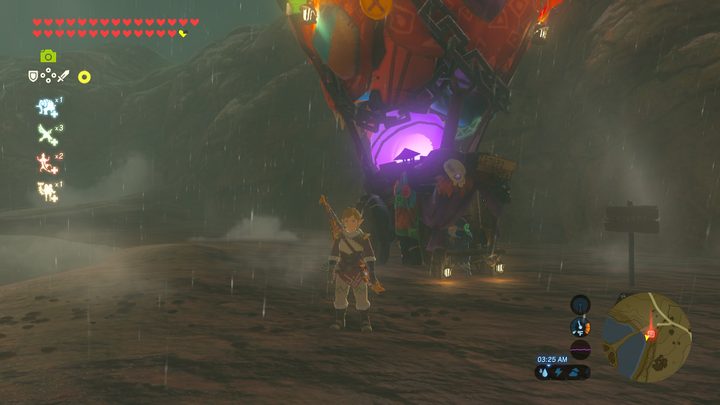
For the Tarrey Town Fang and Bone location, head to the northeastern section of the map, south of Akkala. Spawn in at the Dah Hesho Shrine to the south of the Tarrey Town itself and you’ll find the shop across the bridge that leads to the town.
Zora’s Domain
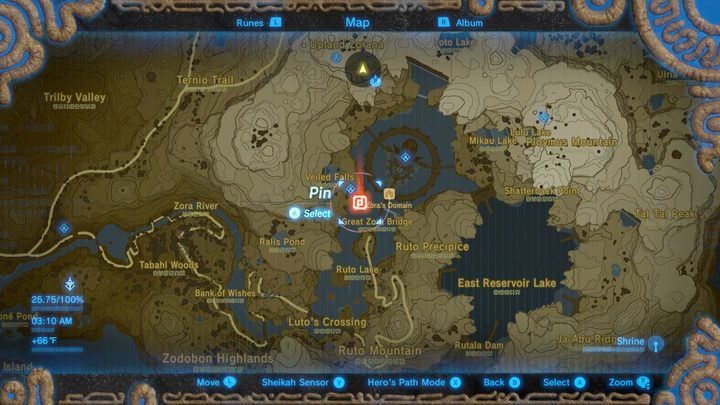
The final location is found at Zora’s Domain, which is on the east side of the map, just north of Lanayru. Teleport to Dagah Keek Shrine and you’ll find the Fang and Bone shop just south, close to a cliff that leads to the water below.
What does Kilton sell?
While Kilton’s inventory isn’t massive, the items available at Fang and Bone are well worth looking into. Most of the items are high-value pieces of gear you can wear, and you can only buy them at Fang and Bone. Below, we’ll list the items available at Kilton’s shop.
List of Fang and Bones items for sale (valued in mon)
One thing to note is that you must defeat Divine Beasts in order to gain access to certain items. For example, the coveted Dark Link set requires you to take out all four Divine Beasts, while the Lynel Mask only needs you to defeat three. We’ll list the requirements of unlocking each item below.
| Item | Price in mon | Description | Requirement |
| Monster Extract | 9 | A result of Kilton’s research into monsters, this suspicious spice can be used to punch up dishes while cooking. Apparently, it can be used to make a number of monstrous meals.
|
None |
| Wooden Mop | 9 | Just a mop to the untrained eye, it excels at tidying up the place. But it owes its sturdy construction to a true craftsman, so it actually has some combat merit. | None |
| Bokoblin Mask | 99 | Kilton’s handmade Bokoblin headgear. It’s almost charming in a cute, monstrous kind of way… Equip it to blend in with Bokoblins. | None |
| Spring-Loaded Hammer | 199 | This strange hammer is one of Kilton’s specialties. Being struck by it doesn’t hurt much, but the fourth swing in a string of attacks will send the victim flying. | Defeat one Divine Beast |
| Moblin Mask | 199 | Kilton’s handmade Moblin headgear. It’s designed to replicate the Moblin’s distinct long nose and large horn. Equip it to blend in with Moblins. | Defeat one Divine Beast |
| Lizalfos Mask | 299 | Kilton’s handmade Lizalfos headgear. It’s designed to replicate the unique tongue and horn of the Lizalfos. Equip it to blend in with Lizalfos. | Defeat two Divine Beasts |
| Monster Saddle | 299 | Kilton hand-made this saddle. Apparently, he had some monstrous horse in mind as he worked on it. It looks strange but is certainly usable. | Defeat two Divine Beast |
| Monster Bridle | 399 | This bridle was handmade by Kilton, but it looks like he may have had some monstrous horse in mind when he made it. It includes a mask that conceals the horse’s head. | Defeat two Divine Beast |
| Lynel Mask | 999 | Kilton’s handmade Lynel headgear. It’s so well crafted, it can deceive a real Lynel. Equip it to blend in with Lynels, but don’t linger too long. Those beasts are smart. | Defeat three Divine Beasts |
| Dark Tunic | 999 | Kilton developed this jet-black armor as a result of his monster research. A Spurious replica of the green outfit once worn by a legendary hero. | Defeat four Divine Beasts |
| Dark Trousers | 999 | This headgear is the product of Kilton’s monster research. He crafted it with a monster born from the shadows in mind. The eyes glow an eerie red in the dark. | Defeat four Divine Beasts |
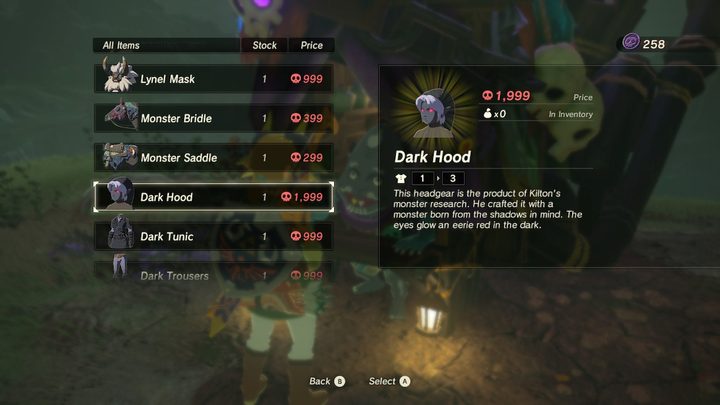
| Dark Hood | 1999 | The result of Kilton’s research into monsters. Looks like your average legwear at first, but these were created based on the image of a monster born of darkness. | Defeat four Divine Beasts |
Many of the items sold by Kilton have specific features that will serve you well. For example, the Bokoblin Mask will help you blend in with Bokoblins, while the Lynel Mask will keep you safe from Lynels. Other items are purely cosmetic, while the Monster Extract material is a valuable resource used in multiple recipes. Bottom line, Kilton sells items you’ll probably want.
How do you get mon?
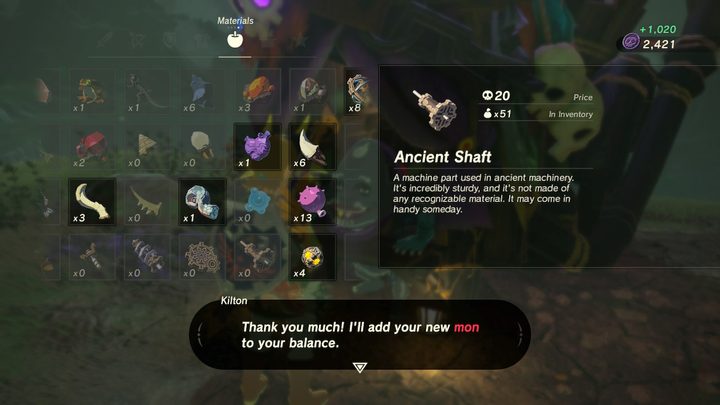
As we’ve mentioned a few times already, Kilton doesn’t take rupees. Instead, he has his own currency, mon. In order to obtain mon, you must visit Kilton and select the Exchange for mon option. Here, you’ll be able to exchange the various monster parts you’ve collected throughout the game for the exclusive currency. This is the only way to obtain mon, so always make sure to loot the bodies of the creatures you defeat as you play.
Each time you defeat a creature, whether it’s a small Keese or a Lynel, they’ll drop parts for you to collect. That’s why we recommend making sure you hoard monster parts as you play through the game.
Upon your first visit at Fang and Bone, you’ll likely have a handful of monster parts in your inventory, so take the time to exchange everything you have. Certain parts are more valuable than others, such as the Shard of Dragon’s Horn, which is worth 150 mon. Once you figure out the items you want, you can start farming specific creatures to gather the materials you need.
Mon rates
Below is a list of the exchange rate for each monster part, along with how to obtain the material. Keep in mind, some parts have a low drop rate, meaning you’ll likely have to farm certain enemies to get the resourses you want.
| Monster material | Mon | How to acquire |
| Octo Balloon | 1 | Defeat Octorok |
| Moblin Horn | 2 | Defeat Moblin |
| Keese Wing | 2 | Defeat Keese |
| Ancient Screw | 2 | Defeat Guardian |
| Monster Extract | 2 | Buy from Kilton or various side quests |
| Bokoblin Horn | 3 | Defeat Bokoblin |
| Chuchu Jelly | 3 | Defeat Chuchu |
| Bokoblin Fang | 5 | Defeat Bokoblin |
| Lizalfos Horn | 5 | Defeat Lizalfos |
| White Chuchu Jelly | 5 | Defeat Ice Chuchu |
| Red Chuchu Jelly | 5 | Defeat Fire Chuchu |
| Yellow Chuchu Jelly | 5 | Defeat Electric Chuchu |
| Octorok Tentacle | 5 | Defeat Octorok |
| Ancient Spring | 5 | Defeat Guardian |
| Moblin Fang | 6 | Defeat Moblin |
| Fire Keese Wing | 6 | Defeat Fire Keese |
| Electric Keese Wing | 6 | Defeat Electric Keese |
| Lizalfos Talon | 8 | Defeat Lizalfos |
| Bokoblin Guts | 10 | Defeat Blue, Black, or Silver Bokoblin |
| Keese Eyeball | 10 | Defeat Keese |
| Ancient Gear | 10 | Defeat Guardian (except Guardian Scout I) |
| Moblin Guts | 12 | Defeat Blue, Black, or Silver Moblin |
| Lizalfos Tail | 12 | Defeat Blue, Black, or Silver Lizalfos |
| Octorok Eyeball | 13 | Defeat Octorok |
| Molduga Fin | 15 | Defeat Molduga |
| Hinox Toenail | 15 | Defeat Hinox (except Stalnox) |
| Icy Lizalfos Tail | 16 | Defeat Icy Lizalfos |
| Red Lizalfos Tail | 16 | Defeat Fire-Breath Lizalfos |
| Yellow Lizalfos Tail | 16 | Defeat Electric Lizalfos |
| Hinox Tooth | 18 | Defeat Hinox |
| Lynel Horn | 20 | Defeat Lynel |
| Ancient Shaft | 20 | Defeat Guardian (except Guardian Scout I) |
| Lynel Hoof | 30 | Defeat Lynel |
| Hinox Guts | 40 | Defeat Hinox (except Stalnox) |
| Ancient Core | 40 | Defeat Guardian (except Guardian Scout I, Guardian Scout II, and Decayed Guardian) |
| Dragon’s Scale | 60 | Attack Ancient Dragons |
| Lynel Guts | 100 | Defeat Lynel |
| Giant Ancient Core | 100 | Defeat Guardian Stalker, Skywatcher, or Turret |
| Shard of Dragon’s Fang | 110 | Shoot Ancient Dragon in mouth |
| Shard of Dragon’s Horn | 150 | Shoot Ancient Dragon in horn |
Monster Medals of Honor
The final option you have when talking to Kilton is About monsters, which is only available after you’ve defeated Ganon. This dialog option will give you more information about three creature types that are scattered around the map: Talus (40), Hinox (40), and Molduga (4). These creatures spawn in fixed locations around the map and are limited, meaning it’s possible to eliminate all of them.
Kilton keeps track of how many you’ve killed, and upon defeating all of them, you’re awarded with a Medal of Honor for that particular creature type. These Medals of Honor don’t do much but are yet another thing you can do if you’re bored. Though, hunting these creatures will grant you lots of monster parts, so it’s worth it to track them down if you’re wanting to buy some of Kilton’s more expensive items.