

Extinction shares a lot of the same traits as Zombies, but it also requires different strategies to succeed. The game is broken into three sections, each with standard hives you must drill by setting a drill in place to destroy them, followed by a barrier hive separating you from the next session. It takes more than a quick set of thumbs to survive, it takes strategy and teamwork. With that in mind, we offer a few tips and tricks that could help you survive the alien onslaught.
We’ll update this post with new tips, and if you have any suggestions sound off in the comments below.
Grind to 29

Extinction features a level progression system that is unique to itself. All players begin Extinction at the lowly level 1, and experience earned in multiplayer has no impact on your Extinction character, and vice versa. So plan to put some time into Extinction if you want to survive until the final hive.
You have four categories of equipment to choose from, along with a choice of pistols, and leveling up unlocks more options. You’ll need to hit level 10 before you even unlock all the classes, and the final unlockable item comes to you at level 29. It’s possible to destroy every hive (as well pass the barrier hives) without unlocking the majority of the equipment and classes, but it is “possible” in the same way that someone using only a throwing knife could go 40-0 in Domination. It would be very, very difficult. So prepare to put some time into leveling up and don’t get discouraged early on.
When you hit level 30, you prestige and earn a “relic,” augmenters that make the game tougher. You can only choose one relic per prestige, but you can earn all five. After prestiging you still have access to aeverything you previously unlocked. They are: Do less damage, Mortal (no class options), Pistols only, Smaller wallet, and Take more damage.
Manage your cash
 You start each game with $500 and can carry a maximum of $6,000 at first. Earning cash is easy enough at the start. Each alien kill gives you a dollar amount starting at $60 with $30 for an assist, and increases based on the difficulty of the enemy. Littered throughout the map are weapons you can purchase and traps you can set (which also costs money), but most of your money will go to the equipment you bring with you, which you set up in your loadaout. Unlike the multiplayer you only have one loadout, so picking complimentary equipment to help the team is important. Your options fall into four categories: Ammo (incendiary, explosive, etc), Team Support (armor, weapons boost, and more), Strike Package (one of five killstreaks), and Equalizer (an offensive option including turrets and grenade launchers). Each item has a cash value that can range from hundreds of dollars to thousands, and you can call on these items at any time – as long as you can afford them. (You will also have to wait for one item to disappear before you can call it again). Strategically managing your cash is vital, and if you are nearing the cash limit, start using money. If you are maxed out, any money you earn is just wasting potential.
After the first barrier hive, you will be awarded $3,000 cash. It is a dollar sign icon you interact with, but before you grab it use everything you can that makes sense. Drop ammo for the team, whatever team support items you have, and call in equipment that you can take to the next hive. Then replenish your cash and sprint to the next hive to start the drilling and make the most out of your cash boost. You’ll earn cash after the next barrier as well, but at that point you probably won’t have any trouble earning money thanks to the number of enemies you’ll be facing.
Earn your skills
 Each character has a set of skills they begin the match with, ranging in power from one to four. Regardless of your overall level, your class, or what you equip, your skills will always begin at level one. There are six categories to upgrade, and you’ll need to do these during the game. When you open the skills menu, be warned, you are still vulnerable.
Four of the six skill classes make your loadout items more powerful – ammo boxes drop more bullets, they give turrets more ammo, explosives gain strength, etc. The other two are specific to your class and the pistol you are carrying. Upgrading the pistol class makes your secondary more powerful, while the class upgrades are always helpful, but won’t always help your team. Although it is tempting, don’t skimp on the pistol upgrades. Later waves will quickly drain ammo, forcing you to switch to your secondary. A weak pistol will barely scratch the later enemies you face.
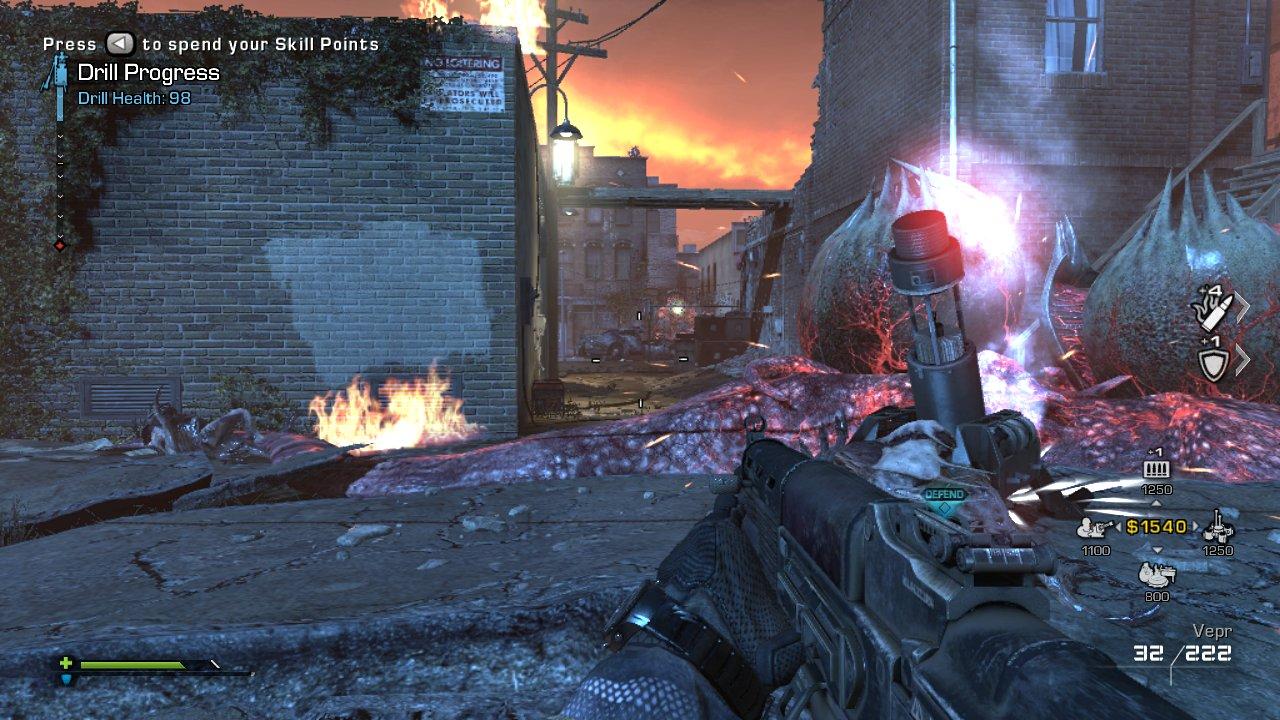
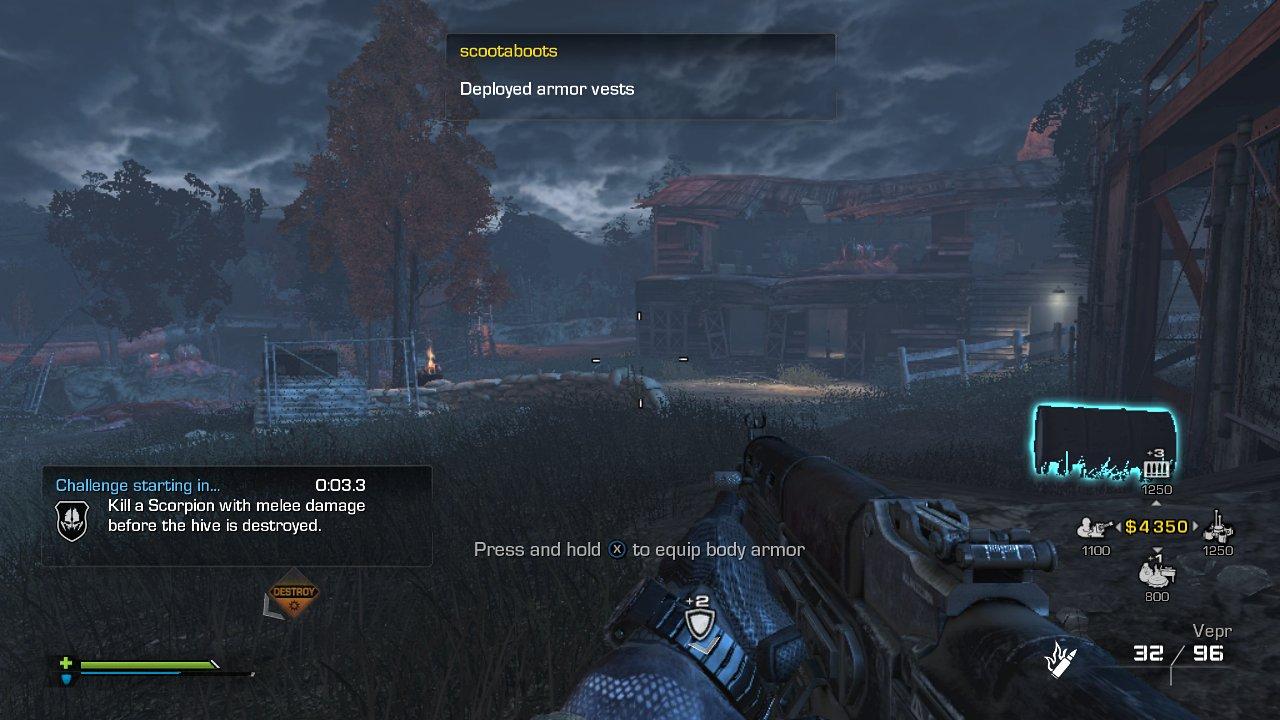
You earn skill points as you play by destroying hives, as well as by completing challenges. Each new hive has its own challenge activated when the drill starts, and it must be completed before the hive is destroyed. Keep an eye on the drill meter in the upper left hand corner of the screen to see how much time you have to complete the challenge; it will vary based on the hive and the damage the drill takes. The challenges are for the entire team, so coordinate.
These challenges are random and may be as simple as something like no one reloading for 60 seconds, or as tricky as keeping the team accuracy above 75-percent. Some challenges may also require certain equipment or weapons. If you see a one that requires you to kill 25 enemies with shotguns, let the people with shotguns handle the brunt of the assault and support them when needed without stealing kills. Once your team completes the challenge, a pop-up notifies you that you earned the skill point – it will also let you know if you failed.
Use the time between hives to upgrade your skills, and play to your strengths. If you are frequently the person dropping ammo, upgrade that skill and let your team know so they can focus on other upgrades. If you are usually the last person standing, work on health and weaponry. Don’t let skill points go unspent.
Know your role

Extinction offers four classes of characters, each with their own skills and loadouts. To defeat all 15 hives, you’ll need to have all four classes working together, and each person playing to that character’s strengths. The four classes are: Weapon Specialist, Tank, Engineer, and Medic.
Each character has its own unique skill tree to upgrade, and you should let these determine your role in a match. The Engineer, for example, can repair the drill faster than anyone else when it is damaged, and they earn the cash back after activating a trap and letting it run its course. A medic is more damage-resistant while reviving a teammate, and can help speed up health regeneration simply by being near wounded players. Determine what everyone should do before a match begins, and stick to it.
Know your surroundings
 Extinction is broken into three distinct areas. In order to destroy the standard hives, you need to lug around a drill and place it on the designated point to start the drilling. Just find the prompt and drop the drill where it tells you. You can choose what order to attack the hives, but the initial hive is determined for you. Think of it as a tutorial – it’s a protected section that you can safely acquaint yourself with the menus before the attacks begin. You need to destroy the hive before you can explore the first section, and once you do, take your time and acclimate yourself to your surroundings before starting in on the next hive. You may still face some resistance, but it should be light, nothing you can’t handle with the knife and the default pistol you start with.
As you explore you’ll notice three things you can interact with, highlighted by blue or yellow outlines: traps, weapons, and searchable objects. If they are blue, it means there is no restriction and you can either buy them or interact with them, while yellow indicates you need to earn more money first. The only way to get a new weapon is to purchase one, and they are always over $1000.
During the first and second hives, you can get by without purchasing a more powerful weapon. Find one that suits you, then save up. You may also find weapon attachments in searchable trash bags and assorted crates – don’t waste these. It should go without saying, but Extinction is a co-op mode in which teamwork isn’t just encouraged, it is vital. If you have a red dot and find a holographic scope, even if you could use it, offer it up to a teammate that doesn’t have a scope. Replacing items destroys the original, so be careful what you grab.
The best time to explore is before you begin drilling the final hive – even though you will get attacked by several stragglers. At that point you should have enough money to purchase any weapon you want (assuming you haven’t already), and you can look for any items you’ve missed in the odd searchable trash bag or munitions case lying around. Be sure to acclimate yourself to where the final hive is. As soon as the fourth hive in an area is destroyed, it triggers the automated helicopter to attack the barrier hive. This gives you a small window to prepare as the helicopter makes its way to you but before it begins its attack and triggers a counterattack. Head to the barrier hive and throw down ammo and whatever team support items you have, then set up additional defenses by calling in a turret or a vulture. You can also throw propane tanks on the main flower of the barrier hive, and once it is active, destroying those tanks hurts the hive.
Choose (your weapon) wisely

Throughout a match you will always have your trusty pistol with you. You can change which pistol you’re carrying at the loadout screen before a match begins, but you can’t switch it out during a game. This means you can only carry one primary weapon; a new one can be purchased at any time, but it will replace what you are carrying. When you do buy a new primary, the weapon you had – as well as any attachments you may have added – disappears completely. Weapons remain in the same place and always cost the same amount, so once you find a weapon that works for you, head for it as soon as you have the money on subsequent playthroughs.
Ideally, your team should have a balance of weapon types, but regardless there are certain things to consider. For instance, shotguns are powerful and useful against the early, weaker enemies that charge both you and the drill, but they also have limited ammo, so you’ll want to switch one out to deal with more powerful enemies in later sections. Marksman rifles deal big damage and are useful against enemies that keep their distance, like the powerful “scorpion” that shoots venom at you, but you can easily be overwhelmed by weaker, fast moving enemies that rush in and attack in groups. Enemies attack in the same patterns from one game to the next, so know what is coming and plan accordingly.
Regardless of the weapon you choose, one equipment upgrade you should strive for is more powerful augmented ammo. One of the four loadout options you bring with you into the fight is ammo, which you can purchase for the team at any time. Just hit up on the D-pad and you will leave an ammo crate everyone can interact with to replenish their ammo and equipment.
During the loadout, you can choose which ammo type of to bring, assuming you have multiple options unlocked. Once a player drops an enhanced ammo type like incendiary or explosive, pick it up and it replaces your current ammo. You get less special ammo than regular, but when you run out of enhanced ammo your normal rounds return. This more powerful ammo makes a huge difference later in a match as the number and power of enemies increase. A good mix is to have one or two players carry standard ammo, while the rest have incendiary and explosive ammo (stun ammo is only really useful in the early waves, so leave it behind). Talk to your teammates and mix and match.
Special finds
 Search the maps to find special items and objects you can interact with, like the Hypno Knife and the assault chopper. The Hypno Knife is a single-use throwing knife you can use to turn an enemy to an ally. Save this for as long as possible, and don’t waste it on a weak enemy. A friendly scorpion, for example, can hold its own against multiple foes. They are randomly placed and you may find more than one, so look around.
Another object worth finding is the laptop that calls in an attack helicopter – but it’ll cost you $6,000. This stationary laptop accepts payment in $1,000 increments though, so spread the pain around the team. The laptop is located in the burned out second story building in the second area.
There are other hidden items to be found as well. We’ll add more to this article soon, but post in the comments if you know the location of something special.
Editors' Recommendations
- Is Call of Duty: Modern Warfare 3 cross-platform?
- All Call of Duty games in order, by release date and chronologically
- Call of Duty: Warzone is finally coming to mobile in March
- The best Palworld tips and tricks for beginners
- Hogwarts Legacy beats out Call of Duty to become 2023’s bestselling game


