
The best perks in Call of Duty: Warzone, and what they do

Having the right perks in Call of Duty: Warzone is practically essential — as many of them can save you from the brink of death. But there are so many to choose from. How do you know which ones will work best for you? Not to worry, because in this guide, we’ll show you everything you need to know about Warzone‘s best perks, including tips and how to use them effectively.

Further reading

Recommended Videos

How to use your custom loadouts with perks in Warzone

Image used with permission by copyright holder

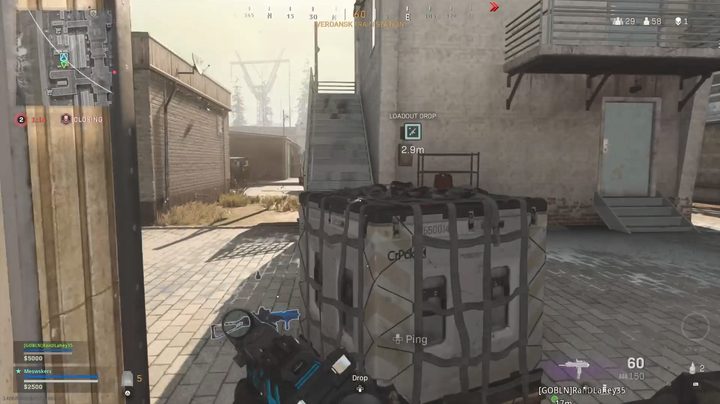
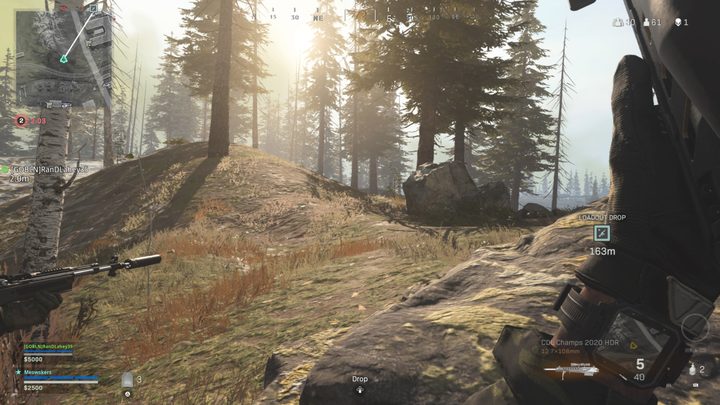
In Battle Royale, you can’t spawn in with your custom loadouts, but you can acquire them from a Loadout Drop — which can be purchased from a Buy Station for $10,000 or found randomly as the match goes on. If possible, it’s recommended to avoid the Loadout Drops that spawn randomly, because other players will see it on the map and flock to it — making it a high-traffic landmark. It’s a case-by-case basis, but in general, buying your own Loadout Drop is safer.

If you’re playing in a group, you should combine your money to buy your own Loadout Drop. This way, you can drop it right next to your team for easy access. However you get your hands on the Loadout Drop, make sure the class you pick is specifically designed for Warzone — whether you’re playing Battle Royale or Plunder. Do note that the Plunder game mode allows you to spawn in with your own custom classes.

First perk

Image used with permission by copyright holder

For the perk one slot, there are a few different ones we’d recommend. Which one you pick will ultimately come down to your play style. In general, this perk slot isn’t as useful as some of the other categories, but there are still a couple we’d like to highlight for you here. Try them out, and see what works for you.

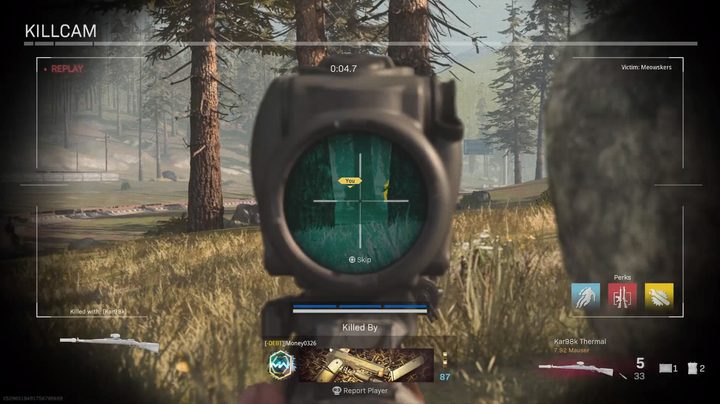
Cold-Blooded: This perk will keep you off your enemy’s thermal scope and will not trigger the High Alert warning if you come into view of enemy players. Since many players tend to use thermal optics when sniping in any Warzone mode, it’s recommended to have Cold-Blooded equipped so you can get by undetected.

E.O.D.: You can’t really go wrong with the E.O.D. perk. It allows you to take far less damage from explosives and fire, which comes in handy when going up against those who like to use grenades and C4. Keep in mind that this does not decrease the damage you take from killstreaks — only equipment. You’ll want to use this class if you plan on being around enemies more frequently. This is for the aggressive players out there.

Kill Chain: If you’re someone who likes using killstreaks often, this is the perk for you. It increases the chance of finding killstreaks in supply boxes, perfect for those looking to provide support for the rest of the team. If you’re someone who engages in firefights often, it’s best to pick a perk that directly impacts your character.

Second perk

Image used with permission by copyright holder

Nearly every perk in slot two is useful, so we’ll go through some of the ones we think are essential here. If you’re playing with a team, using the Hardline and Pointman perks is a great idea since they benefit the entire group. Here are some perks we really like using.

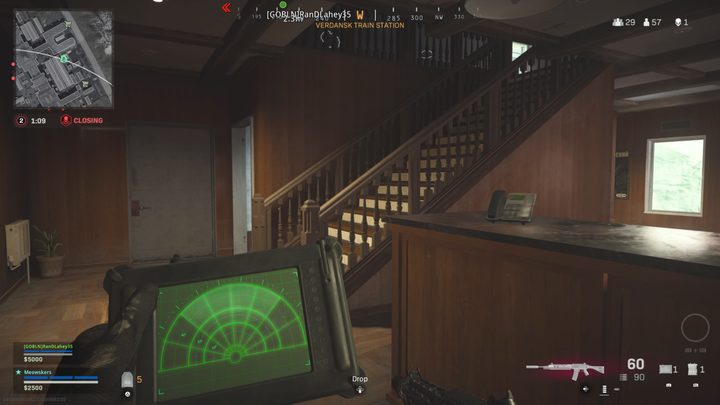
Ghost: It’s really hard to go wrong with Ghost. Not only does it make you undetectable during enemy UAVs, but it also removes you from showing up on enemy Heartbeat Sensors. Unless you plan on being super aggressive, this is the default perk we’d recommend to stick with. It will keep you safe in a mode where 100 or more other players are trying to take you out.

Overkill: While it’s tough to recommend you skip out on Ghost, the next best thing is Overkill, which allows you to carry two primary weapons. In Warzone, having a versatile loadout is key. If you do opt to use this one, we suggest having a weapon that’s good for medium range, along with something that works in long-range battles. It’s up to you, of course, but having a weapon for any scenario will do wonders.

Hardline: If you’re playing with a group, especially one that likes to visit the Buy Stations frequently, going with Hardline is a good choice. It knocks off 25% from the prices of killstreaks, field upgrades, and armor plates. Even better is if someone else on the team uses the Pointman perk, which gives your team more money when completing contracts. Make sure you stock up on UAVs, armor plates, and a gas mask to help get you closer to victory.

Third perk

Image used with permission by copyright holder

The third perk slot has a few options that will improve your game — especially if you’re playing with a team. Some are more useful than others, so pick one that suits the mode you’re playing, and if you’re a team player, go with something that can benefit the group.

Amped: The Amped perk is probably the most useful of this category, as it allows you to swap weapons faster. In the heat of battle, this can absolutely save your life, so we recommend using this one when in doubt. It works with the RPG as well, which is great if you’re looking to finish someone off quickly.

Tune Up: In Warzone, this perk increases the revive time by 25%. If you’re playing solo, obviously this perk won’t be useful at all, but when playing with a group, you’ll be glad you picked this one because even a second or two can make a difference.

Tracker: Tracker is great for those who like to attack their enemies at close range. If an enemy slips out from underneath you, the perk will come in handy, giving you a short glimpse at their footsteps. They don’t stay on the ground forever, but it can be enough to allow you to secure the kill — or escape. Even if you storm into a building that you thought was empty, seeing footprints on the ground will let you know you aren’t alone — so make sure you give a callout to your team if this happens.

Topics
Joseph Yaden
Former Digital Trends Contributor
Joseph Yaden is a freelance journalist who covers Nintendo, shooters, and horror games. He mostly covers game guides for…
Call of Duty: Black Ops 6 Zombies: tips and tricks for beginners
A bunch of characters standing around with guns getting attacked by flying giant bugs in Call of Duty's zombies mode

After the backlash surrounding the Zombies mode in Modern Warfare 3, Call of Duty: Black Ops 6 has returned to the round-based roots we all know and love. Well, the structure might be familiar, but this mode has more than its fair share of new tricks that will see you getting swarmed in seconds if you can't learn to adapt. If you're familiar with how Call of Duty handles its Zombies mode, you will know that there's a lot more you need to know besides just shooting zombies if you want to make it to the later rounds. If you want to survive as long as possible, we have the key tips and tricks to withstand the zombie horde in Black Ops 6.
The basics still apply

There are a few tips from past Zombies games that will serve you well here in Black Ops 6 that are worth a quick reminder. Starting off with the need to conserve ammo in the early game. Zombies are weakest in the first handful of rounds, but ammo is incredibly scarce. You can't count on getting more when you need it, so save as much as possible and try to melee as many zombies as possible. Only shoot if you get swarmed, need to save a teammate, or when a boss or elite shows up.

Read more
The best Wildcards in Call of Duty: Black Ops 6
Kill Order gameplay in Call of Duty: Black Ops 6.

The concept of a Wildcard might sound like a risky endeavor in Call of Duty: Black Ops 6, but this part of your loadout isn't random at all. We haven't seen this system since Cold War, and even those who remember it from that game will need to learn all the new cards there are in Black Ops 6. You can only equip a single Wildcard on your loadout, but they are powerful enough to completely redefine your playstyle. So far, there are only six to unlock while grinding through the levels with your friends, but picking just one is still a tough choice, especially if you want to use a permanent unlock on one after hitting Prestige. We've ranked all the Wildcards in Black Ops 6 so you can always have the winning hand.
All Black Ops 6 Wildcards, ranked

There is a level of personal preference in which Wildcard you will find better than others, but in most cases, the ones we've ranked as the best will help every player gain an edge in online matches. Here's our ranking of each Wildcard from best to worst, along with what level you unlock them at.
Perk Greed - Level 54
The last Wildcard you unlock is easily the most powerful. Perk Greed lets you unlock a fourth Perk to your loadout instead of being limited to three, which can borderline break the game if you choose the right set of Perks. It is also the most versatile of the Wildcards since it gives you the most options to play with instead of a specific bonus you may not find useful. It can also more easily unlock the special bonus buff you get for equipping three Perks from the same category.
Gunfighter - Level 33
Right in the middle of the unlock list, Gunfighter is one Wildcard you could easily make a case for over Perk Greed in some situations. This one increases your attachment points for your primary weapon by three. If you're rocking a top-tier weapon already, this Wildcard can let you tweak its stats even higher. We rank it second because it only applies to one weapon and thus is a bit more limiting.
Overkill - Level 24
For such an early Wildcard, Overkill is quite a powerful choice. This card lets you equip any weapon (except melee weapons) in your Primary and Secondary slots instead of the ones typically reserved for each. That means you can build a loadout with two Primary weapons and be far more versatile on the battlefield. Instead of having to trade off range, damage, rate of fire, mobility, or any other aspect of your game, you can cover almost all your bases by picking two Primary weapons that cover each other's weaknesses.
Prepper - Level 45
Field upgrades are powerful, don't get us wrong, but having two instead of one isn't always that much of a game-changer. It's a bit less useful than Gunfighter only because field upgrades are more situational and require more attention to use to their full potential. If that's you, then this is a great choice.
Danger Close - Level 38
Who doesn't want another grenade, Molotov, or combat axe? Is getting a second Lethal worth the Wildcard slot, though? Not in our opinion. Most of the time, Lethals are used in desperation or as a way to deny enemy movement for a time, and even then, they are risky because of how vulnerable you are while using them.
Tactical Expert - Level 15
The first Wildcard you get is better than nothing, but only just. It's exactly like Danger Close, only you can hold two Tacticals instead of Lethals. This is, by nature, a little worse since Tacticals don't have the ability to kill an enemy (unless you get super lucky and you directly hit an enemy with one who is on low HP). You can get some use out of them, but you're better off upgrading as soon as you have another option.

Read more
The best Perk-A-Colas in Call of Duty: Black Ops 6
A screenshot from Call of Duty: Black Ops 6's zombies mode.

There's nothing more refreshing than taking a nice big swig of a Perk-A-Cola during an intense Zombies match with your pals in Call of Duty: Black Ops 6. Besides tasting great (we assume), these colas empower you with buffs that will keep you alive until the later rounds. These bonuses are just as important as the Pack-A-Punch, but come in a wider range of flavors. It is possible to stack them all, but that gets expensive very fast so you need to be thrifty about choosing which ones are most valuable early on. These colas come in eight different types that may or may not be worth your Essence to chug. If you want to know which ones are the best in Black Ops 6, check out our ranking.
Best Perk-A-Colas in Black Ops 6

We're ranking these Perk-A-Colas based on their base bonuses, not any additional effects you can get if you Augment them, from best to worst.
Jugger-Nog
You can never go wrong with the classic Jugger-Nog. Increasing your health by 100 is useful for the entire duration of a Zombies mode, but especially in the early rounds. Going down is at best a major setback and at worst a cascade into defeat. This extra health allows you to get out of a bad situation that would otherwise end your run.
Quick Revive
This Perk has two components, with the less useful one being the ability to revive teammates 50% faster. Ideally, that shouldn't be needed but is nice. However, what makes it rank so high is the 50% shorter delay on health regen. Your health will come back over time in Zombies but at a dreadful pace. Starting to heal faster means less time running and kiting zombies around and more time in the action helping the team.
Speed Cola
The best early guns for Zombies mode have a large magazine, fast reload, or both. Running out of ammo at the wrong time and not being able to get more rounds in the chamber fast enough has ended many a run, but Speed Cola is the solution. It will speed up your reloads and armor plating by 30%. That's not a massive number, but fast enough to make the difference.
Stamin-Up
These zombies aren't the shambling types. They will chase you down like sprinters, and some of the monstrous ones can outpace you even at full tilt. Stamin-Up sounds like it would let you run for longer, but actually just lets you run faster since you have no limit on sprint in Black Ops 6. Positioning is everything in Zombies so being able to get where you need to be faster is never a bad thing, especially if it's a downed teammate bleeding out.
Deadshot Daiquiri
Every zombie has a weak spot, which is most often the head. Deadshot Daiquiri makes a critical hit hurt even more than normal, plus increases your auto-aim on those weak points when you aim down sights (ADS). That second part shouldn't factor much if you've got good aim, which is why this is only a decent Perk-A-Cola.
PhD Flopper
Not being able to hurt yourself is situationally useful, and the ability to cause an explosion by diving is a risky move. Yes, it's cool, but you don't want to be lying prone surrounded by zombies. This is a cool gimmick, but save yourself the Essence and skip it.
Elemental Pop
When Elemental Pop works, it's great. The problem with it is that you can't rely on it. It gives a small chance on every shot you take to add a random ammo mod effect, which is cool but impractical. If you have spare Essence on you, sure, it won't hurt you to have, but it isn't something that will turn the tide for you or your team.
Melee Macchiato
Finally, Melee Macchiato bottoms out the list. It is fine in the early game when the hordes are small and you're better off meleeing enemies since it will smack enemies away with each hit, but quickly drops off in usefulness. When the zombies get too strong and too numerous, you will need a lot more than a strong punch to deal with them and end up forgetting you even have it.

Read more