
All Curveball locations in Dead Island 2

Your bread-and-butter method for dispatching the undead in Dead Island 2 will always be the strongest blunt or bladed melee weapon you have on hand. There’s certainly no shortage of shovels, knives, gardening equipment, and even swords to choose from, but you can also mix things up with some throwable items as well — and we don’t just mean throwing your weapon. Curveballs, as the game calls them, are more like skills that can be equipped than weapons since they work on a cooldown timer rather than ammo. Your character can only hold two at once, but there are 13 in total to experiment with. You’ll be given one by default, but the rest are up to you to collect. Here’s a full list of all the Curveballs in Dead Island 2 and where to find them.

How to get all the Curveballs in Dead Island 2

A molotov cocktail on a table.
Image used with permission by copyright holder

We’ll list off the Curvballs, their locations, and their effects in the order you should naturally come across them while playing Dead Island 2. If you miss one, you can always fast travel back to the area to collect it later. While you can only have two Curveballs equipped at any time, you can swap them out no matter where you are, so feel free to try them all out and change up your loadout depending on your current situation.

Meat Bait

Given as part of the story by Carlos in Emma’s house, this lets you throw out a chunk of meat that explodes on impact into a pool of meat(?) that attracts all nearby zombies to it.

Shuriken

On your way to the Halperin Hotel, the Shuriken are lodged into a car door directly in front of you. Using these throws out three Shuriken in a horizontal spread that travels a short distance before falling. They don’t do a lot of damage, but can stagger and even remove limbs if you aim them well.

Chem Bomb

This is the second unmissable Curveball and is given to you inside the Halperin Hotel to put out a fire. It is good for more than just fire control, though, since you can use it to make zombies wet and susceptible to electricity.

Caustic-X Bomb

Keep your eye out for “The Rav-Ages of Caustic-X” sidequest if you want to add this to your arsenal. Completing this quest will reward you with a bouncing bomb that deals some damage, but is mainly used for applying the Melting status on zombies and leaving behind damaging acid.

Electric Star

You’ll be taken to the Brentwood Water Reclamation Project plant during the “Justifiable Zombicide” mission. While there, make sure to snag the Electric Star sticking out of the safety sign on the fence. If you missed it, you can also purchase it from Rodriguez later on. This Curvball is a straight upgrade over the Shuriken since it functions exactly the same, but is electrified.

Pipe Bomb

While going through the checkpoints between Beverly Hills and Monarch Studios, keep an eye out for an open crate with the Pipe Bomb in it on one of the tables. This is a basic timed explosive, so toss it into a group for maximum damage.
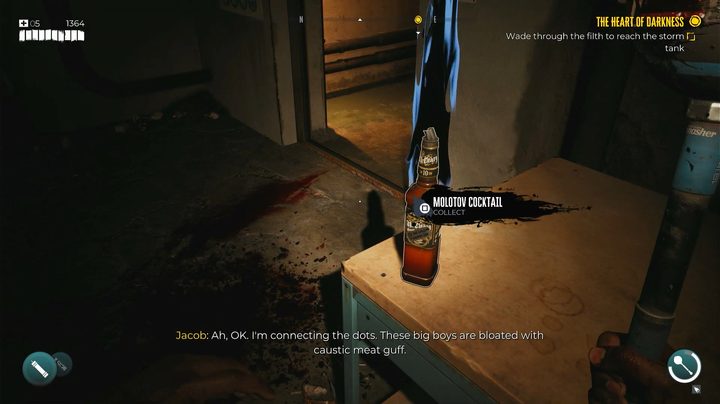
Molotov Cocktail

When you’re brought into the Brentwood Sewer during “The Heart of Darkness” mission, the Molotov will be in the office next to the Filtration Access and Servicing room. If it wasn’t obvious, this flaming bottle will light any zombie hit with it on fire, plus leave a lingering patch of fire on the ground.

Electric Bomb

This is another Curveball tied to finishing a sidequest, this time the “Jo’s Rainy Day Stash” quest. Think of it as a Pipe Bomb, only replace the explosion with a dome of electricity that is great for stunning groups.

Flashbang

You’ll need to pony up $2,500 and buy this Curveball from Rodriquez once you’ve completed the “Cremains of the Day” sidequest. What you get is a weapon that inflicts Traumatized on zombies, meaning they’re stunned and available to be counterattacked.

Sticky Bomb

Bring Dougie at the Serling Hotel $1,500 and he’ll part ways with the Sticky Bomb. This is just your old Pipe Bomb, but now it will stick to any surface — or zombie — it hits.

Bait Bomb

This is another item Dougie will sell you, this time only after you beat “The Search for Truth” main mission. For just $3,500, you can get what is essentially your Meat Bait and Pipe Bomb stuck together. Zombies will all close in on the bomb before it detonates

Nail Bomb

For the final Curveball you need to invest your cash in, you can buy the Nail Bomb from Ezekiel for $1,500. This is a simple explosive, but with the added benefit of inflicting Bleeding on anything it hits.

Military Grenade

Once you complete the “Boz Makes a Bang” sidequest for Hana, which you can only get after beating “The Rav-Ages of Caustic-X” and “Dez and the Mother of Satan” quests, you will be given the final Curveball in Dead Island 2. This high-explosive detonates on impact no matter what, which could be a good or bad thing depending on the situation. It isn’t all that much more powerful than any other explosive, but the utility of it not having a timer makes it useful.

Editors' Recommendations

Jesse Lennox
Jesse Lennox loves writing, games, and complaining about not having time to write and play games. He knows the names of more…
All sphinx riddle solutions in Dragon’s Dogma 2
A sphinx in Dragon's Dogma 2.

Dragon's Dogma 2 is full of mythological monsters and beasts. During your travels, you will encounter many classics like Cyclopses, Griffins, and Dragons, but a more obscure creature is hidden away in a cave waiting to challenge you in a different way. The Sphinx is found in the Mountain Shrine at the top of the hill once you go through Wordlsend Cave. It won't attack you when you approach, but instead, it will challenge you to a test of intellect. There are a total of 10 riddles to be solved, with a reward given for each one you manage to crack. Dragon's Dogma 2 never holds your hand with anything, so we'll help you unravel these riddles.
First five riddle solutions

The first half of the riddles are given at the location mentioned above. Once you solve this first batch, the Sphinx will move, and you will need to find it again to continue. Here are the first five riddles, their solutions, and rewards.
Riddle of the Eyes
“Our eyes are our allies, yet oft do they betray, for eyes tell lies, so I advise, and thence do lead astray. Yet how will your eyes advise you? Venture through yonder door and retrieve that which is of greatest value.“

Read more
How long is Dragon’s Dogma 2?
A sphinx in Dragon's Dogma 2.

Open-world RPGs can be anywhere from around a dozen hours long to well over 100. Dragon's Dogma 2 is very unique, even among others in the genre, for not adhering to a lot of traditional design philosophies, such as how it handles fast travel. If anything, that will only add to your total playtime, plus there are all the optional quests to do, Vocations to try out and level up, and more if you're a completionist. If you're wondering if you have the time to fit Dragon's Dogma 2 into your schedule among all the other games releasing, here's how long you can expect this adventure to last.
How long is Dragon's Dogma 2?

For the main quest, Dragon's Dogma 2 can probably be beaten in around 25 hours, give or take. That's assuming you mainline the story as efficiently as possible and don't get stuck on any boss fights being under-leveled. A more realistic playthrough where you explore a bit, do some side content, and maybe go for the true ending will push you into the 30 to 35-hour range, as it did for us.

Read more
The best vocations in Dragon’s Dogma 2
Dragon's Dogma 2 key art featuring a knight with a fiery hole in their chest.

Your Vocation defines your role in combat in Dragon's Dogma 2. Everything from your skills to what weapons and armor you can use is tied to this class. You will pick from just a handful at the beginning of the game, but can easily change Vocations later on, as well as unlock more than twice as many new options than what you start with. It can take a while to really get a feel for a Vocation and how it performs in combat, as well as to look through all of its skills and augments, before knowing if it's worth sticking with to level up. Personal preference will play a part to some degree, but these Vocations have the most potential to make you the strongest Arisen in history.
The best vocations in Dragon's Dogma 2

You can pick from 4 Vocations at the start of Dragon's Dogma 2, but will end up with a total of 10 by the end of the game if you unlock them all. New Vocations are unlocked by completing quests, but they are almost unmissable. Four Vocations -- the Magick Archer, Mystic Spearhand, Trickster, and Warfarer -- can only be used by your character and not any Pawns.
Warfarer
There's very little downside to being a jack-of-all-trades in Dragon's Dogma 2, which is exactly what the Warfarer is. This is the only Vocation that can use any weapon in the game AND learn any skill from other Vocations. This is the only Vocation that really lets you build whatever class you want and gives you the ability to adapt to any situation you find yourself in. The main downside to this class is it has the lowest base stats, but that is a small price to pay for how versatile you can be.
Mystic Spearhand
Hybrid Vocations are all quite powerful, but we put the Mystic Spearhand at the top of the heap. This class turns you into a fighter that can take advantage of magic to output crazy damage. The two almost overpowered abilities you get here are the ability to slow enemies for a short time and to create a magical mimic that doubles all your actions. It is great for both crowd control and large single targets, but takes a while to unlock and lacks some range.
Warrior
If you're going to be a straight-up melee fighter, you might as well hit with the biggest weapon you can, right? The Warrior swings swords large enough to make Guts blush and is a full-on tank. You won't be doing anything fancy with this vocation beyond charging up and swinging as hard as possible. The obvious drawback is any flying or ranged enemy will counter you, so bring some Pawns in those classes to cover your bases.
Sorcerer
For those who fancy themselves a pure mage, stick to the Sorcerer over the actual Mage vocation. While the Mage is more focused on healing, it is the Sorcerer who gets the best offensive spells you will want to be casting. If you have a second Sorcerer with you, you can even sync up and decrease your casting time. If not, you will need some tanks to take aggro while you deal with some slightly long casting times and low total health.
Thief
As far as the starting Vocations go, the Thief is the one we find the most fun and viable for the entire game. This is a light and speedy build focused on critical hits and being able to climb and hang on to large beasts. Once on, you have a number of great skills to stagger and knock down an enemy so the rest of your squad to gang up on it. Just don't get hit because you're one of the squishier Vocations.

Read more