At the end of 2017, the Nintendo Switch was updated to version 4.0, which included the ability to record 30-second gameplay clips of certain games to share on social media. Previously, Switch users could only snap and share screenshots with the world, but now they can highlight the best (and funniest) gameplay moments playing Nintendo's finest. At the time of the update's release, only a small handful of Nintendo first-party games supported this feature, but now the list has expanded to most games on the platform. Here's what you need to know about capturing and sharing footage on Nintendo Switch.

How to capture and share gameplay on Nintendo Switch
First, you'll want to know how to capture and share gameplay directly from your Nintendo Switch system.
Step 1: When you're ready to record, press and hold the Switch's Capture Button — it's the square button with the indented circle, located under the directional pad on the left Joy-Con, or opposite the home button on the Switch Pro controller. Holding the button automatically records 30 seconds of gameplay. You do not need to hold the button for the full 30 seconds: A long press should be enough to get it going. A quick tap takes a screenshot, while a full press records video.
Step 2: The console signals that it is recording a clip with a spinning icon, and a message that says "saving" appears in the upper-left corner of the screen. When the video capture is complete, a new message with the play icon states that the clip has been successfully saved.
Step 3: The Switch automatically records the last 30 seconds of gameplay, but if you just entered a game and want to record a clip, it will record any length up to 30 seconds.
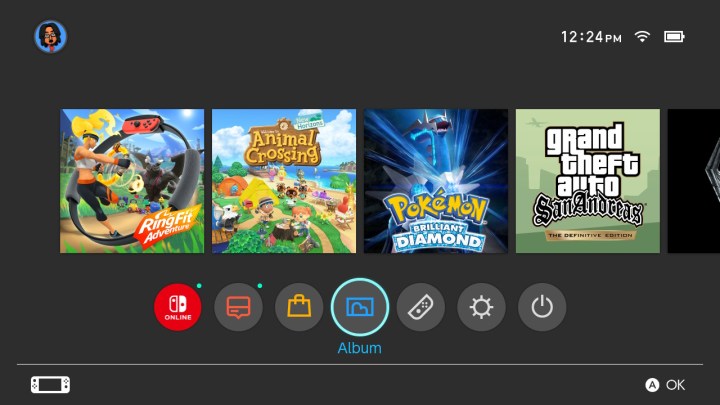
Step 4: After recording a clip, simply navigate to your Album on the home screen.

Step 5: Your clips are automatically grouped with your screenshots, but you'll notice the clips are denoted with "30s" in the lower-right corner of the thumbnail. You can filter the library to only see your clips by pressing Y and clicking Videos Only in the dropdown menu.
Step 6: Opening the clip automatically plays it.
Step 7: Sometimes, not everything in that 30-second clip is noteworthy. If you want to cut it down, press A while viewing the clip. From there, you can move the bar frame by frame from the start of the clip, clipping away the portion of the video you don't want. This will turn into the new start of the video. Press A and do the same from the end of the clip until you're satisfied with where the clip finishes. Don't worry — your original clip will still be saved even after you trim it down.
Step 8: You can also grab screenshots from within the clip using the edit function. Press A at the spot in the clip you'd like to screenshot and press Save as Screenshot. This is a good way to retroactively secure a screenshot that you may have missed during the last 30 seconds of gameplay.
Step 9: Among the most intriguing parts of recording clips is the option to send them to other people. You can easily upload your clips to social media platforms like Twitter and Facebook. To do this, just find the specific clip, select A, and hit Post. Connect your Twitter and Facebook pages to your account, and you can start uploading and sharing your fun clips with your followers. You can even type a comment to go along with the clip.

How to record with a capture card
If you run into problems with the Switch's built-in recording system or discover a specific game that isn't compatible with it, other options are available. The surefire way to store and share your Nintendo Switch gameplay is by using a capture card. These special devices consist of a third-party hardware system that records screen footage utilizing the system you're using. It can also override time limits and even block gameplay recording. Users can record however long they want or as much as their hard drive memory will handle. We believe that capture cards are undoubtedly the most high-quality method of gameplay recording.
When you use a capture card, you'll experience a much more involved process than when you simply share from the Switch. However, all of its bonus features make it a worthwhile time investment. Our favorite is the Elgato Game Capture HD60 S, but there are plenty of other excellent choices too.


