
Pokémon Scarlet and Violet haven’t abandoned the classic, tried-and-true formula the series was built on. Obviously, the game is still all about catching, battling, and forming your own team of Pokémon to be the very best. However, the main story of the game isn’t simply limited to the old idea of going from region to region and facing off against the eight gym leaders to eventually face off against the elite four. Yes, that is still in the game, but it’s only one of the main storylines open to you.
One of the other main story paths in Scarlet and Violet is called the Path of Legends. This quest focuses on finding and defeating the intimidating Titan Pokémon with the help of another student named Arven. Each Titan is a unique version of a Pokémon hiding out in a different location that has different types and gives you a great reward. If you’re struggling in any way with these massive foes, here’s a full guide on all five Titan Pokémon in Scarlet and Violet.
Note: There will be spoilers ahead for what all five Titan Pokémon are, their locations, details, and what you get for defeating them.
Further reading
- The best fan-made Pokémon games
- All Pokémon in Scarlet and Violet: full Pokédex, typing, and version exclusives
- The best Pokémon games, ranked from best to worst
How Titan Pokémon work
Titan Pokémon are the main goal of one of Scarlet and Violet’s three primary story routes called Path of Legends. It is kicked off by meeting Arven at the academy and then left up to you to begin whenever you choose. These five massive Pokémon bosses all protect a Herba Mystica, which is what Arven is after, so it’s your job to track down each of them and defeat them in battle. While this sounds simple, they are quite a bit more challenging than any normal Pokémon encounter you will face.
Titan Pokémon guide and rewards
While you’re free to tackle most Titan Pokémon you wish in any order, we will be listing them based on their difficulty, with the easiest first so you can have a more smooth difficulty curve as you play. Each version also has one Titan not featured in the other version, which will be denoted by their name but are at the same level of challenge.
Klawf — Stony Cliff Titan
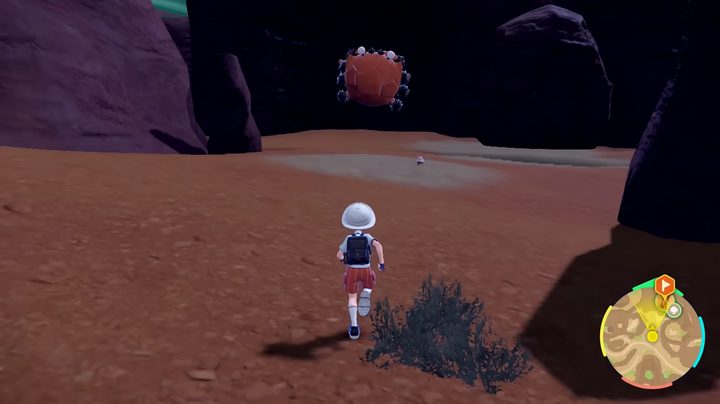
The Klawf Titan is the lowest level Titan that is a pure Rock-type that you should be able to overcome with a team of around level 15 or higher. You can search for it by following the road to the east of Naranja between Mesagoza and Artazon in the South Province. You’ll know you’re in the right area since Arven will give you a call once you arrive. From there, simply look for the giant enemy crab clinging to a cliff and begin the battle.
Being a Rock-type, Klawf is weak to Fighting, Grass, Ground, Steel, and Water-type attacks. If you picked either Sprigatito or Quaxly as your starter, then you will already have a great counter to fight with. Otherwise, Grass and Water-types aren’t too hard to come by anyway. The first phase of the fight is normal, but once you deplete its health bar, Klawf will flee.
After you start the second phase of the fight, Arven will join you with a Shellder to finish off the Titan.
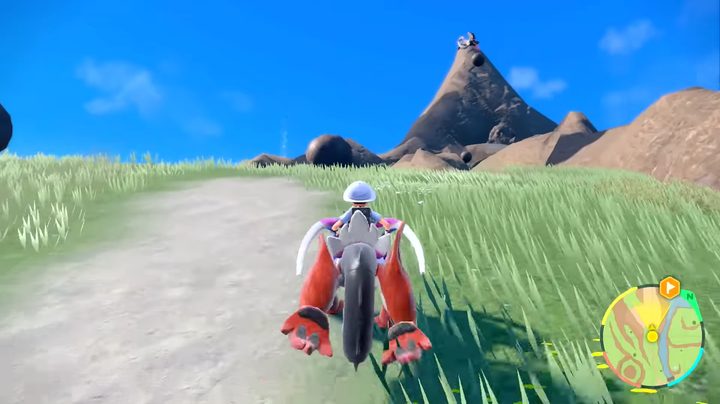
Once defeated, your legendary will snack on the Herba Mystica and acquire the ability to dash while you ride them on the ground.
Bombirdier — Open Sky Titan
The second Titan you should seek out is the Flying/Dark-type Bombirdier. This one is a bit tougher, but if you’re around level 20 with the right type advantage, you shouldn’t have an issue. Bombirdier is to the northwest of Naranja and Cortando. If you go north past the windmills, you will spot a mountain with a ton of boulders rolling down. That’s your goal.
Bombirdier, again, is Flying/Dark-type, which makes it susceptible to Electric, Ice, Rock, and Fairy-type Pokémon. Good options at this stage in the game include Nacli, Shinx, and Pawmi. The first phase is normal, just like Klawf, before it runs away, and you can start the second phase, where Arven gives you backup with his Nacli.
Once beaten, your legendary will eat the Herba Mystica and learn the ability to Surf, which lets you travel over water.
Orthworm — Lurking Steel Titan
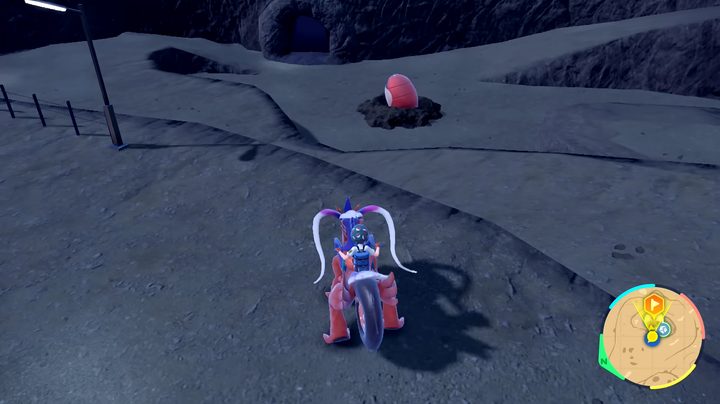
Next up is the Lurking Steel Titan Orthworm. If the name didn’t give it away, this is a Steel-type Pokémon. However, it has an interesting twist. Orthworm has the Earth Eater ability, so any Ground-type moves will be absorbed and restore its HP. Instead, focus on exploiting either its Fighting or Fire-type weaknesses. You’ll want to be close to or above level 30 before challenging this massive worm, which you will find east of Zapapico and northwest of Levincia. Just follow the main road connecting these two locations, and you will find it burrowed in the ground.
Once you begin the encounter by Dashing into it a couple of times, we recommend bringing out something like a Mankey, Crocalor, or Litleo as examples. The first phase is a simple process of hitting it with Fighting or Fire moves until it runs into the tunnel to escape. Follow it inside, Dash at it some more, and team up with Arven and his Toedscool to bring it down once and for all.
Orthworm will drop the next Herba Mystical that grants your legendary the ability to jump much higher than normal, which is great for exploration.
Great Tusk (Scarlet) — The Quaking Earth Titan
If you’re playing on Pokémon Scarlet, you’ll be facing Great Tusk as The Quaking Earth Titan. This massive mammoth-looking monster is Ground and Fighting-type and shouldn’t be messed with until you have a team close to level 40. It can be found in the desert south of Porto Marinda PokéCenter. This is a very open area, so you should see this giant from a good distance.
Based on its type, Great Tusk is weak to Water, Grass, Ice, Flying, Psychic, and Fairy-type moves, which gives you plenty of options. If you picked either Quaxly or Sprigatito as a starter, then you’ve already got a ringer, but others like Gyrados and Dachsbund can certainly do the job. Take it down as you see fit.
For the second phase, once you’ve caught up to it again, Arven will help you secure the win with a Scovillain.
Great Tusk’s Herba Mystica will grant your legendary the Glide ability, which pairs great with the boosted jump you just got.
Iron Treads (Violet) — The Quaking Earth Titan

Iron Treads, the Violet version of The Quaking Earth Titan, is very similar to Great Tusk, with one key difference. You will find it in the same place and should be at the same level, but instead of being a Ground and Fighting-type, Iron Treads is a Ground and Steel-type. This makes its weaknesses Fire, Water, Fighting, and Ground-types. Starters again work perfectly here, though Skeledirge, Golduck, and Drednaw are easy alternatives.
The fight will play out exactly the same as Great Tusk, including what Pokémon Arven assists with and what ability you earn.
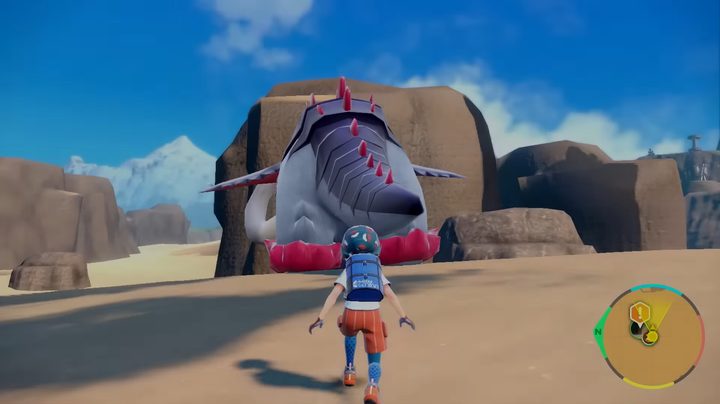
Dondozo — The False Dragon Titan

The final Titan to face down is The False Dragon Dondozo. This is the toughest of all the Titans, so prepare yourself to be at least in the mid-50s or higher to have a chance. You will track this beast down in Casseroya Lake, which is to the north of Medali. It requires you to know how to Surf, so you can’t accidentally trigger this fight too early. To start the fight, find the fish with the speech bubble shouting “Taitaan!” on the little island and talk to it. This will begin the battle.
Dondozo is a pure Water-type, so pack a team of strong Electric and Grass-types to hit it where it hurts. Aside from starters, Raichu, Scovillian, Breloom, and others are great choices, but they also come with at least one Fairy or Dragon-type in reserve for later.
In the second phase, with Arven and his Greedent fighting beside you, Dondozo will fall just like the rest. However, this isn’t the end. You’ll be ambushed by a Tatsugiri, which is a Dragon and Water-type just as strong as Dondozo. That makes it weak to Dragon and Fairy-types, which is where that extra Pokémon we mentioned comes in for the save.
Win this gauntlet of battles to get the last Herba Mystica and the Climb ability.
Report to Arven

Once you’ve conquered all five Titans, head back to the lighthouse to report back to Arven. While not a Titan battle, the capstone to this quest is a duel with none other than Arven himself. Well, he and his team of Pokémon, of course. You should be leveled up enough to face him if you managed to beat Dondozo and Tatsugiri.
Arven’s team consists of a Normal-type Greedent, Grass and Fire-type Scovillian, Rock-type Garganacl, Grass and Ground-type Toadscruel, Water and Ice-type Cloyster, and Dark-type Mabostiff. Fighting-types do well against his first two and last Pokémon, while Flying-types can mop the floor with his middle Pokémon.
Defeat Arven’s team to get a nice payday of 12,600 in prize money, plus put a lid on the Path of Legends plot!


