Apple TV 4K is one of the best streaming devices you can buy. It’s so capable that we’re willing to bet it can do things you never knew it could. While Apple makes it very easy to pull Apple TV 4K out of the box and get right to streaming movies and TV shows, it is capable of so much more — and not just for Apple users. Though, let’s be frank, there are several features available only to those who own other Apple devices.
Trust me when we say that just a little bit of time invested in learning about this stuff pays off big as you use your Apple TV day after day. By the time we’re done, you will be an Apple TV power user.
Video guide
Personalize the look
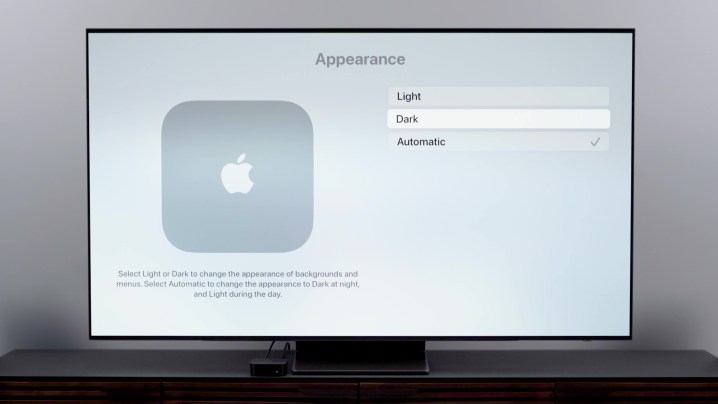
Dark mode
Are you a fan of dark mode on your devices? Apple tvOS can do that. Hit the Settings icon, then navigate to General > Appearance. From there, you can select Light, Dark, or Automatic. Selecting Dark will keep the Apple TV in dark mode all the time, while selecting Auto will shift from light during the day to dark during the night — just like the iPhone.
Arrange your home screen
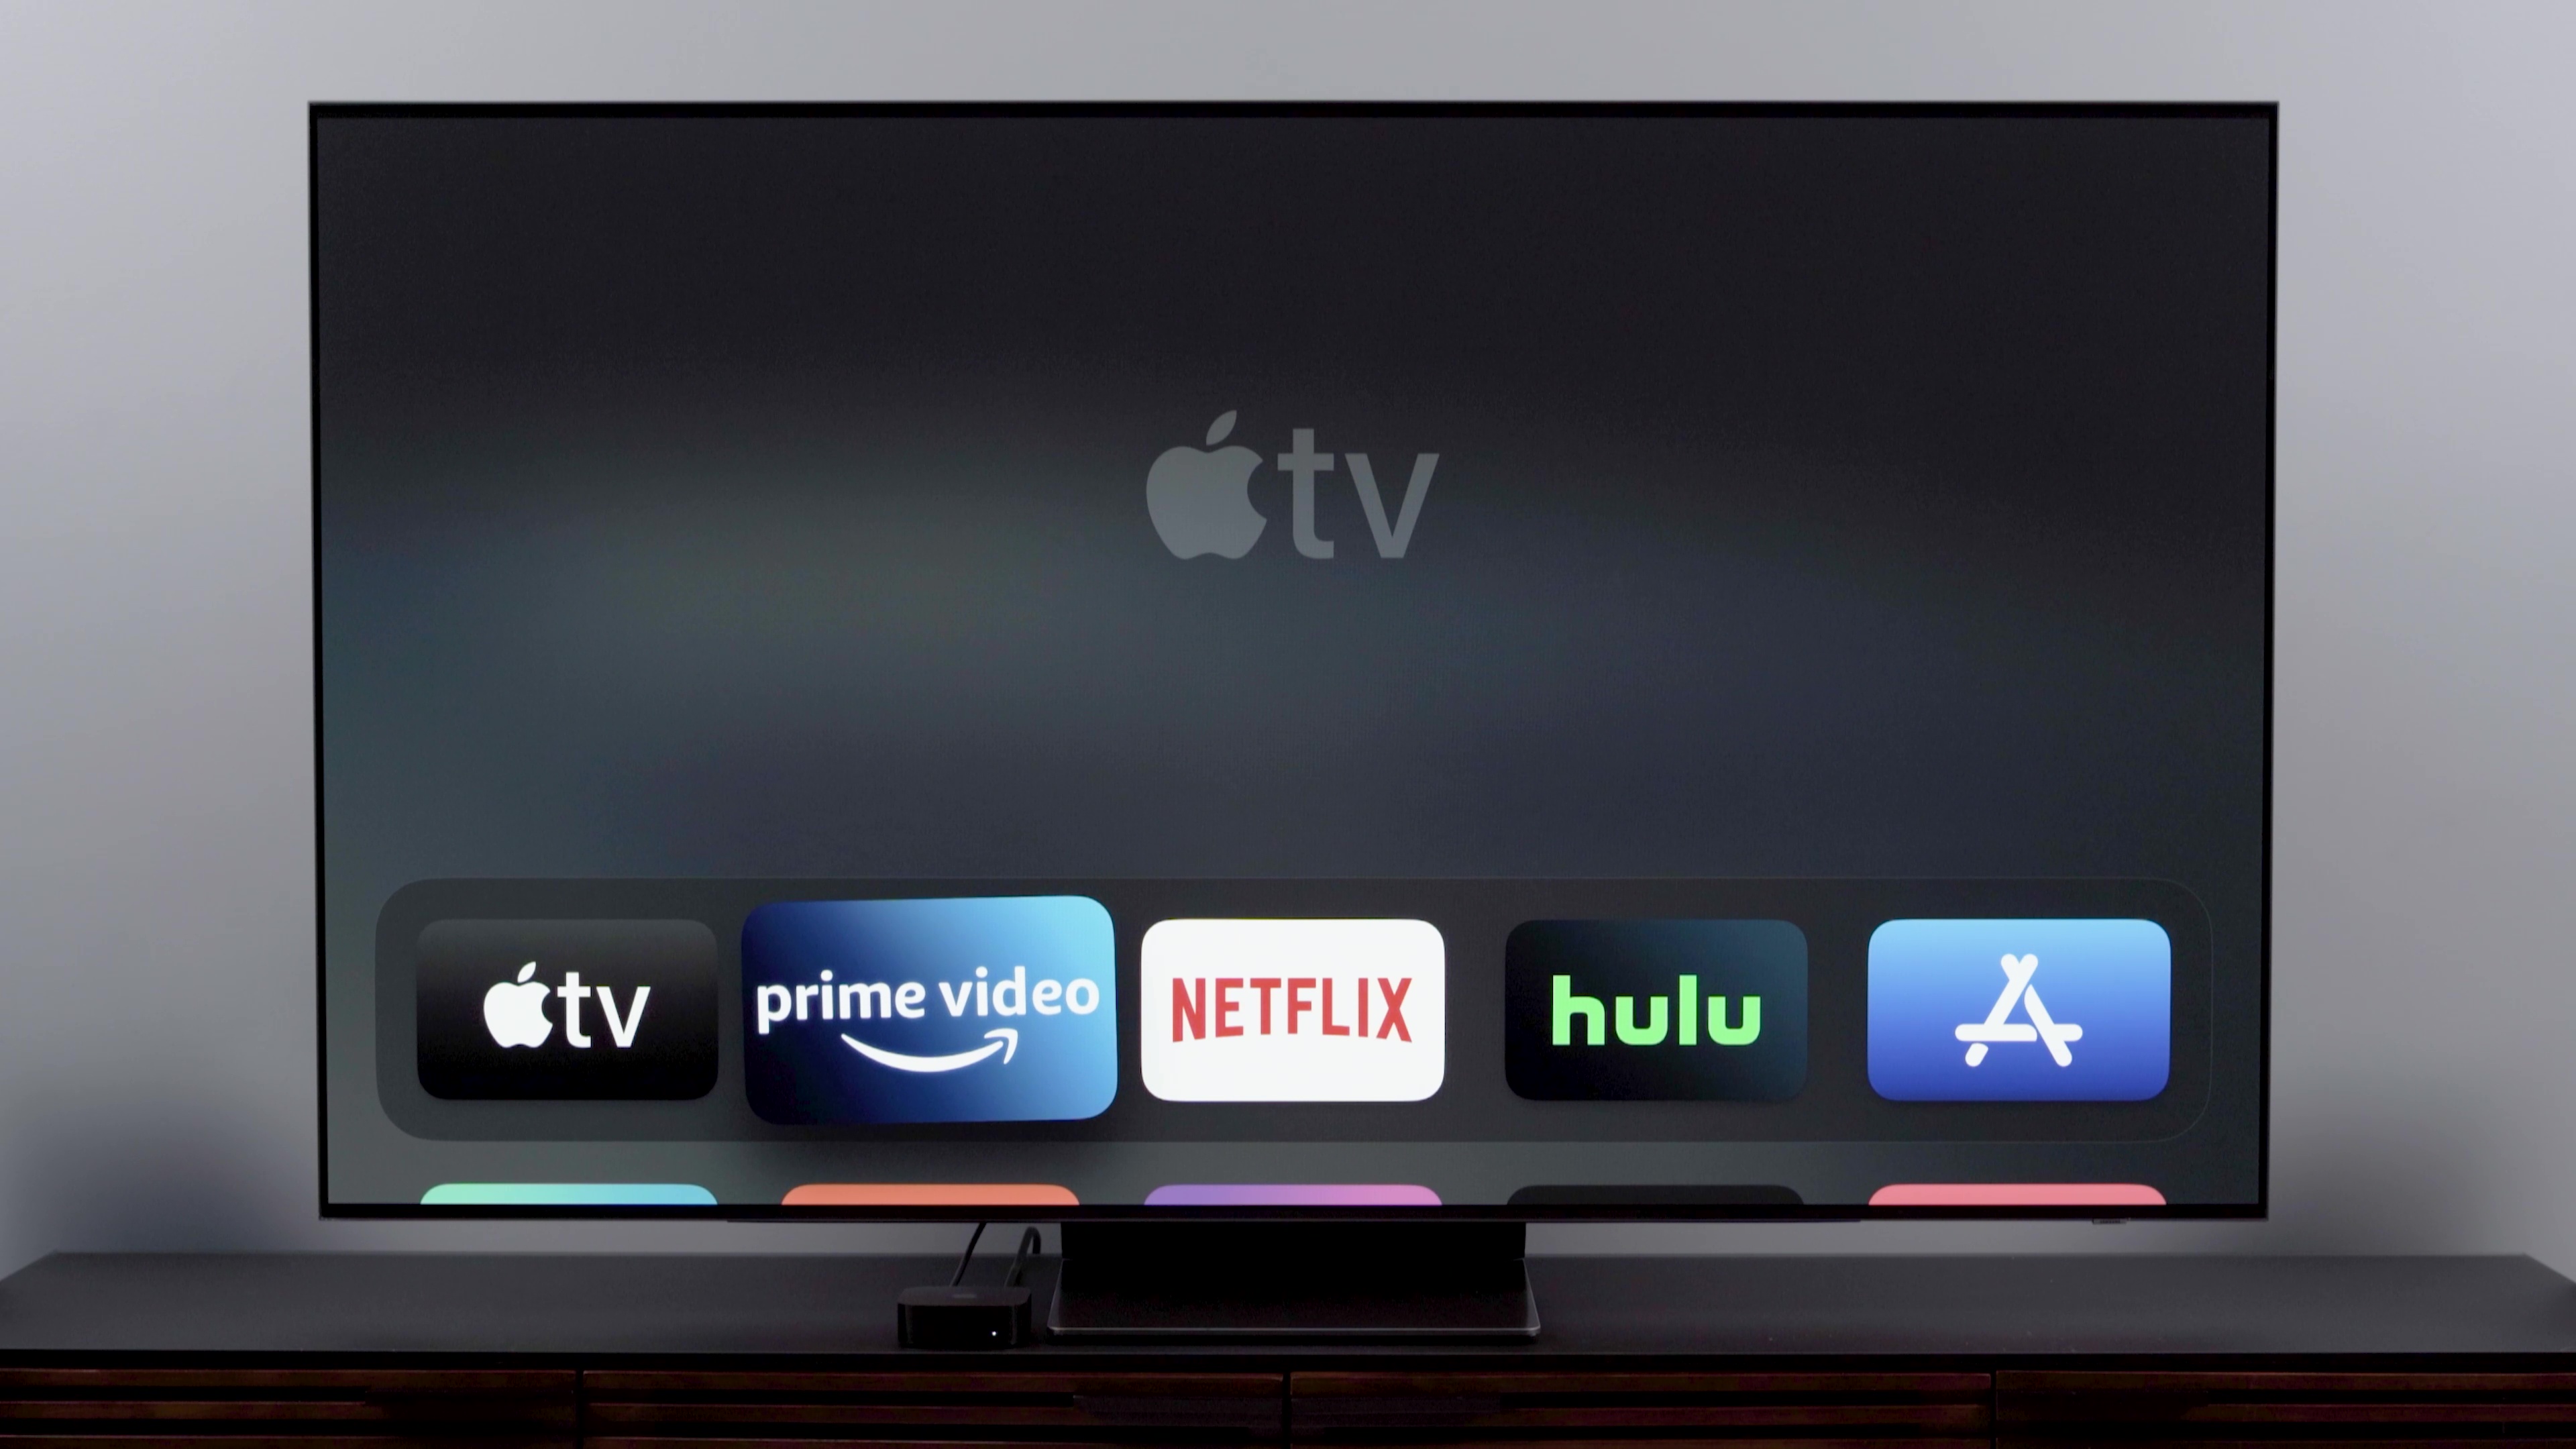
Now, let’s play around with how your home screen looks. You might want to arrange the apps in the order of most-used up top. You might also want to delete some apps or tuck some apps into folders.
To move apps, simply highlight the app you want to move, press and hold the Select button until the app starts jiggling, use the directional buttons or the swipe pad to move the app where you like, and then click Select again.
Now, this is pretty important: Be selective about which apps you put in the top row because tvOS uses the top row apps when it starts suggesting content you might want to watch — but not all apps work equally. That’s why you might want to put Netflix, Amazon Prime Video, and Hulu there. Paramount+ also seems to work.
Deleting apps or creating folders starts the same way. Highlight the app, press and hold until it jiggles, and then you want to press the Play/pause button. This will give you more options, and at that point, you can delete an app. Or, if you want to create a folder or move an app to a folder, you do that here as well. One tip for creating folders that makes intuitive sense is to use an app that is a prime example of its category type in order to start a folder. For instance, use an Apple Arcade game app when creating a games folder.

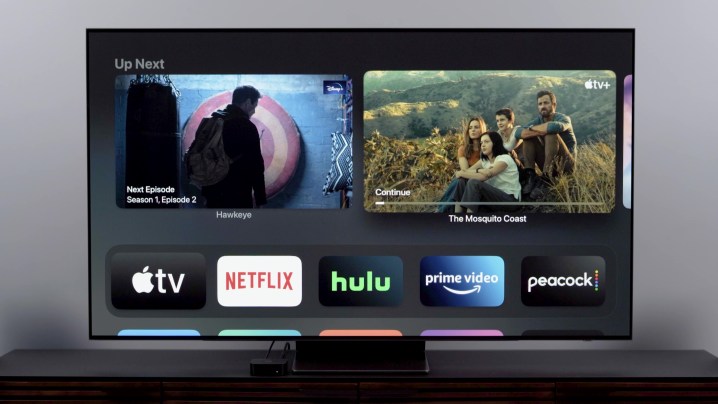
Up Next
You can add the Up Next feature to the very top of the home screen instead of having to go into the Apple TV app to see it. This way, you can get back to something you’ve been watching even faster. To do this, make sure the Apple TV app has a spot in the top row of apps using the process we showed you earlier. Then, go to Settings > Apps > TV. Click on Top shelf so it says “Up Next.” When you go back to your home screen, you’ll see your recently watched shows at the top instead of suggested content.
You also can influence what goes into the Up Next section — it doesn’t have to be stuff you’ve already started watching; it could be something you want to watch soon. To do this, just long-press the Select button on the show or movie you plan to watch and select Add to Up Next.
Custom navigation
Now let’s talk about getting around the Apple TV more easily. We’ll start with things you can do to make using the remote easier.
First, you’ve probably noticed that getting back to the home screen can be kind of a hassle if you’re several clicks deep into the system. There are two ways to get back to the home screen faster. One is to simply press and hold the Menu button, which zips you straight to the home screen. The other way is to change the TV button on the remote so that, instead of taking you to the Up Next section of Apple TV, it takes you straight to the home screen. Do this by pressing Settings, selecting Remotes and devices, selecting the TV button, and then choosing Home screen. You can undo this later if you want.
Siri
Manual
Now let’s adjust how the Siri remote works. You may notice that the touch-enabled click pad is a little too touchy — or maybe it isn’t sensitive enough. Either way, you can adjust this by clicking Settings >Remotes and devices> Touch surface tracking and then finding your sweet spot.
On the other hand, if you find you don’t really like using the touchpad at all and would rather disable it entirely, do that by clicking Remotes and devices, then Clickpad, and selecting Click only. Now the touchpad is turned off, and it’s back to a directional pad and select button.
Finally, if you want to switch between apps quickly, just double-tap the TV/home button — you get a row of the most-recent items, and you can just swipe and select the next thing over. You also can change whether a single press of the TV/home button takes you to the Apple TV app or to the home screen.
Voice
That’s manual control covered — now let’s talk about voice control. We’re all used to using digital assistants for help finding things or executing basics, like, “Show me movies with Charlize Theron,” “What’s the weather like today?” or “Open Netflix.”
But you can use Siri for more specific jobs, and often, it’s easier than using the remote. For instance, let’s say you want to back up or advance in a movie or TV show. Just ask Siri to “go back 15 seconds” or “skip ahead 20 minutes.” This can come in really handy when scrubbing through a show takes a long time – as it does often on HBO Max.
You can also save several clicks by asking Siri to pull up specific shows in apps or specific channels in live TV apps. For example, you can say, “Open Stranger Things season 3 on Netflix,” or, “Open ESPN on Fubo.” Now, Siri doesn’t cover every single app, but more often than not, you’re gonna get right where you want to be more quickly by using voice than by clicking around.
Connect peripherals through Bluetooth
Next, let’s talk about connecting Bluetooth devices. You can connect headphones, keyboards, and game controllers, all via Bluetooth.
Obviously, with Apple’s AirPods, the process is streamlined. But any pair of Bluetooth headphones will work for private listening. And you might want to connect a PlayStation or Xbox controller for playing games and basic navigation. Also, keyboards can come in handy for typing in text, such as your many passwords, if you want to save some time. (But if you have an iPhone or iPad, those work great, too.)
Your pathway for all of this is Settings > Remotes and devices > Bluetooth. There’s a customized guide at the top for game controllers, but for headphones and keyboards, it will just look for a Bluetooth device in pairing mode and allow you to select it. If there’s a four-digit security code you’ve set, enter it. And if you aren’t aware of ever having set a cod, entering 0000 almost always works.
Now, since we were talking about controls, using an iPhone, iPad, and Apple Watch for controlling the Apple TV is awesome, and I’m going to get into that in a moment, but there are a few settings and security options on the Apple TV I want to talk about first.
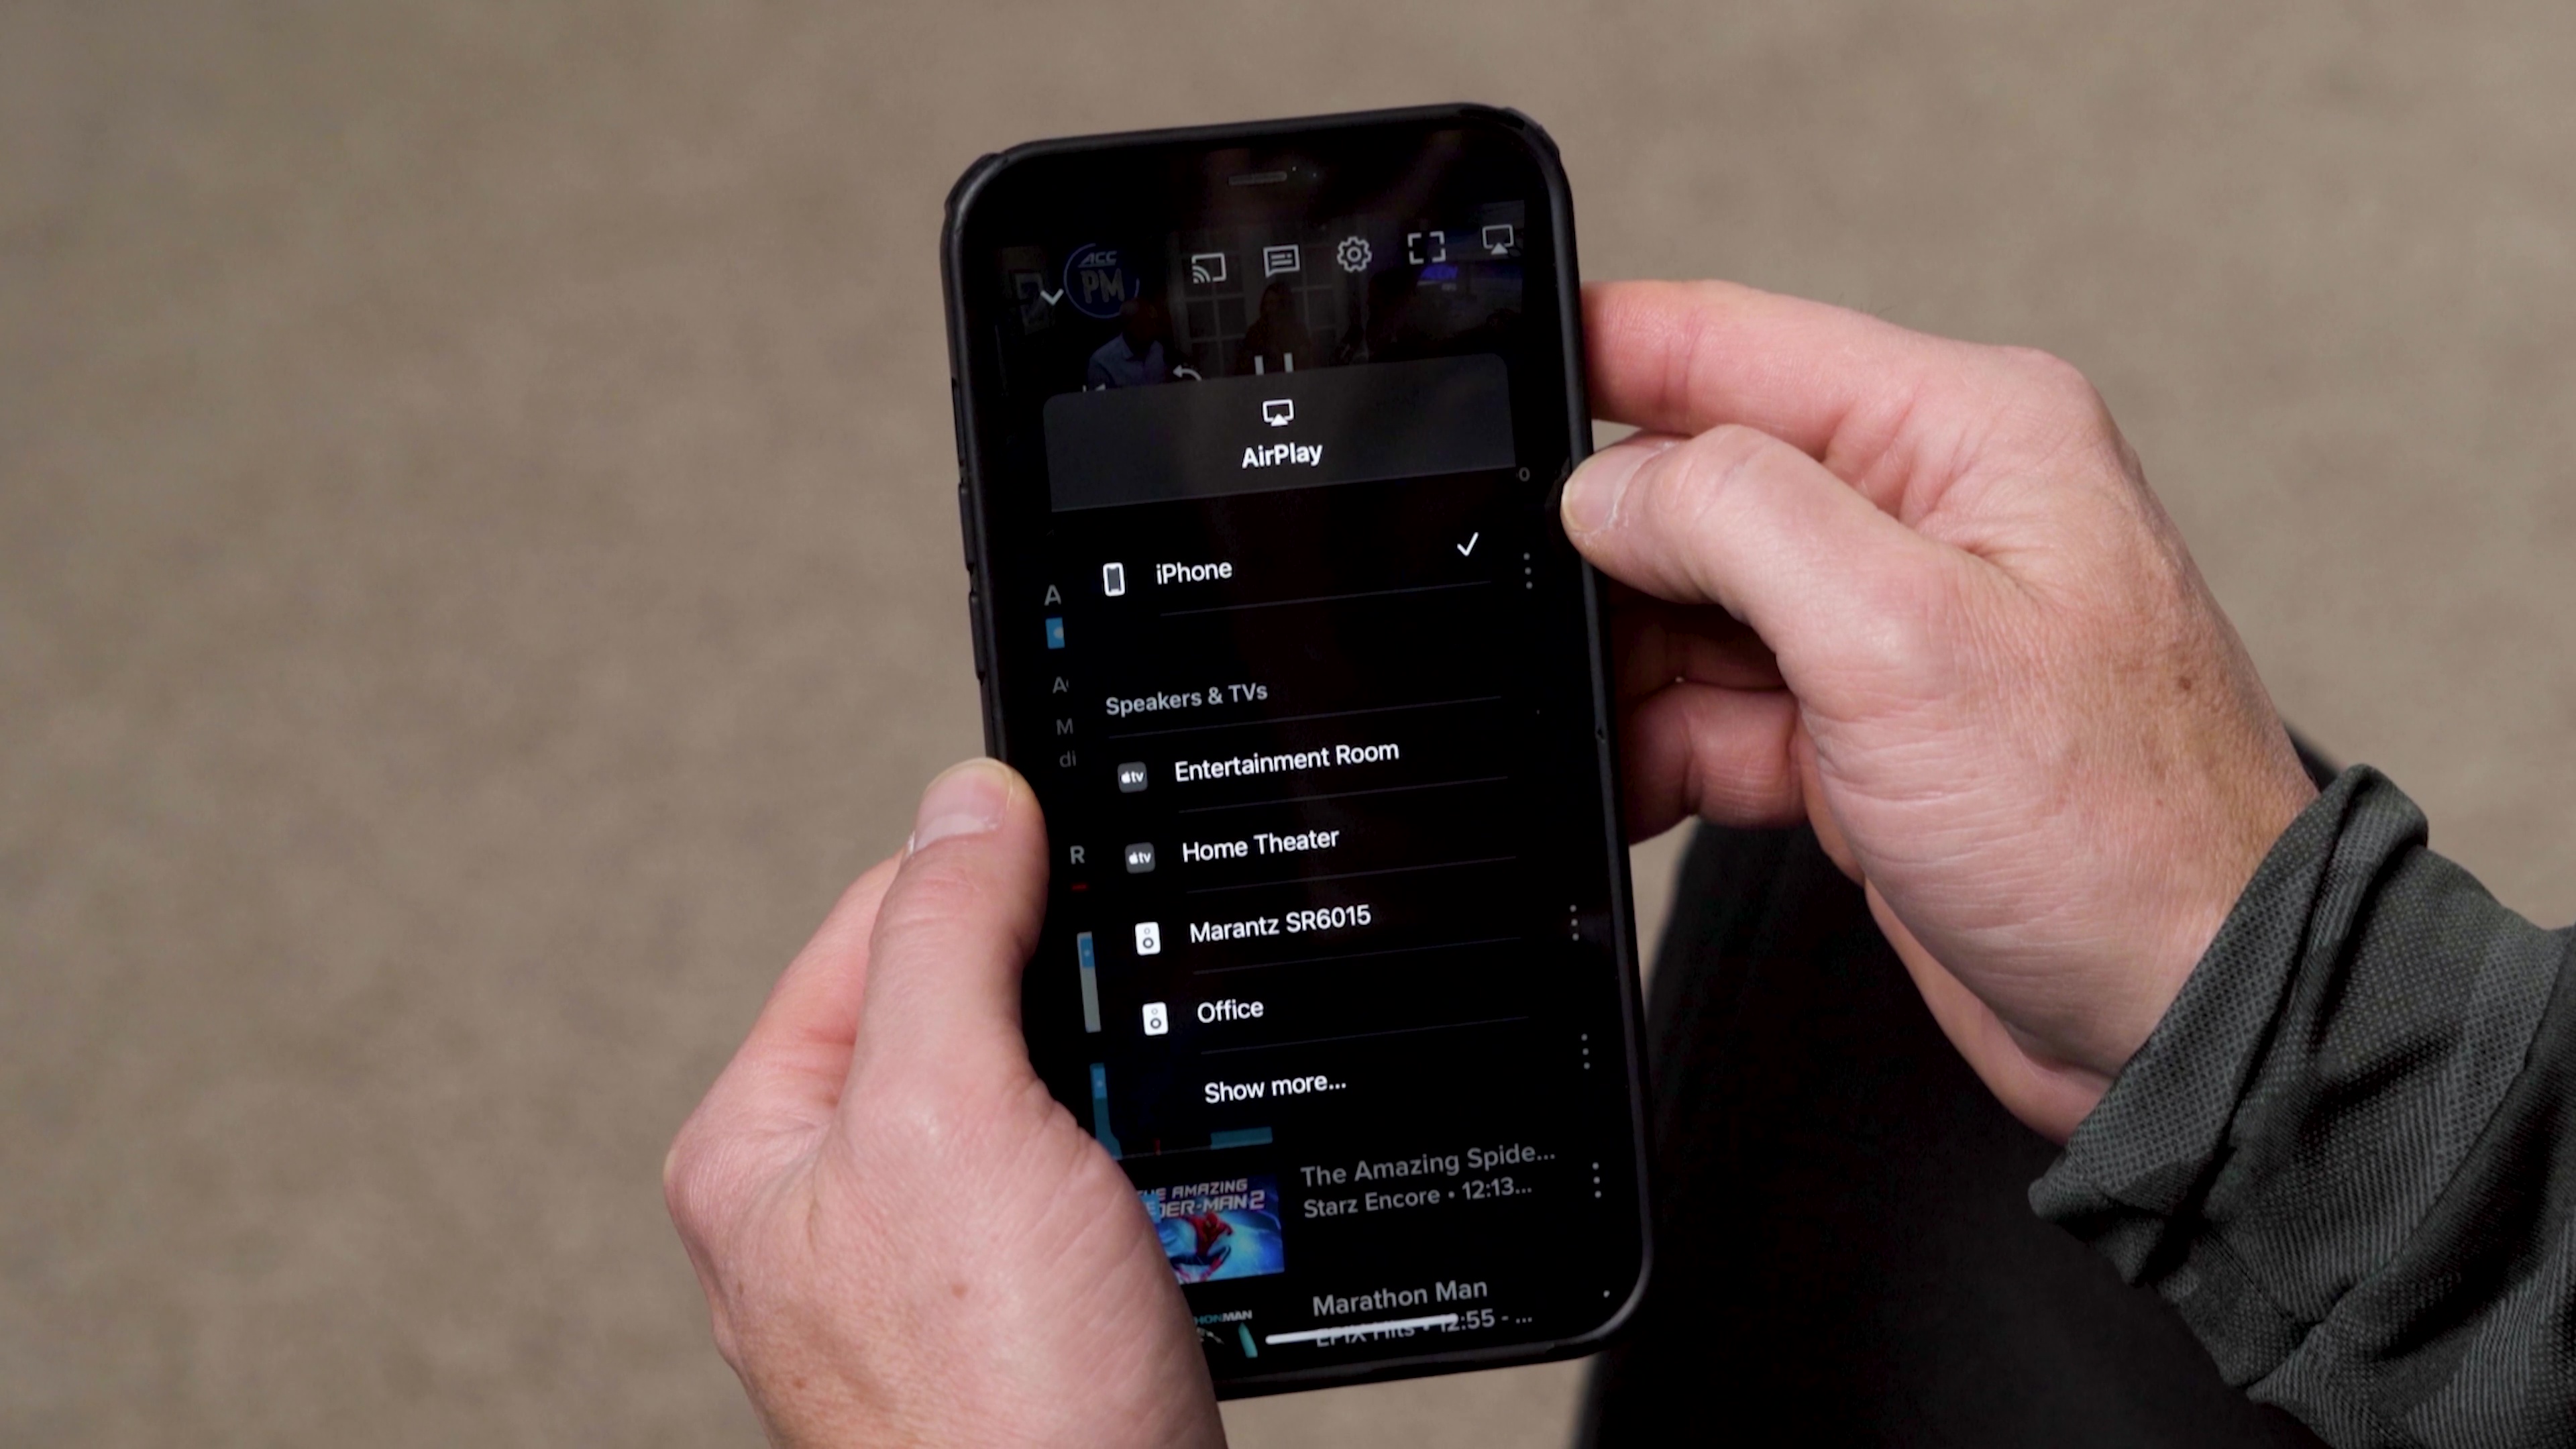
One of the most important ones is to set a security code for AirPlay — AirPlay is what lets you stream video or music to the Apple TV from another device. And it can be done by anyone within range of your Apple TV unless you lock it down behind a code. To do this, go to Settings > Security > AirPlay > Turn on device verification. Once a device is granted access, a code won’t be required again. So if you grant your friend or roommate access once, they’ll continue to have it unless you remove their device from the approved list.
Create individual profiles
Speaking of friends, roommates, or family members: Anyone who has an Apple ID can have their own profile on the Apple TV. That means their own app layout, folders, dark mode, and content recommendations. You can do this a couple of ways, but I go to Settings > Users and accounts > Add New User, and then I add the Apple ID.
Along these same lines, you can use Family Sharing on the Apple TV — it functions the same across all Apple devices. If you are the family organizer, you can share your subscriptions to apps and services with up to six people. The thing is, you can’t set up Family Sharing on an Apple TV itself. So, you’ll need to do it on a Mac, iPhone, or iPad. It’s worth the time to set up because once you do, if you add a “family member’s” Apple ID — I mean, it could be a roommate, right? — they will have access to the subscriptions you already pay for through Apple.
Fine-tune your AV settings
By default, your Apple TV 4K is going to communicate with your TV and determine what the best video settings will be. It may ask you if you want to turn on HDR, and you can go ahead and say “yes” if you have an HDR TV. If you do that, though, your Apple TV will always be in some kind of HDR mode, be that Dolby Vision, HDR 10+, or HDR, depending on your TV. This means that if you watch content that wasn’t made in HDR, you’ll be getting fake HDR, and you may not want that. Especially with really dark content — ahem, Game of Thrones.
There are two options I encourage you to explore. Choose Settings > Video and audio > Match content. Here, you can select Match dynamic range, which means that the Apple TV will go to SDR mode when you’re watching content made in SDR and then help your TV kick into HDR mode when watching HDR content. It’s the same idea with Match Frame Rate. Rather than show all content at the same frame rate, you can have the Apple TV deliver the content as it was made — this is especially important if you like watching movies in 24 frames per second, as they were made — otherwise, they can look artificially smoothed out.

On the audio side of things, there really isn’t much you need to mess around with. Almost everything should be automated. Go ahead and thumb through this, though. You can turn on Reduce loud sounds, for instance, and that will apply dynamic range compression, which is great when you’re just using TV speakers, but it really puts limits on your soundbar or home theater system.
For the Apple fans
OK, Apple fans. This next section is for you. This is all stuff you can do if you’re invested in the Apple ecosystem beyond just the Apple TV.
AirPlay
Let’s start with AirPlay, which is Apple’s protocol for sharing audio and video. Whether you use Apple Music, Spotify, or another music service, you can click the AirPlay button (this looks like a rectangle with an upward pointing arrow under it) on your Apple Device and select Apple TV to play music through the Apple TV. The same goes for video. If I’m watching a YouTube video, for example, I can move it from watching on my phone to watching on Apple TV. The Apple TV will also let you screen mirror, though, which is great for Zoom calls.
On iOS devices, you have to swipe to open the Control center, then select Screen mirroring, then select your Apple TV. On a Mac, you click Control center from the menu bar, then Screen mirroring, then click the Apple TV.
But AirPlay can also be used for picture-in-picture, which I think is a super slick tip.

You can already engage picture-in-picture on the Apple TV itself, but the list of apps that support it is kind of small. To get to it, you have to swipe or click up to reveal what looks like a dual TV icon — click it, and the Apple TV will move what you are watching to a small picture-in-picture window.
The way I like to use picture-in-picture is with AirPlay. This way, you can send something from your Phone by selecting the AirPlay icon, sending it to the TV, and moving that to the small picture window so you can go about finding something else. This is a great way to keep an eye on a game while watching your other favorite shows.
Image calibration
For you iPhone owners, this is a way to optimize everything that you watch on your Apple TV. This is kind of a picture calibration process that bypasses your TV’s picture settings, so you might not want to use this if you’ve spent time getting your picture settings the way you want them. But if you want to optimize your Apple TV, just click Settings, then Video and audio, and scroll all the way down to Calibration, then select Color balance. Then, take an iPhone with FaceID and iOS 14.5 or later and bring it near the TV. The TV will walk you through the process from there.
If your TV supports Dolby Vision, you might see this option grayed out because it’s handling all that calibration instead.
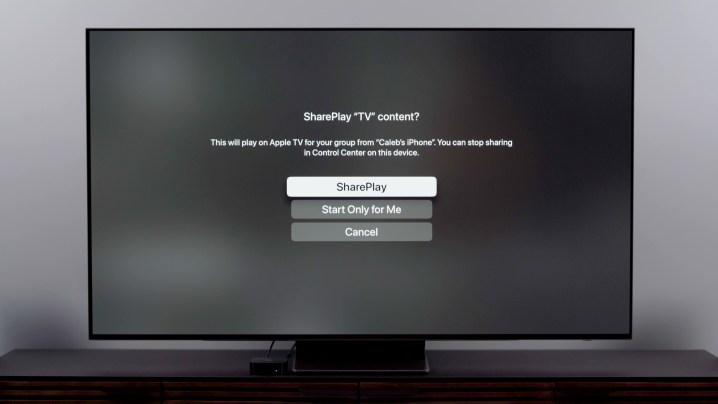
SharePlay
This is a feature I don’t think people use enough, but it’s great for watch parties. Apple calls it SharePlay, and it requires that the people that you watch with have an iPhone or iPad, too, at least. What you do is start a FaceTime call — add as many people as you want. Once you have them on the call, go to your Apple TV and make sure that your user is selected. You can do that by pressing and holding the TV button on the remote, then checking the upper portion of the pop-up window to verify you’re logged into your Apple ID.
At that point, you can start playing a movie or TV show, and because you are on a FaceTime call already, the Apple TV will ask if you want to use SharePlay. Say Yes, and then you’ll be asked to confirm whether you actually want to start SharePlay on your iPhone or iPad. Once you agree, you and your friends can watch the content together in sync.
Remote options
Since we’re talking about iPhone and iPad, don’t forget they, along with your Apple Watch, can be used as an Apple TV remote. This is especially helpful when you need to type something in. On your watch, you can choose the Remote app. On your iPhone or iPad, go to the Control Center by swiping down from the upper righthand corner and then selecting the icon that looks like an Apple TV remote. Any time you need to enter text, a keyboard will automatically pop up on your phone.
Spatial audio
Finally, I want to highlight using spatial audio with head tracking. This is the best at-home surround experience that doesn’t involve a massively elaborate home entertainment system. To really take advantage, you’ll want AirPods Pro, AirPods Pro 2, newer Beats Headphones, or my favorite for this, the AirPods Max.

You can do this one of two ways. Either click Settings > Remotes and devices > Bluetooth, then the headphones you are using, or while you’re playing content – movies, TV shows, or music – press and hold the Home button and select the headphones from there. Then you can choose spatial audio or spatialized stereo for two-channel content. But to get the best experience, I suggest using head tracking – this changes the soundstage depending on where you turn your head, so if you turn your head to the left as you are facing your TV, then the audio will seem to come from the TV. But if you don’t want this, you can turn it off. Either way, to access this, open Settings > Accessibility > AirPods, then toggle Center audio on TV on or off.