

Editing a 360 photo in Photoshop is a bit different than editing a typical photograph, however. In order to maintain that scroll around 360-ness, there are a few extra steps. Learn how to edit 360 photos in Photoshop with this quick tutorial.
Important: While working, don’t save over the original file. Instead, save your progress as a PSD file until you reach the final export step.
1. Open the image and apply universal edits
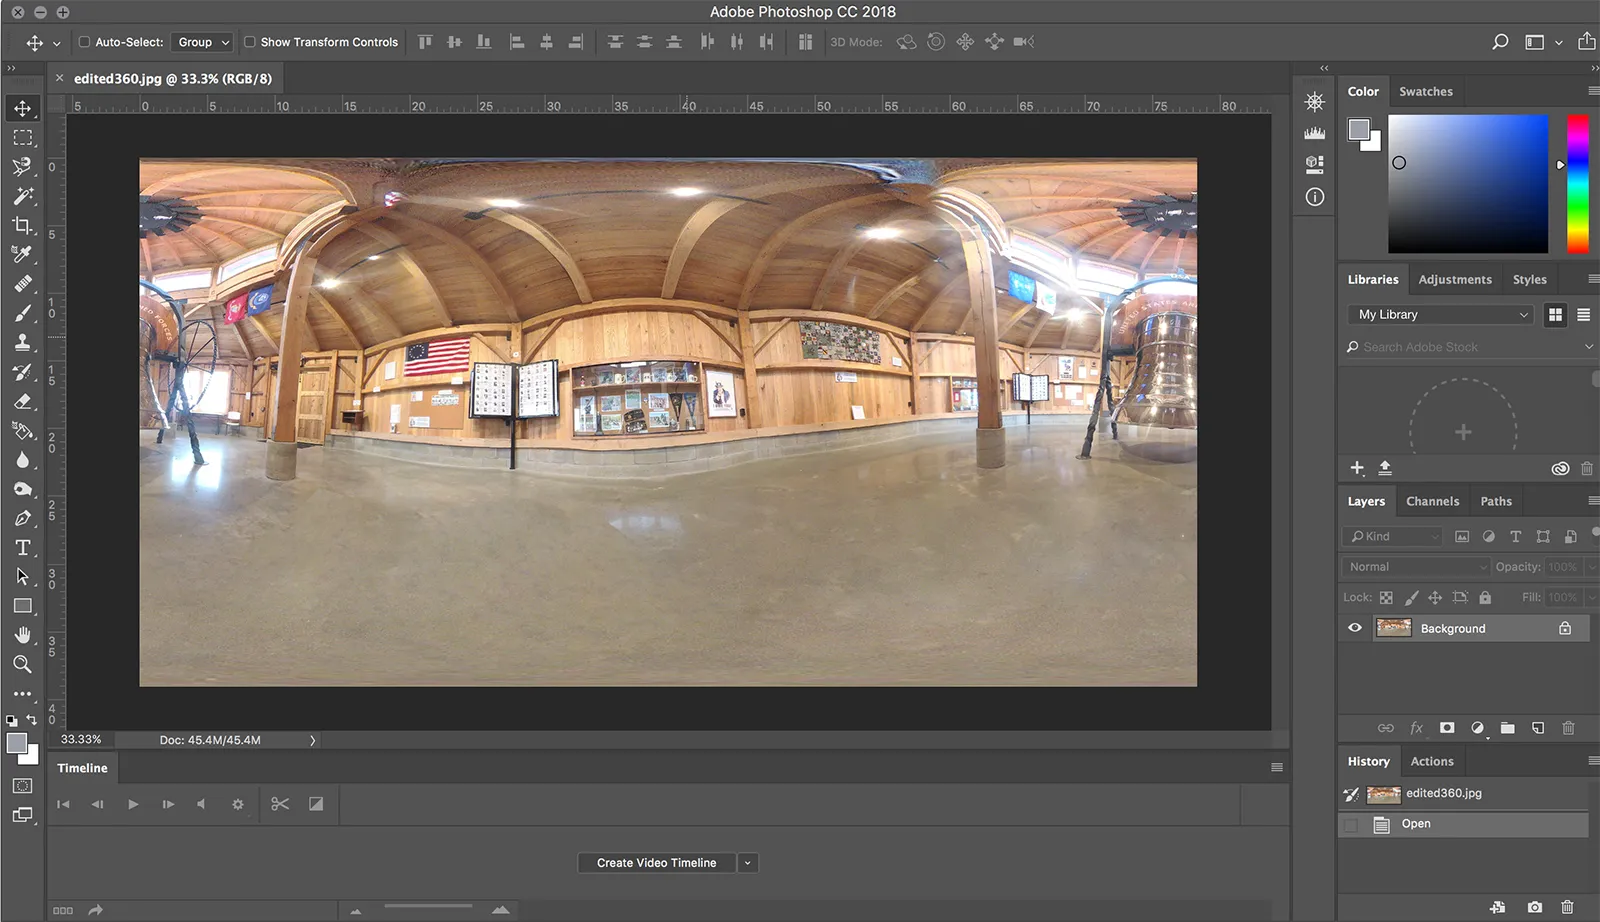
Universal edits, or the changes applied to the entire photo, aren’t accessible once the image is rendered into a 360 file that you can scroll around inside, so those changes must be made at the beginning. First, open the image in Photoshop. Don’t worry that it looks distorted, you’re not in the 360 workspace yet — that comes later.
Next, make any changes that apply to the entire image. These adjustments include options found inside the Image > Adjustments menu such as exposure, saturation, and black and white conversion, as well as options accessible from the Filters menu, such as the unsharp mask or turning the photo into an oil painting.
You won’t be able to use layers once the image is converted in the next step, so if you want to make any adjustments that require them, such as adding text or shapes or using adjustment layers, make those edits before converting as well. If you do make any changes using layers, flatten the image before you move on to the next step or you’ll lose everything not in that background layer.
Finish all the adjustments that apply to the entire image first before entering the 360 workspace.
2. Render the image as a 360 layer
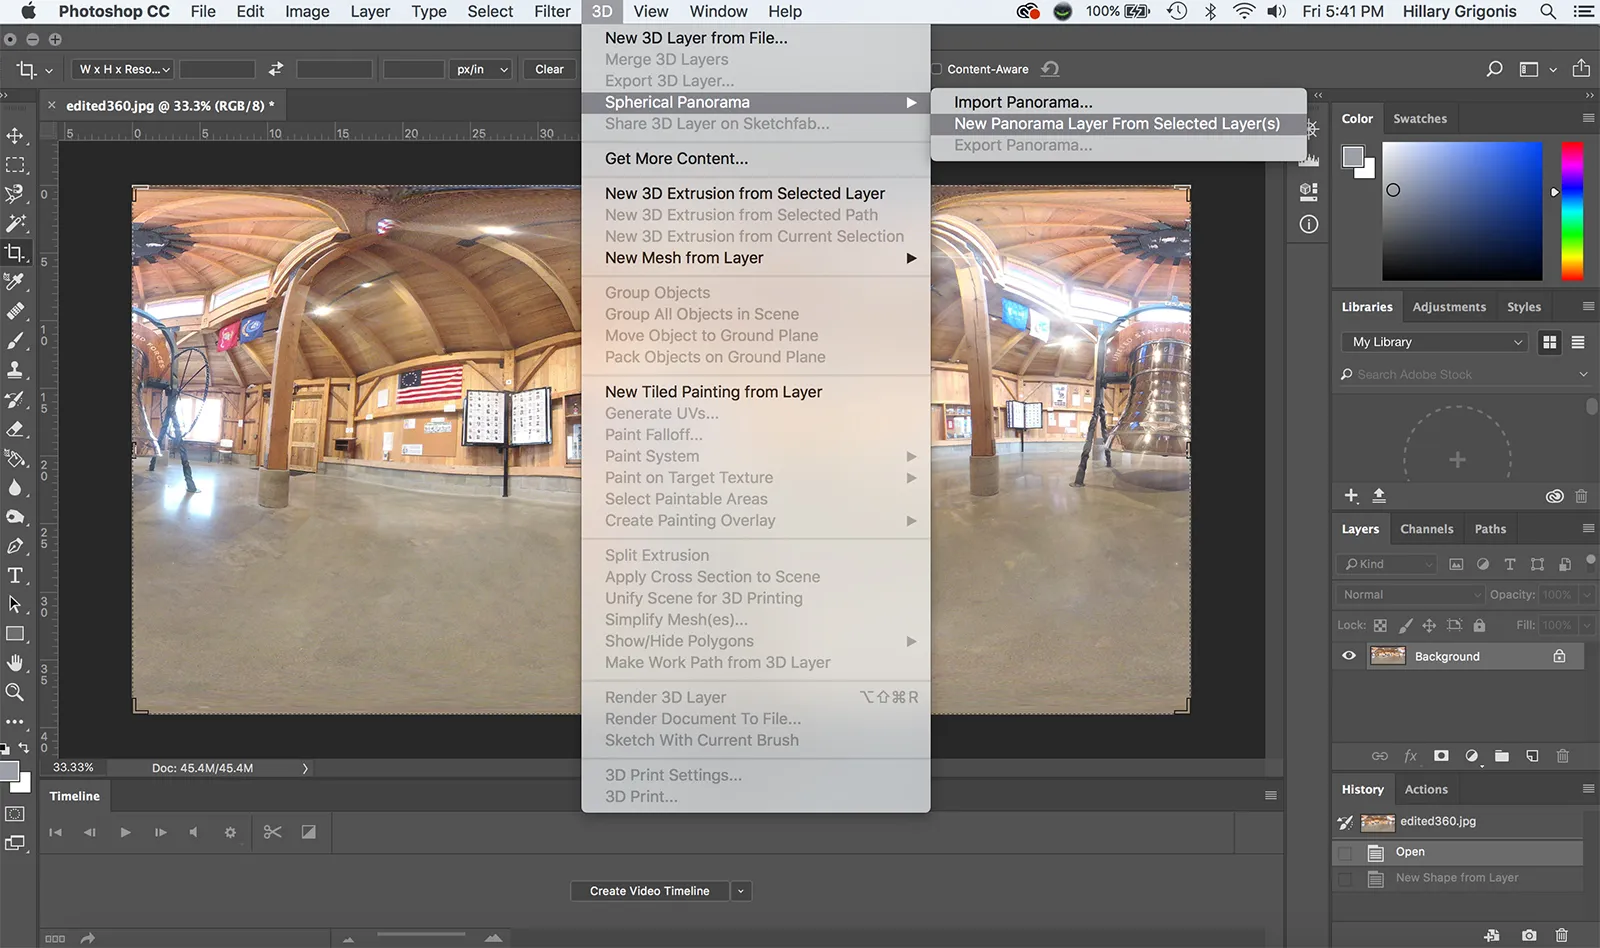
Next, you need to tell Photoshop that the image you are working on is in the 360 format, in order to get that scroll-around view. Switching to this view makes it easier to apply local adjustments and will also maintain the 360 format after exporting.
To turn the photo into a 360 layer, make sure the original photo is selected in the layers panel, then go to 3D > Spherical Panorama > New Panorama From Selected Layers.
After clicking, you’ll get a pop-up dialog where you can change the size of the window in which you scroll around the image, along with other options. If you want to crop the 360 photo to a traditional aspect ratio, you’ll want to make sure you use a size large enough to see the entire desired view at once — but in most cases, sticking with the defaults is fine.
Don’t need to make universal adjustments first? You can also head to 3D > Spherical Panorama > Import to start inside the 360 workspace.
3. Choose your workspace
A pop-up window will ask if you want to switch to the 3D workspace, which includes a few tools specifically for 3D. The 3D workspace highlights tools that work best with 360, but it also eliminates a few tools, including the healing brush and the dodge and burn. Workspace is largely a matter of personal preference and available tools, so there’s no wrong choice. You can always switch back and forth between workspaces by going to Window > Workspace.
4. Navigate through the 360 photo
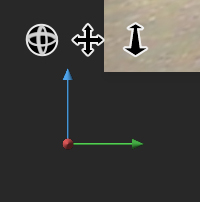 Photoshop’s new 360 compatibility means you can move around the image as you would on Facebook. Just outside of the left corner of the current view of the image, use the orbit, pan, and dolly controls to look around the image to find the perspective you want to edit. You can also click the hand tool and click and drag to change the perspective as well.
Can’t navigate? Make sure the 360 photo is selected from the layers panel.
4. Use the toolbox to make local adjustments
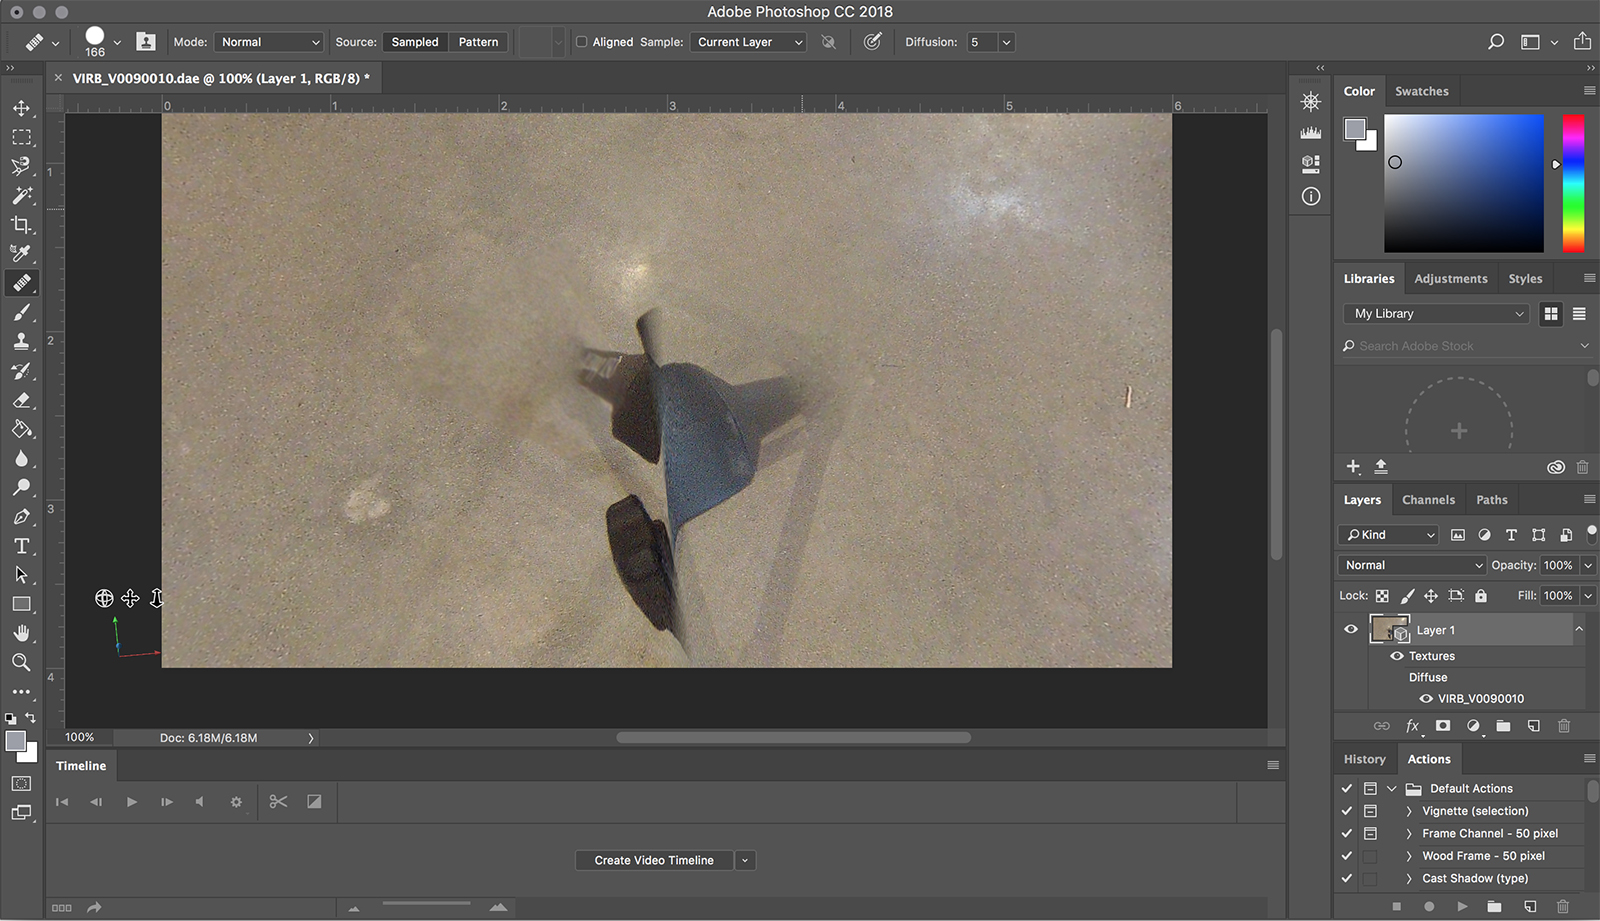
Once you’ve imported the image as a 3D panorama and navigated to the problem area, just use Photoshop’s tools to make local corrections. For example, we used Photoshop’s clone and healing brush tools to remove pieces of the tripod on which our 360 camera sat. The options are nearly endless, but some of the available tools you might want to try out for 360 shot include:
- Clone tool: Use this to copy a section of the image and paint over another object to remove it from the photo. Control click to select the area that you would like to copy.
- Healing brush: This is a smarter version of the clone tool that blends the adjustment in with the surrounding area. This tool is slower than the clone tool in 360, so you can also eliminate as much as possible with the clone tool fist, then switch to the healing brush to smooth out the edges.
- Dodge: Lighten an area of the image.
- Burn: Darken an area of the image.
Editing 360 photos is a data-intense task, so if your computer slows down during the edits, try closing out of all other programs before editing.
5. Export the image
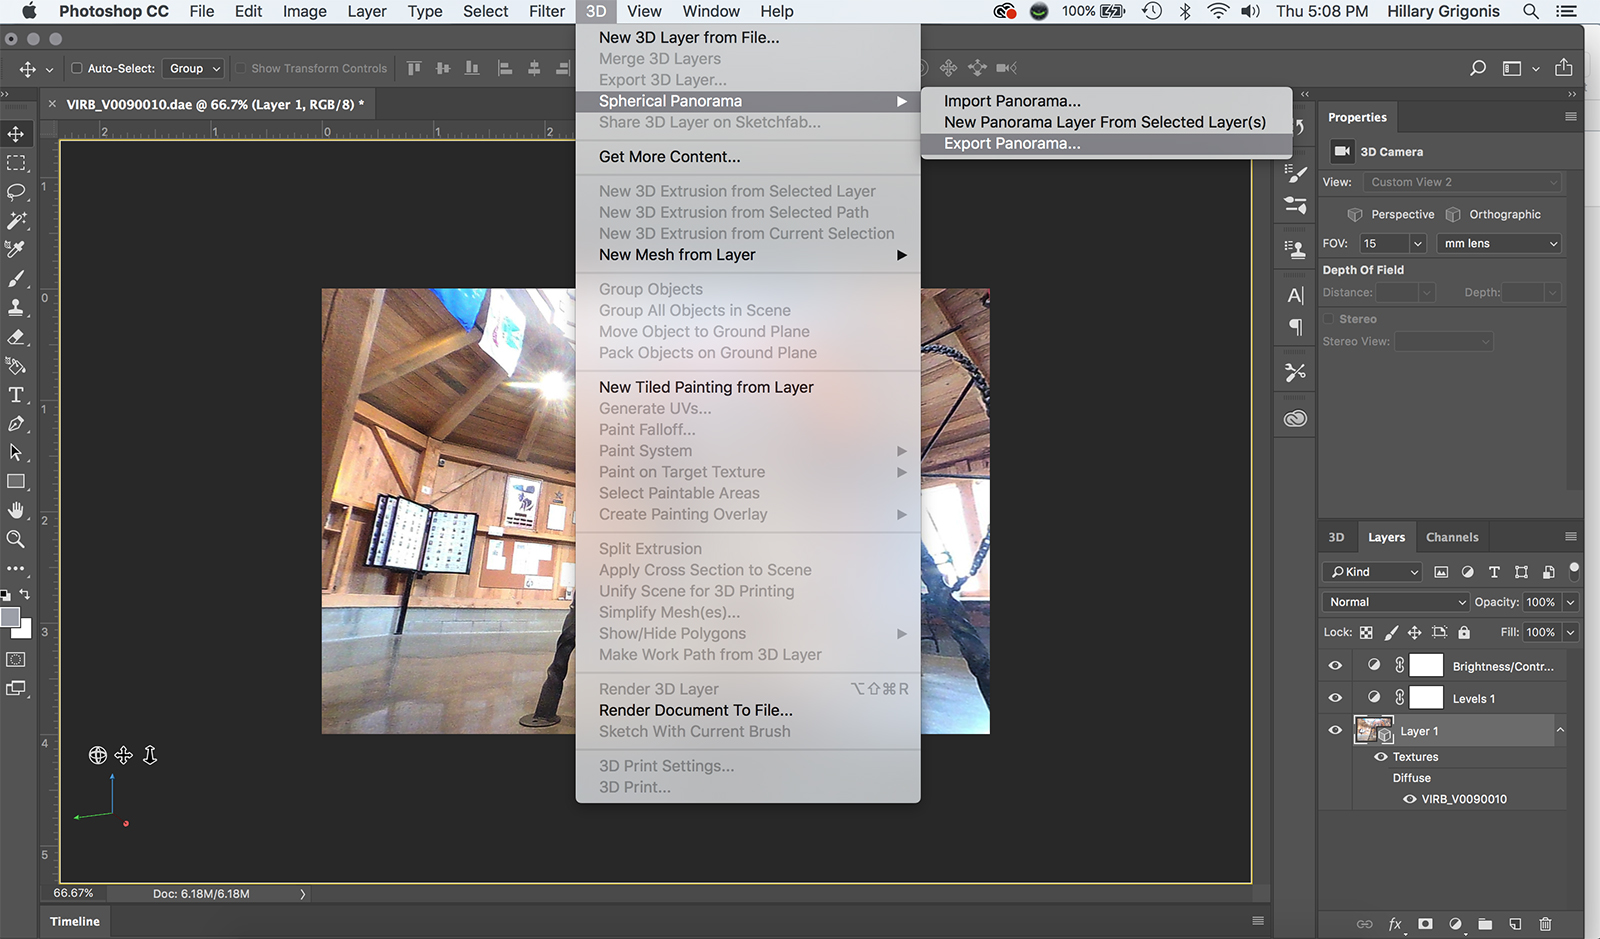
You can’t open a 360 image normally and still maintain that 360-ness, and you can’t use the “usual save as” command either. Once you’re finished with the edits, don’t save — go back up to 3D > Spherical Panorama > Export Panorama. If you use the export option, the image will still have that scroll-around ability inside Facebook as well as compatibility with VR headsets. If you need to come back and finish edits later, save the image as a PSD file, then use the export option when you are finished.
The option to edit 360 photos in Photoshop means you can now take out that pesky portion of tripod that’s showing, eliminate those distracting power lines, or fix a minor exposure error — you just have to take a few extra steps for importing, exporting, and navigating around.
Editors' Recommendations
- The best photo printers you can buy in 2024
- The 5 best laptops for photo editing and photographers
- The best monitors for photo editing
- How to make a background transparent in Photoshop
- How to delete and recover photos in Android


