
Given the global pandemic, you may not be planning to travel overseas for the moment — but that makes this the perfect time to make sure your passport is up to date, so that you’re ready to go when the world reopens. In addition to the documents you need to submit, you’ll also have to provide a photo. The U.S. Department of State has a list of requirements for the photo that must be met, or else you’ll risk a delay in your application being processed.
Fortunately, so long as you know what they are, meeting these requirements is not difficult — even if you want to take your own passport photo. There are even apps that will guide you through the process and let you take a qualifying photo with your phone.
Taking your own passport photo has the advantage of being free (and gives you a tinge of pride), but paying someone else to do it can feel simpler. There are a number of places to have passport photos made, including select U.S. Post Office locations and many drugstores. If you’re up for the challenge of doing it yourself, here’s what you need to know.
Official passport photo requirements
A passport photo is not the time to submit your Hollywood headshot. In this case, the more natural you look in the photo, the more likely it will be accepted by the Department of State. The photo also needs to be taken recently, within the last six months. If you’ve undergone a significant change to your facial appearance — if you’ve grown a beard, for instance — you may also need a new passport with an updated photo.
While the list of guidelines is long, they aren’t really that complicated:
- Photo must be in color and taken within the last six months
- Do not use social media filters
- No selfies — have someone else take your photo, or use a tripod and a timer
- Background must be entirely white or off-white
- Remove glasses
- Head facing directly at the camera and in clear view
- Eyes should be wide open (infants’ eyes can be closed or partially open)
- Remove red eyes and shadows (caused by a flash or overhead lighting)
- Keep a neutral facial expression or make a normal smile
- Wear clothing you would normally wear
- Unless it’s for religious reasons, no hats or head coverings
- No objects should be in the photo, such as headphones or pacifiers
Also, keep in mind that the State Department does not endorse any particular photo service, even those that claim to be government-compliant. The State Department could still reject a photo if it fails to meet the guidelines listed above.
Use a mobile app
There are plenty of passport apps available for both iOS and Android. One relatively new app that we found worked well is Passport Photo AiD (iOS, Android). The app lets you shoot or add a photo from your camera roll, then analyzes it for compliance using artificial intelligence. Another nice feature is that it can automatically remove the background and replace it with pure white, which is great if you don’t have white walls in your home.
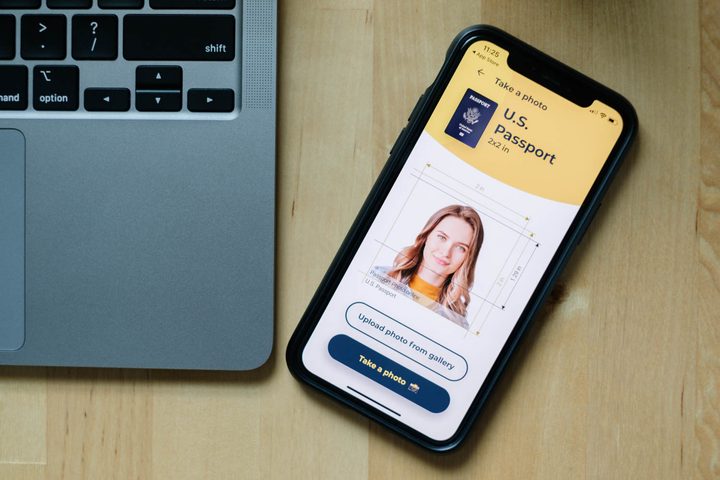
While you can use the app for the free, taking advantage of the automatic background removal does incur a small fee, but also promises to have a human review your photo for accuracy. You can also pay a bit more for premium service, which will print and deliver your photos to you within 72 hours, according to the app. In addition to passports, the app can assist with a number of different official documents.
If you’d rather just upload a photo from your computer, you can still take advantage of Passport Photo AiD’s A.I. compliance checks and other features through the company’s website.
If you prefer to have your passport photo mailed to you, another popular app is Passport Photo Booth (iOS, Android). A set of two photos — printed on one 4-inch by 6-inch sheet of photo paper — can be had for $6, and it’s mailed to you within seven to nine days. The app also lets you email the photo (as two 2-inch by 2-inch photos on a 4-inch by 6-inch canvas; six 2-inch by 2-inch photos that cover the entire 4-inch by 6-inch canvas; or a single 2-inch by 2-inch photo), or save it to a camera roll. You can also use the square photos in your social media profile, and both the latter options allow you to print at home or send to a pharmacy via an app like Walgreens or CVS.
Another highly rated app to consider is Passport Renewal and Photo (iOS, Android) from ItsEasy.com. Like the aforementioned options, the cross-platform app guides you in taking a proper passport photo. In addition to having the photo sent to you for a small fee, you can also apply it to a passport application, which ItsEasy.com can facilitate.
Shoot and print at home
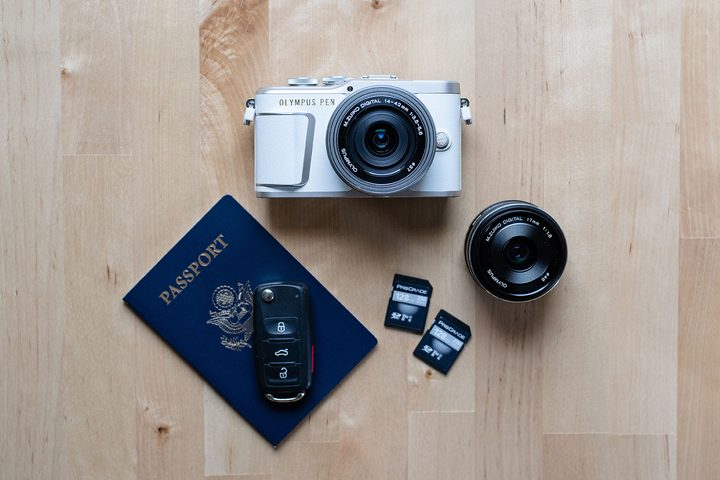
Do you have a digital camera, inkjet printer, and photo paper? Then you can take a professional passport picture just like a photography studio.
Have someone take the photo for you, or set your camera on a tripod and use a timer or remote (most modern digital cameras have Wi-Fi and companion apps that will even let you preview the photo and trigger the camera from your phone). For positioning, the camera should be at least 4 feet away, perhaps farther, depending on the lens (avoid using a wide-angle lens for a more flattering portrait).
Make sure that the photo is properly exposed (not too bright or too dark) and that the subject is facing directly ahead, with their eyes open. If there’s a shadow, you will need to adjust the lighting (usually caused by overhead lighting) and retake the photo. Keep in mind, even if you’re an advanced photographer, this is not the time to get fancy with your lighting setup. Use a flat, even light that shows your entire face clearly. If you can position yourself with an open window in front of you, that’s probably all the light you’ll need.
The background must be white or off-white, without any distracting patterns or textures. A smooth white wall is perfect. A white sheet, if suspended evenly without any wrinkles, can also work. We would avoid going out and buying an actual photo backdrop, as this will cost more than simply having your photos done at Walgreens.
Be sure to leave spacing at the top and sides of the image (you can crop it to the right dimensions later). The printed photo will need to be 2 x 2 inches, and your head needs to be between 1 and 1 3/8 inches tall. The State Department provides its own tool on its website for cropping your image, but note this is an older tool that requires Adobe Flash Player.
To print your passport photos, use a color inkjet printer. It’s best to use one that supports photo paper. A portable photo printer like Epson’s PictureMate PM400 is handy for a task such as this. It even comes with a built-in passport photo template that helps make the process go a little faster. With that in mind, note that 2-inch by 2-inch photo paper does not exist (the passport photo requirement size). Government guidelines require you to print your image on 4-inch by 6-inch paper (or larger) and cut the portrait out yourself.
You can expect to always get a pair of printed passport photos from expert photographers, but it’s unnecessary to have two for yourself. Usually, the only time you would need another picture is if you happen to make a mistake when filling out your application. Of course, it can be beneficial to have a spare print on hand, especially if you aren’t confident with a pair of scissors.
Our pick
We’re leaning towards a mobile app that conveniently transfers passport photos directly to your home. Although it comes with a higher price and you can’t choose your preferred print service, it’s still quite elementary. Instead of going through numerous print sessions and breaking out your safety scissors, you can relax and let the pros handle the details. We’re also big fans of compliance checks, which are a more reliable option than doing it on your own.
That being said, if you’re a photographer or are especially picky about your photo, taking and printing your own passport photos is still an available option for you. Keep in mind that this is pretty much the only way to guarantee that you get a flawless shot. Similar to driver’s licenses, passport photos are known to be unflattering, so this may be the route to take if you find yourself concerned about your image. If you choose this option, we advise having the proper equipment ready to go. If you’re prepared, you’ll be able to capture the most attractive passport pic of all time.


