Whether you have emails you want to make sure to hang onto because you’re getting a new computer or you're troubleshooting a problem, you can create a backup in Microsoft Outlook.
By exporting your inbox to an Outlook file format, you can easily import it again later if needed. Alternatively, you can export a CSV file that you can open in Excel to review and analyze. Here, we’ll explain how to back up emails in Outlook using both file types.
Back up emails with an Outlook file on Windows
If you want to create a backup of your emails that you can easily import back into Outlook later, the best option is to create a PST file. Unfortunately, this technique is not available on the Mac version of Outlook.
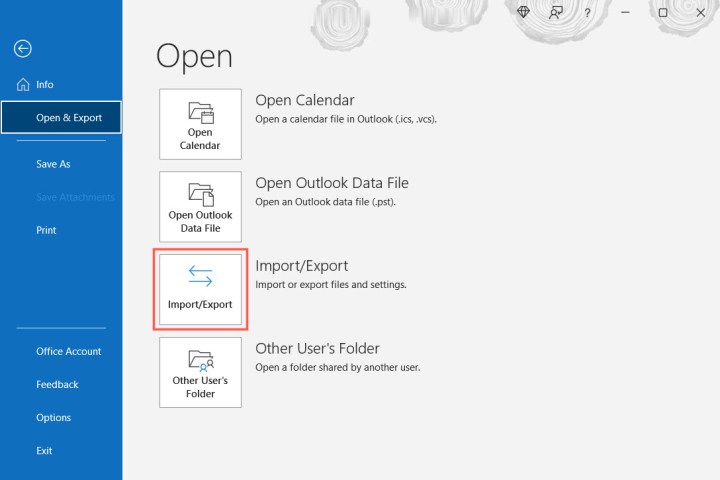
Step 1: Open Outlook and select File > Open & export. Then, pick Import/export.
Step 2: When the Import and Export Wizard window opens, select Export to a file and choose Next.

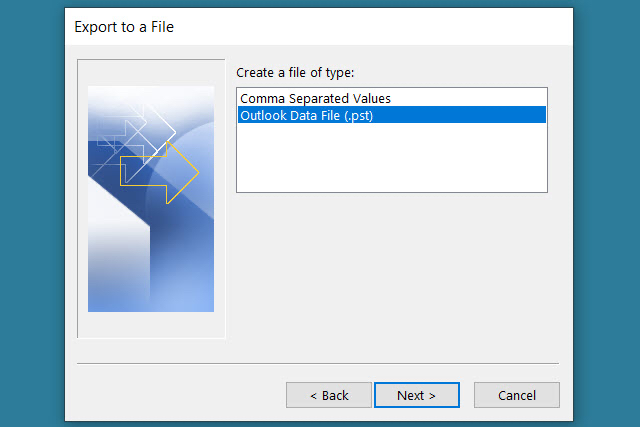
Step 3: In the subsequent window, pick Outlook data file (.pst) and select Next.
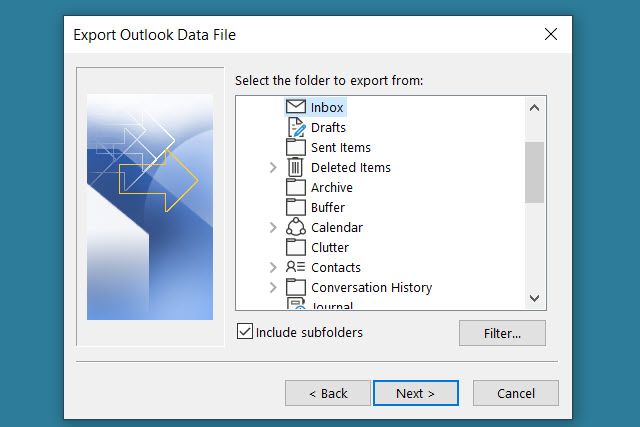
Step 4: Then, select your Inbox and check the box for Include subfolders to make sure you have all of the folders you created. Optionally, you can choose a different, specific folder if you prefer.
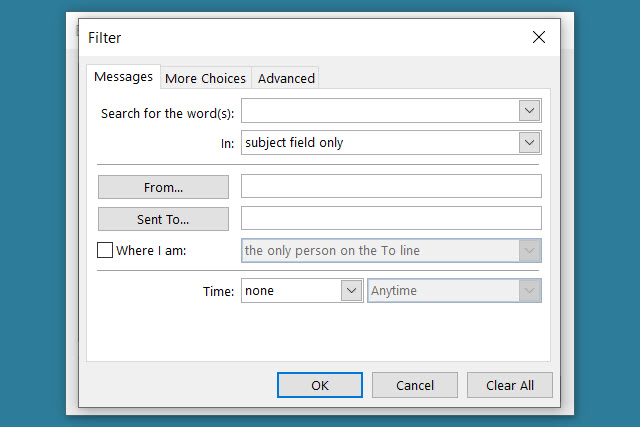
Step 5: If you want particular emails, such as those from a certain sender, during a time frame, or with specific keywords, select Filter. Add the criteria, and pick OK.
Step 6: Select Next after you pick the inbox, subfolders, and filters.
Step 7: Choose a location to save the file. You can use the Browse button to select the location or enter the full path into the box at the top.
Step 8: Then, pick one of the options to replace duplicates, allow duplicates, or not export duplicates. Select Finish.
You can then visit the location you selected for the file to open it.

Back up emails with a CSV file
If you want to back up your emails so that you have a readable file that you can open in Excel if needed, you can create a CSV file instead. Try this technique on Windows of Mac versions of Outlook.
Step 1: Follow the first two steps as above to select Import/export and open the Import and Export Wizard.
Step 2: Select Export to a file and pick Next.
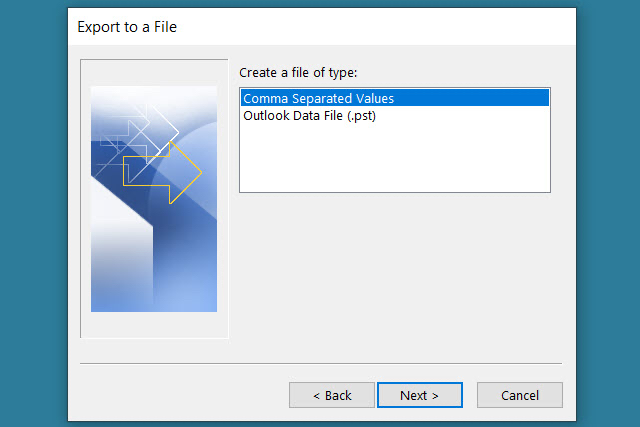
Step 3: This time, pick Comma separated values in the Export to a file box and select Next.
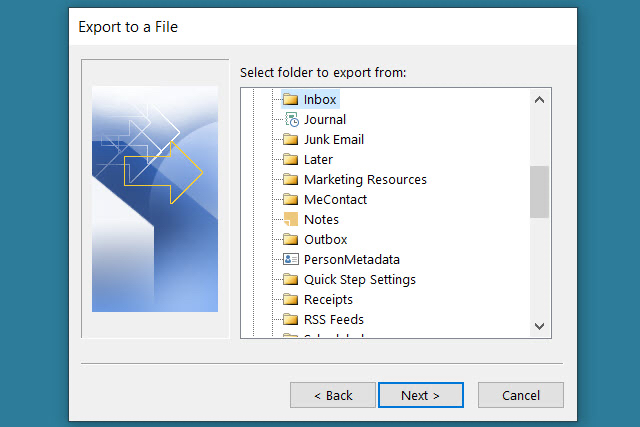
Step 4: Choose your Inbox from the list and pick Next.
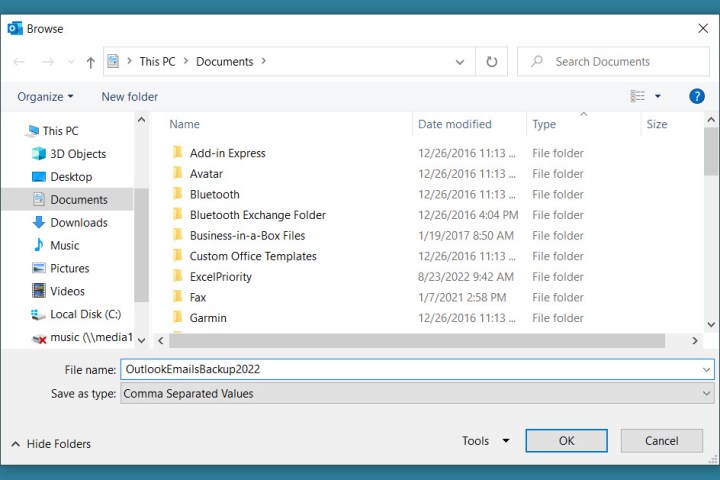
Step 5: Enter the location and file name using the path, or select the Browse button to pick the location for the file.
If you use the Browse button, navigate to the location, enter the file name you want to use, and select OK.
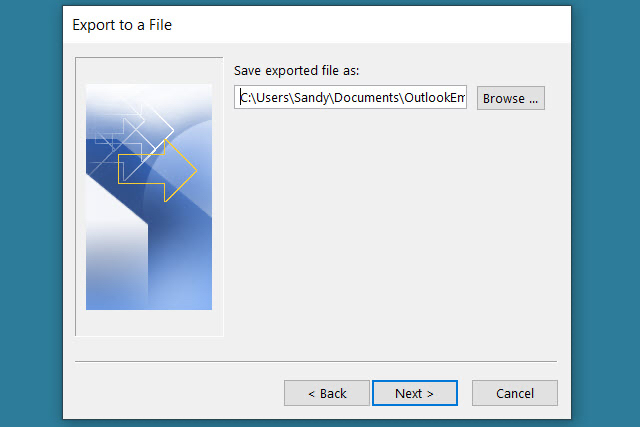
Step 6: When you have the location and file name in the Save Exported File As box, select Next.
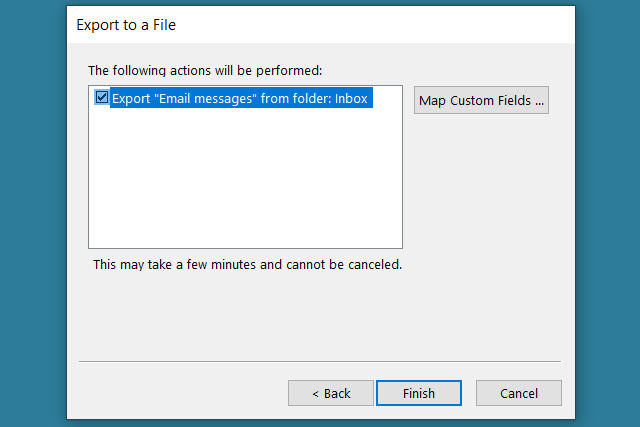
Step 7: Confirm the inbox you are exporting and select Finish.
You’ll see a brief message as the file is created, and you can then visit the location you picked to access the file and open it in Excel or a similar application.
Backing up your Outlook emails for safekeeping or importing again later takes only a few minutes. And, it’s probably worth your time to make sure you don’t lose any important messages.
For more, look at how to recall an email in Outlook or how to change your Outlook signature.
Editors' Recommendations
- How to disable VBS in Windows 11 to improve gaming
- How to convert WMA to MP3 on Mac, Windows, and Web
- How to convert M4A files to MP3 on Mac, Windows, and web
- How to convert a PDF to JPG on Mac, Windows, and web
- How to factory reset Windows 10 or Windows 11


