Mac OS is an inherently secure and private operating system, but that doesn't mean there's nothing you can do to ensure that it's as safe and private as possible. Here's how to make your Mac private and secure in a few different ways.
Lock down administrator accounts
MacOS allows multiple user accounts to be set up on a single Mac. That's a real convenience, especially if you share a machine with family members or colleagues.
However, all user accounts aren't the same, and there's one step you should take to limit access to your Mac's settings: Make sure you only have one administrator account. Administrator accounts, as opposed to regular accounts, can do anything on a Mac. They can manage other user accounts, including changing their passwords. They can install software and change all system settings, including security and privacy settings.
You only need one account with that level of control. In fact, it's not a bad idea to create a separate account just for administrative purposes. That account should have some name other than "admin" or "administrator" to make it more difficult for a hacker to guess the username, too.
Step 1: To change an account's security level, open System preferences > Users and groups.

Step 2: To make any changes to an account, you will first need to unlock the account. Select Click the lock to make changes and then enter the password for the current account. Note that you'll need to be using an administrator account to make these changes.

Step 3: Select the account that you want to enable or disable administrator privileges for. To enable administrator privileges, select Allow user to administer this computer. If the account already has administrator privileges and you want to remove them, then uncheck this setting.
Once you've finished, select Click the lock to prevent further changes.

Manage your Mac's idle time
Leaving your Mac unattended and logged in can present a security problem. That's why it's a good idea to make sure that your Mac locks itself after a period of time and requires logging in from sleep or when the screen saver is running.
Note that you can use MacOS Hot Corners feature to immediately lock your Mac. Check out our guide on how to use MacOS Hot Corners to learn more.
Step 1: To set your Mac to log out after some time, select System Preferences, Security & Privacy, then the General tab. Unlock the page using Click the lock to make changes. Select Advanced... in the lower right corner.
On the following screen, you can select Log out after and specify how many minutes of activity to wait before logging out.

Step 2: Another option to increase security is to require a password after the laptop goes to sleep or after the screen saver runs. You can choose a timeframe from immediately up to eight hours later.
In System Preferences > Security & Privacy > General, you'll find the option to configure this security setting. You can also set a lock message from the same screen.

Turn on the MacOS firewall
MacOS has a firewall that can be turned on to protect incoming connections. The firewall is turned off by default.
Step 1: To turn on the firewall, open System Preferences then Security & Privacy. Select the Firewall tab and unlock the settings. Select Turn on Firewall.

Step 2: Select Firewall Options... to configure the firewall. You can disable all incoming connections except for basic internet services, automatically allow the built-in software to receive connections, automatically allow downloaded signed software to receive connections, and enable stealth mode to hide the Mac from test applications.

Turn on the FileVault
MacOS has built-in disk encryption, called FileVault, that makes it nearly impossible for someone to access your data without logging in to your Mac. If it's not enabled by default, you should turn FileVault on as one of your first tasks when setting up your Mac.
Step 1: To turn FileVault on, open System Preferences and then Security & Privacy and select the FileVault tab. Select Turn on FileVault...
You will be presented with the option to either use your iCloud account to unlock your disk or create a recovery key. Using your iCloud account is more convenient and helps avoid the possibility of losing your recovery key.
Once you've set your options, select Continue.

Step 2: The disk will be encrypted and the progress reported in the window. Once it's completed, you'll receive a notification that a recovery key has been set and that encryption has finished.

Configure access to built-in services
You can allow various applications and services to access the built-in features and services in MacOS or disallow them for added privacy.
To configure your privacy settings, open System Preferences and Security and Privacy. Select the Privacy tab. Unlock the settings to make changes.
You'll see a list of services on the left, and then a list of applications and services that can access each one on the right. You can allow or disallow access to each service as required.

Control which apps can be installed
You can install apps on your Mac from both the App Store and from third-party developers. MacOS lets you control whether third-party apps can be installed.
To allow or disallow third-party apps, open System Preferences and Security and Privacy. Unlock the settings to allow changes.
Under Allow apps downloaded from:, select either just the App Store or both the App Store and identified developers.

Automatically update your Mac
MacOS can automatically install various application and system updates, but that's not enabled by default. Turning on automatic updates, particularly for security updates, helps keep your Mac protected from malicious actors.
Step 1: To turn on automatic updates, open System Preferences, then Software Update. Check Automatically keep my Mac up to date to turn on automatic updates. You will need to authenticate to make the change.

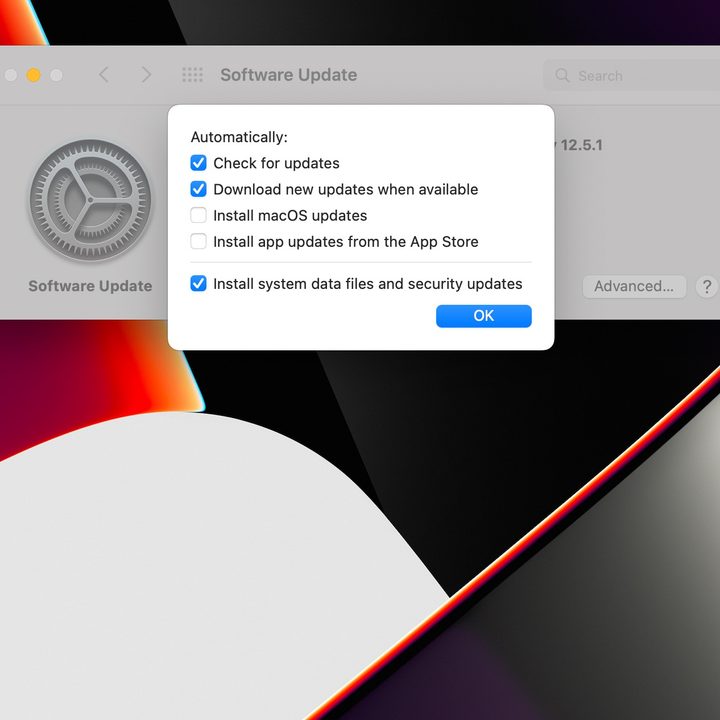
Step 2: You can specify which updates to automatically install by selecting Advanced.... You can configure MacOS to automatically check for updates, download new updates when available so that they're ready to install, automatically install MacOS updates, automatically update apps installed from the App Store, and automatically install system data files and security updates.
At the very least, you should turn on automatic updates of system data files and security updates. These can arrive at any time and need to be installed as quickly as possible. Letting MacOS install them automatically means that they'll be installed as soon as Apple makes them available.