
Every once in a while, a PC might have a file that you really need on another computer. It could be an important document, a set of photos, or perhaps something that you might want to print on another computer.
If you’re confused about how you can do so, then we’re here to help. From using a cloud storage service or physical media like a USB drive to using a network transfer, we have you covered with our guide on how to transfer files from one PC to PC using Windows 11.
And while you’re at it, we also have guides on how you can hide files in Windows.
Physical media
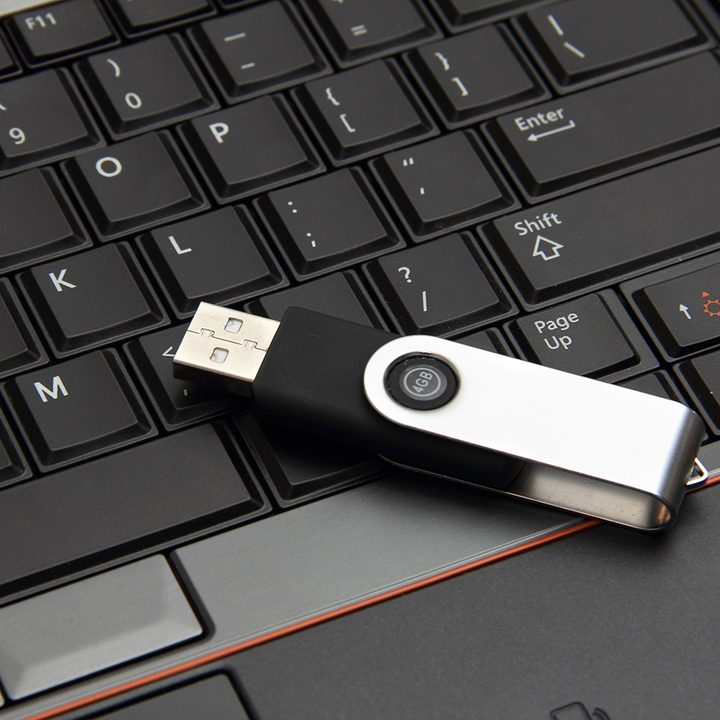
The easiest way to transfer files from PC to PC is with physical media. When we say physical media, we mean something you can plug in one PC and then another. Examples include USB drives (commonly known as flash drives) or portable solid-state disks. You even can use a CD if your PC supports it.
We have a guide for the best portable hard drives if you need even more storage space. In all cases, you want to make sure that the drives are at least USB 3.0 compatible so you can get the fastest transfer speeds.
Also look out for newer drives that have USB-C, as newer PCs don’t have traditional USB-A ports, and you might need a dongle for your drive.
Step 1: Plug the drive into your main PC via one of the USB ports.
Step 2: In the pop-up prompt that says Choose an Action, choose the option to Open Folder to View Files.
Step 3: Keep the window that you just opened at the front of the screen, and then hit Control + N to open a new File Explorer window.
Step 4: In the new window that just opened, navigate your way to where the file you want to transfer to the other PC is saved. It could be in documents or elsewhere. Find the file, click it to highlight it, then hit Control + C on your keyboard while it’s still highlighted.
Step 5: Navigate back to the open window for your USB drive. Hit Control + V to paste the file into your USB drive.
Step 6: Unplug the USB drive from your main computer once the transfer is complete. Plug it into the other PC, and then choose Open Folder to View Files. Find your file, and then click on it to drag it to your desktop or any other location on the second PC.
Cloud storage or email
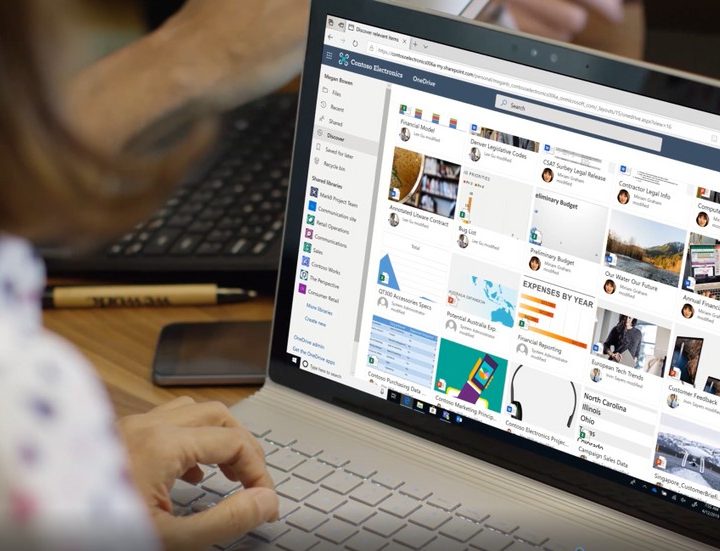
Another good way to get files from one PC to another involves cloud storage or email. This method involves having an internet connection on both PCs, but otherwise, it’s the simplest option. There are many cloud storage services you can choose from and also many emailing services. Just keep in mind that email and cloud services have file-size limits, so for large transfers, you might be better off using physical media (as we described above).
We prefer using Microsoft’s OneDrive and Outlook, so our directions will cover these services. Compare OneDrive vs. Dropbox if you’re not sure which to choose.
Step 1: Sign in to OneDrive using your web browser.
Step 2: In OneDrive, click the blue Upload button at the top of the screen. Then choose Files. You also can create a folder with the New button to the left if you want.
Step 3: Navigate to where your file is saved on your PC.
Step 4: Click that file, and then choose Open.
Step 5: The file will upload.
Step 6: Visit OneDrive on the second computer and then navigate to where you uploaded the file online in OneDrive. You also can search for it using the box at the top of the screen.
Step 7: Click on the file and then choose Download to download it and save it to your other PC.

If you’re opting to email the file to yourself using Outlook on the web, then you can follow our steps below. For other services like Gmail, you can look for support documents online.
Step 1: Visit Outlook.com in your web browser.
Step 2: Compose a new email, and then click the Attach button (it’s a paper clip). You’ll also want to make sure you’re sending it to yourself and to your own email address for quick access.
Step 3: Attach your file by browsing for it and clicking Open. If the file is too large, try zipping it.
Step 4: Send the email to yourself.
Step 5: Open Outlook.com on another PC and open the email attachment to save it.
Wireless transfers with nearby sharing
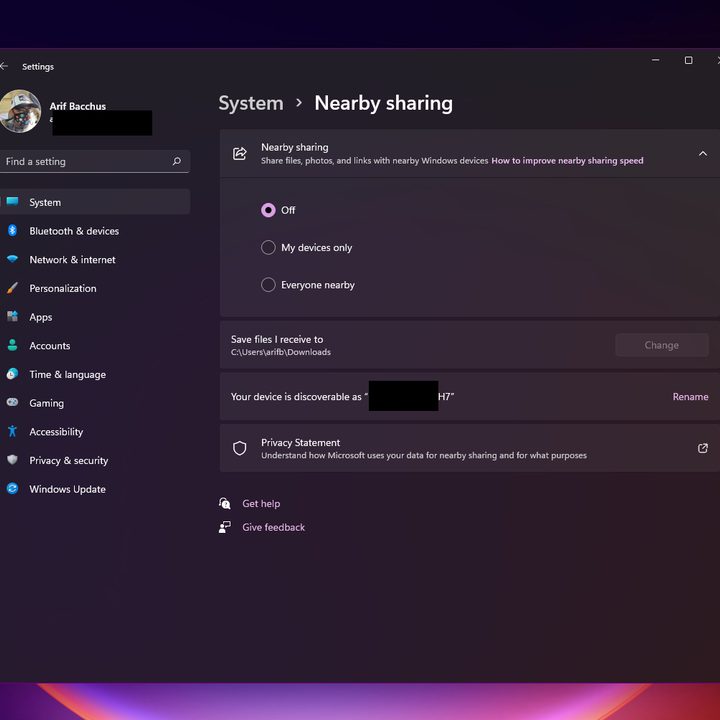
Another quick way to transfer a file from one PC to another is through Windows’ Nearby Sharing menu. This lets you use Bluetooth and Wi-Fi to share documents, photos, and even links. Again, you’ll have to have Bluetooth enabled on both PCs. Then, make sure they’re on the same Wi-Fi network. Here’s how to use it:
Step 1: On the PC you’re sharing from, select the Action Center, choose Nearby Sharing, and make sure it’s turned on. After that, do the same on the PC you’re sharing to. If you don’t see this setting in the Action Center, you can search for it in the Windows settings app and then toggle the switch for Everyone Nearby.
Step 2: On the PC that has the document you want to share, open File Explorer and find the document you want to share.
Step 3: In the File Explorer, select the Share tab, select Share, and then select the name of the device you want to share with in the pop-up list.
Step 4: On the device you’re sharing with, select Save & Open or Save when the notification appears.
Network transfers

Arguably the fastest way to transfer files from PC to PC is with a network transfer; it’s just a little more complicated to set up. For this option, you need to make sure that both PCs are on the same network and have network discovery turned on. This is something best done at home or in the office, and can work between most versions of Windows. Follow along below for some directions.
Step 1: Navigate to the File Explorer on your main PC and choose Network from the sidebar. If you get an error about Network Discovery, click OK, and then click the Yellow Error Banner in the File Explorer to turn network discovery on. Click Yes on the prompt.
Step 2: Do the same on your second PC to make sure network discovery is turned on with all devices.
Step 3: Go back to your main PC. Then, right-click the file you want to share across both PCs. From there, choose to Give Access To. Choose Specific People from the list.
Step 4: In the drop-down box, choose Everyone, and then choose Add. After that, in the drop-down box under permission level, choose Read/Write. Then click Share. Note down the file path listed there for access in the next step.
Step 5: Open the File Explorer and type \\localhost into the address bar on your main PC. This will let you open up a list of everything on your PC that can be shared across the network, just to be safe.
Step 5: Go to your secondary PC, and visit the Network section in the File Explorer. You should see your other main PC with the file listed here now.
Step 6: From the network section, click on your main PC name to navigate to the location where the file is saved on the main PC (in the location you noted earlier). Hit the Control + C keyboard shortcut to copy it when you see it, then minimize the window and go to your desktop to paste the file onto your secondary PC.


