Just like on an iPhone and iPad, the Find My app on MacOS helps you locate people, devices, and items. Depending on what you want to find, you can take additional actions such as getting directions or turning on "lost" mode.
Whether you lost your iPhone or want to confirm your child made it to school safely, here’s how to use Find My on a Mac.
Turn on Location Services on Mac
To use the Find My app on your Mac, make sure you’re running MacOS Big Sur or later and have Location Services enabled.
If you already use Location Services on your Mac, you can skip down to the next section. Otherwise, follow these steps to turn on the feature.
Step 1: Open System Preferences using the icon in your Dock or the Apple icon in the menu bar.
Step 2: Select Security & Privacy.

Step 3: Click the Padlock on the bottom-left to unlock the settings. Enter your username and password.
Step 4: Select the Privacy tab and click Location Services on the left.
Step 5: Check the box for Enable Location Services at the top of the right side.
Step 6: Check the box for Find My in the list of apps on the right.
You can then click the Padlock to relock the settings.
Click the Show All icon at the top of the System Preferences window. This returns you to the main screen for the next part of the process.

Turn on Find My on a Mac
If you closed System Preferences or already had Location Services enabled, open System Preferences to turn on Find My.
Step 1: Select Apple ID.
Step 2: Pick iCloud on the left.
Step 3: Check the box for Find My in the list of apps on the right.
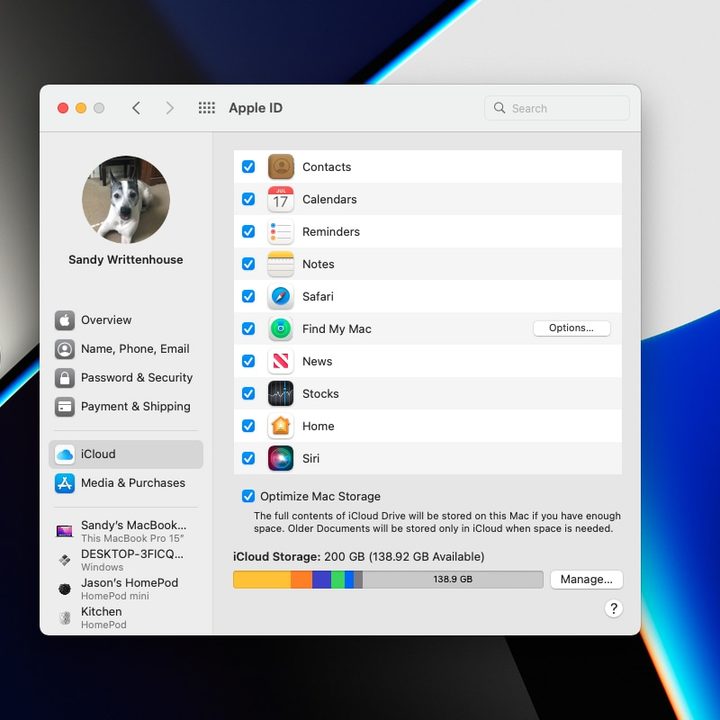
Step 4: If prompted to let Find My Mac use your location, pick Allow.
You can also click Options next to Find My on the right and turn on Find My Mac and Find My Network if you like. Click Done.
When you finish, close System Preferences and get ready to use the Find My app.

Use Find My for friends or family
If you have friends or family members sharing their location with you, you can see where they are using Find My.
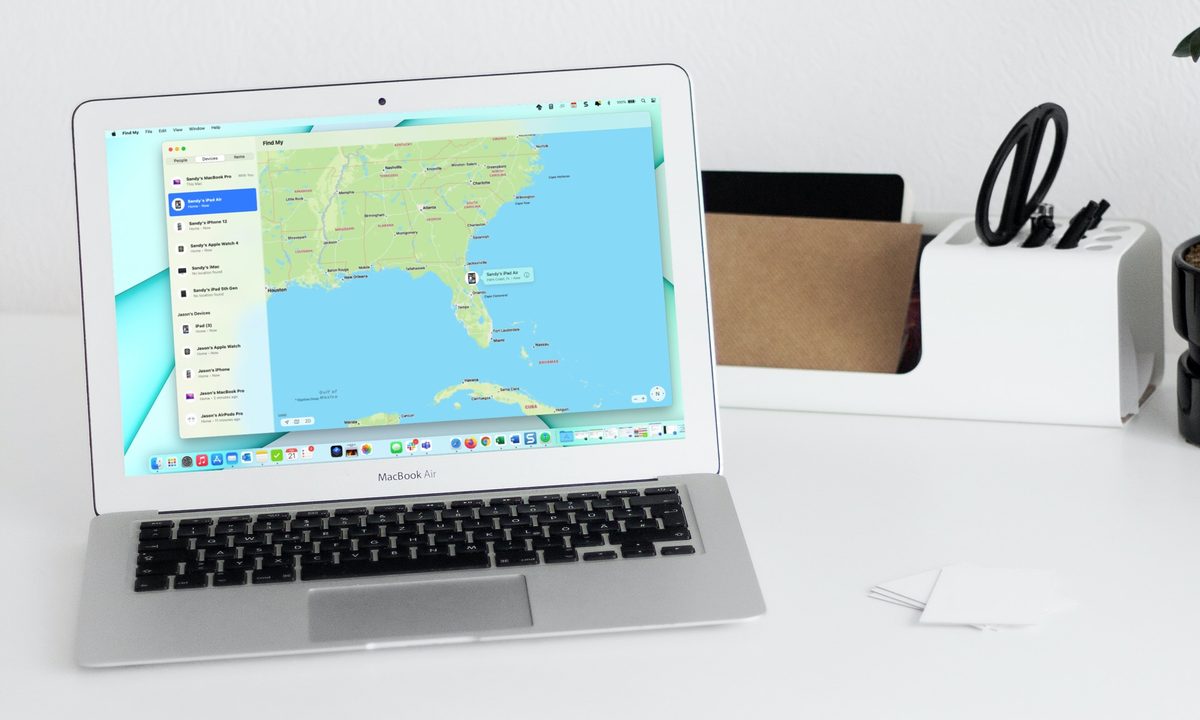
Step 1: Open the Find My app from the Applications folder on your Mac.
Step 2: Select the People tab at the top of the sidebar or View > People from the menu bar.
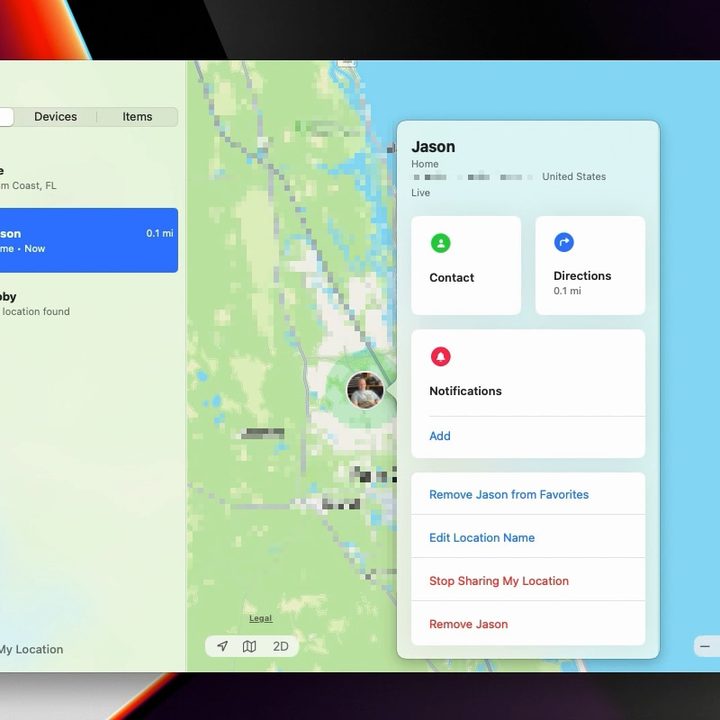
Step 3: Choose a contact from the list and you’ll see their location plotted on the map to the right.
Step 4: To get their exact location with an address, see directions to their spot, or add a notification, click the Info icon next to their name on the map.
Use Find My for devices
When you or a loved one misplaces an Apple device, you can use the Find My app to track it down.
Step 1: Open the Find My app from the Applications folder.
Step 2: Select the Devices tab at the top of the sidebar or View > Devices from the menu bar.
Step 3: Choose a device from the list and you’ll see its location on the map to the right.
Step 4: To see its exact location with an address, play a sound on the device, mark it as lost, or receive notifications when you leave the device behind, click the Info icon next to the device’s name on the map.
You can also right-click a device in the list for a few quick actions.
Note that if you have disabled location services on your iPhone, this won't work.

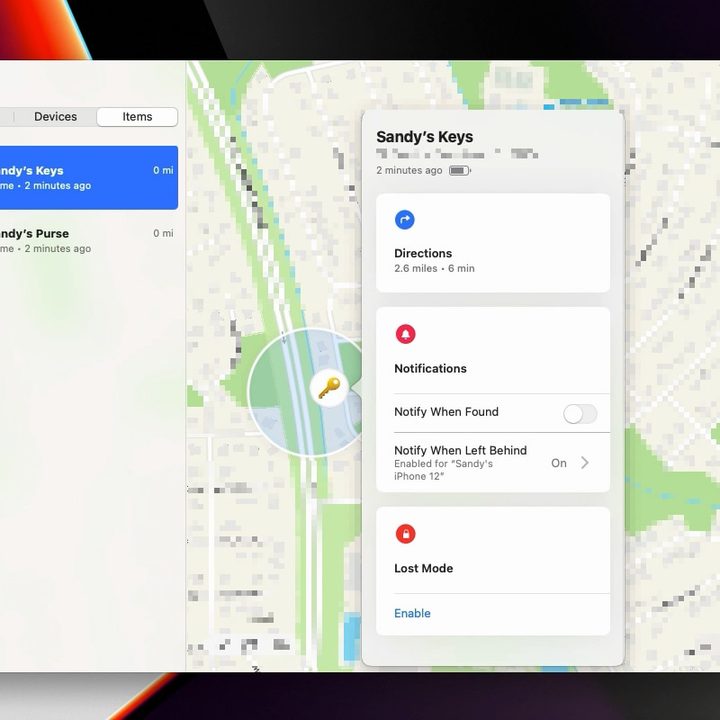
Use Find My for items
If you own AirTags or another type of item supported by the Find My app, you can see where those items are located, too.
Step 1: Open the Find My app from the Applications folder.
Step 2: Select the Items tab at the top of the sidebar or View > Items from the menu bar.
Step 3: Choose an item from the list, and you’ll see its location on the map to the right.
Step 4: To see its exact location with an address, get directions to its spot, enable notifications, or turn on lost mode, click the Info icon next to the item’s name on the map. The actions available depend on the item.
Change the Find My view
While using the Find My app, you can switch from the default view to Satellite or Hybrid, change from 2D to 3D, and zoom in or out.
On the bottom-left of the map side of Find My, you’ll see the icons to change the view or enable 3D. You can also switch views or adjust the distance measurement using View in the menu bar.
On the right side of the map, you can zoom in and out using the Plus and Minus buttons. For a quick way to zoom in, you can simply double-click the map.
Find My is a helpful app on Mac that allows you to check on a family member or find a misplaced device with only a couple of clicks. Hopefully, you won’t have to use it often, but know that it’s there when you need it.
If you do lose your device, encrypting with FileVault will ensure the data is protected.