How to get the Hylian Shield in Breath of the Wild

Legend of Zelda: Breath of the Wild still reigns as one of the best open-world RPGs in recent history. There’s a seemingly endless plain of areas to explore, mountains to climb, and gear to obtain. Of course, there are only two pieces of equipment that all Zelda fans strive to get. The Master Sword and the Hylian Shield are Link’s iconic weapons. No Legend of Zelda game would be complete without them. Since they’re some of the most powerful weapons in the game, they’re not easy to come by. This guide will focus on where to find the Hylian Shield in Breath of the Wild.

See more

BOTW – Hylian Shield location

If you plan on adventuring for the Hylian Shield, you’ll need to err on the side of patience. Players will have to travel deep into Hyrule Castle to find the Hylian Shield. While players can technically speed-run to Hyrule Castle to get the shield, they will come up against some challenging enemies. It’s best if you grind out the early stages of the game. Your best bet is to obtain a few extra hearts and high-powered weapons before attempting to go after the Hylian Shield.

Recommended Videos

Once geared up and ready to go, you’ll want to head to the west side of the castle. You’ll find a narrow interior passed called Hyrule Castle Lockup. Here you’ll discover imprisoned creatures that are not fans of Link.  There are two different ways to get into Hyrule Lockup, and both will require you to find specific items throughout the game.

Entrance #1 – Secret Mine Cart Entrance

Mine Cart Entrance Hylian Shield BOTW
Image used with permission by copyright holder

From the Western moat, head northwest from Katah Chuki Shrine, past the Water Reservoir, and climb one of the large pillars. From atop the pillar, glide around the right side to keep the pillar on your left. You’ll be aiming for a narrow entryway to the left of a waterfall. More specifically, the entrance is on the beach under the First Gatehouse. You can also swim across the moat and up to the beach. Be careful; there’ll be handfuls of ancients looking to block your path.

Once you’ve ventured into the entrance, look for a rideable mine cart that will take you to a bombable wall. Remember, you’ll need to use a Remote Bomb to get the mine cart moving. Follow the torches up a path to the left side of the area. At the end of this hallway, you’ll find a breakable wall. Blow it up and enter the prison block.

Entrance #2 – Castle Town Prison (Main Entrance)

Head around the northern edge of the Castle Town Prison until you find a docked raft. It’ll be to the left of the words “Hyrule Castle Moat.” Hop on the raft and use a Korok leaf to ride the raft to the northern end of the moat. You’ll find the main entrance to the prison after heading up the path in from of you. Use a Cryonis rune to open the gate and enter the prison.

Where to find the Hylian Shield
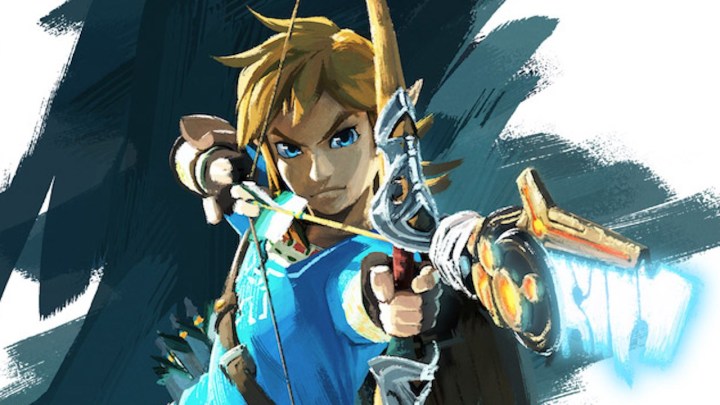
Nintendo

Once inside, you’ll be looking for a circular room full of bones. It’ll take some exploring depending on which method you used to enter the Prison Block. As mentioned, you’ll be fighting high-level enemies such as Moblins. Once you find the bones, they’ll assemble themselves into a mini-boss fight, the Stalnox. Shoot the Stalnox in the eye to stun it. However, shooting the eye with an explosive arrow will dislodge it. From here, wail on the eye to deal massive amounts of damage. Killing the Stalnox will reward you with a chest that will contain the Hylian Shield.

Mike Colucci
Former Digital Trends Contributor
Michael Colucci is a lifelong video game fan based out of the greater Boston area. He's the one insistent on searching every…
How to upgrade armor in Monster Hunter Wilds
A Monster Hunter Wilds character wielding the Lance.

Staying alive shouldn't be a surprising tip or trick you need to learn in Monster Hunter Wilds. While upgrading your weapons comes down to forging new ones with Gemma, which is made all the easier with the wishlist feature, the early hours of Monster Hunter Wilds will force you to make new armor sets if you want to increase your defense. Once you get a bit further into the story, though, you will be able to upgrade your existing armor so you can keep all your favorite perks and skills associated with it. Here is when you can upgrade your armor and how it works.
How to upgrade armor

You won't be able to upgrade your armor until the early parts of Chapter 2. Once you reach the Oilwell Basin region and can access the forge again, Gemma will tell you about armor upgrades.

Read more
Where to find iron in Monster Hunter Wilds
Gemma working the forge in Monster HUnter WIlds.

Ask any Monster Hunter Wilds player and they will tell you that the most important tip and trick to know is how vital it is to always upgrade your gear. There are no levels like a normal RPG, so the only way to get stronger is to forge better weapons and armor at the blacksmith. Like almost every game, you can't just make better gear for free. It costs you money and the raw materials to make it. One of the early materials you will need to get is iron. Unlike monster parts, you need to go out of your way to find deposits of iron to mine to get your hands on it. If you're at a loss for where to track down this ore, here's where you can find iron in Monster Hunter Wilds.
Where to find iron

Iron is a very common resource in the starting area of Monster Hunter Wilds, Windward Plains, but it also shows up in Scarlet Forest. You can see it as a big blue geode on the ground and a blue icon on your map. The easiest way to locate them on your map is to open your map and open the Filter Icons menu. Turn everything off except for the Mining Outcrop icons. Then, all you need to do is find an iron one on your map, set a waypoint, and have your Seikret take you there.

Read more
Monster Hunter Wilds weapons guide
A hunter leaps at a Monster in Monster Hunter Wilds.

There are dozens of important tips and tricks you need to master in Monster Hunter Wilds, but they all pale in comparison to learning how to use your weapon effectively. All 14 are available right from the start and each one completely changes the flow of a hunt. Experienced hunters will be familiar with most of them, but there are some new aspects to take into account this time around. If you plan on playing with friends especially then you will want to make sure you're not holding the team back by just spamming attack. Before you put a new weapon on your wishlist, check out this quick weapons guide for Monster Hunter Wilds.
Weapons guide

As mentioned, there are 14 weapons in Monster Hunter Wilds. We will give you a basic idea of each one's strengths, weaknesses, and playstyle but the best thing you can do to decide is take on into the training area and try it out.
Great Sword
If you like a slow weapon that packs a massive punch, the Great Sword is still the king. This is the iconic weapon of the franchise capable of high-damage charge attacks and a block. You need to be brave and account for your slow swing speeds to land a hit, but once you do, it will count.
Long Sword
A sword so long even Sephiroth would be jealous. This weapon allows you to perform perfect dodges and counterattacks more like an action game. It also has nice wide, sweeping attacks for smaller mobs and hitting multiple parts of a monster at once. Landing hits builds a spirit gauge you can spend on a special combo that buffs your attack.
Sword and Shield
If you're new to the series, this is a great weapon to start with. It has fast attacks with the sword and shield, a decent block, dodge, and is the only weapon that lets you use items without having to put your weapon away first.
Dual Blades
For something a bit more fancy, the Dual Blades are just as fast but have more layers to consider. They give you a Demon and Archdemon gauge that buffs your attack power and speed as you build each one up. If you want to be fast and aggressive, give these a whirl.
Hammer
The Hammer is a lot like the Great Sword, only dealing blunt damage that can quickly tire a monster out or stun it if you target the right body parts. You're not as slow with this weapon and have a dodge, but no guard.
Hunting Horn
This weapon is one best saved for veterans or players who are part of a dedicated squad. The horn plays different tunes that buff yourself and other hunters in addition to attacks, meaning you need to pay attention to the entire battlefield and know which buffs to trigger when.
Lance
If you fancy yourself a tank, pick up the Lance. This weapon lets you attack from relative safety behind your big shield at the expense of speed and damage. What it lacks in damage, however, it makes up for in targeted damage. You can easily wound and exploit a monster's limbs with precise thrusts.
Gunlance
The Gunlance is basically what it says on the tin. You still have the heavy shield, but now focus on shooting explosive shells. It gives you a lot more range to work with and has a dodge.
Switch Axe
This weapon feels ripped right out of Bloodborne. You can use it as a heavy axe or transform it into a more nimble sword. Each one has their strengths, such as being able to cause explosions, but neither are the best in their class. If you want to be as versatile as possible, go with this.
Charge Blade
Another transforming weapon, the Charge Blade also has an axe mode as well as a sword and shield. Most consider this the most difficult weapon to master in the series since using one mode powers up the second and each has their own complete combo list to internalize.
Insect Glaive
Verticality is better in Monster Hunter Wilds than ever before. The Insect Glave will let you leap and sping around the environment and make mounting monsters a breeze. You will need to snag parts of monsters with your Kinsect during fights to buff yourself otherwise you will deal very little damage.
Light Bowgun
The first pure ranged weapon, this bowgun keeps you light on your feet and has a fast rate of fire for great DPS if you can keep the monster in your sights. Landing hits build up a gauge you can spend on a Rapid Fire ability to unload all at once. Just make sure you come stocked with ammo.
Heavy Bowgun
We suggest saving the Heavy Bowgun for party hunts since it is most effective from long-range while others draw aggro. You do have an auto-guard just in case, but an ideal run with this weapon will have you sniping from a distance with the correct ammo type to bring down your target.
Bow
The Bow is unique compared to the other two ranged weapons. It uses your stamina to draw and fire but encourages you to stay somewhat close since a perfect dodge will completely refill your stamina. The coolest feature, though, is the tracer shot. Once you land this, all the arrows you shoot after will home in on that spot. Eventually, the tracer explodes for even more damage.

Read more