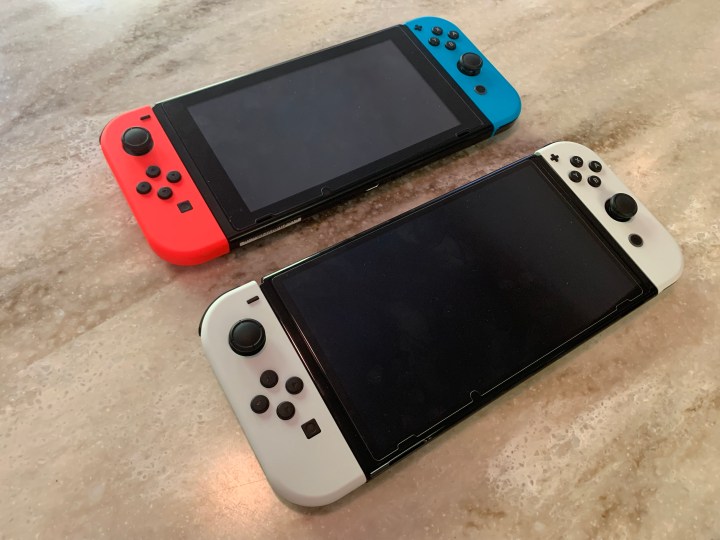
If you've picked up a new Nintendo Switch OLED, you already know that it's a substantial upgrade from the previous iterations of the console. Without even offering any performance boost, all the best Switch games look even better on this new display. Whether you're playing any of the free games on Switch or kicking back with a party game, the OLED is the best way to play all the current and upcoming Switch titles.
But because this version of the Switch came out later, it might not be the console you started on. Being a member of Nintendo Switch Online helps, but there are multiple ways to transfer all your data to the OLED.

How to transfer data from Switch to Switch OLED
You’ll need your original Switch, along with the new Switch OLED turned on, to begin the transfer process between the two. Both systems need to be plugged in for this so they don’t die in the middle of the transfer. (If you don’t have access to the old Switch system, you can skip down to the alternative method we have below.)
Step 1: Go through the setup process on the new Switch OLED and get to the point where you can navigate the main menu. Before starting the transfer process, make sure your Switch OLED has the most recent update. To verify, select System Settings indicated by the gear icon from the main screen and then navigate down to System. From here, select the System Updateoption, and if an update is available, it will begin downloading.

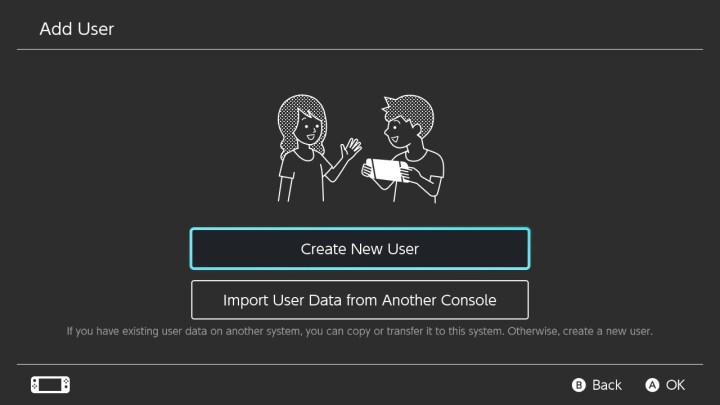
Step 2: After the system has been updated, make your way back to System Settings * -> *Users -> Add User -> Import User Data from Another Console.

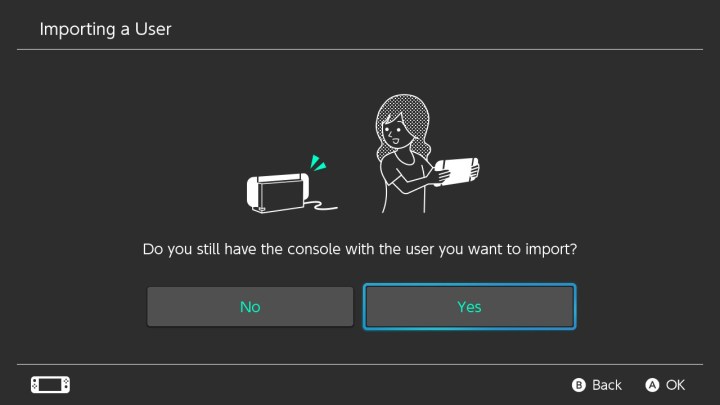
Step 3: Then, the system will ask you if you still have the console with the account you want to import. Select Yes.
After that, it’ll ask if you still intend on using the previous console. The answer to this question will differ from person to person, but it’s likely you won’t be using the older system anymore.
We selected No in our case. You’ll be notified that the data will be deleted from the source system after the transfer process is complete, which is fine since everything will be available on the new OLED system. Press Next, and you’ll be taken to the following screen. Click Transfer to begin the process.

Step 4: At this point, the system will ask you to sign in to the Nintendo Account for the user that will be transferred. Select Sign In and you’ll be presented with two options: Sign in using email and password or sign in using a QR code and smart device. Pick whichever one you’d like, but note that the QR code option is convenient and easy.
If you select the QR code method, you’ll need to scan the QR code with the camera on your smart device and follow the on-screen prompts to sign in to your account. Then utilize the five-digit code to get signed in on your system. Alternatively, you can simply sign in the old-fashioned way by typing in your email and password. After you’ve signed in on the Switch OLED, the system will confirm “X user will be transferred to this console. Please ready the console from which X user will be transferred.”
Select Next, and once you do, you’ll be ready to move over to the source Switch. Keep your Switch OLED on and plugged in at this point.

Step 5: On the source Switch, make sure it’s plugged in and navigate to System Settings from the main menu. Then navigate to Users -> Transfer Your User Data -> Next -> Next -> Source Console. The Switch OLED is the target console, while the original Switch is the source console. After this, select the user you’d like to transfer and then click Continue.

Step 6: Now, the Transferring Users screen should show both your original Switch on the left, along with the OLED model on the right. If the OLED model doesn’t appear, make sure it’s plugged in and that it’s also on the Transferring Users screen. Once both appear, select the blue Transfer button on the bottom from the original Switch system. Depending on how much data is being transferred, this process might take a while, so give it time and check it periodically.
Remember, this will migrate your account and saved data from the source system to the new system.
Step 7: Once the transfer is complete, select the End option to finalize the process. On the Switch OLED, assuming you don’t have any other accounts to transfer, you can select Skip when it asks if you want to add additional users. Navigate through the prompts, and once the system asks you to press the Home button, you’ll be all set.
Alternative method of transferring data from Nintendo Switch to Switch OLED
While the previous method works well and is thorough, it might be a little too comprehensive for some users. Or maybe the transfer process simply isn’t working for you. Luckily, there’s an alternative method for transferring the data from a Nintendo Switch to a Switch OLED works just as well and is much faster to complete. It’s not necessarily a transfer process but simply involves signing in to the new Switch OLED and manually moving everything over. Keep in mind, you’ll need to be a Nintendo Switch Online subscriber to download your saves from the cloud.
Here’s how it works.
Step 1: Navigate to the System Settings on the Switch OLED and then select Users -> Add User -> Import User Data from Another Console.
From here, it asks if you still have the old console with the user you’d like to import from. Select No (even if you do have the old system), and then it’ll ask you if your Nintendo Account was linked to that console. Select Yes.
Step 2: Then, select Link a Nintendo Account and sign in using that account information. Once you’ve signed in, click through the prompts and you’ll have that account on the new Switch OLED system. From here, grab your old Switch system, go to the eShop, and then select your User Icon on the top right. From here, scroll down on the submenu that has your email address on the top left and you’ll find the Primary Console section. Deregister it, and then your new Switch OLED should register as your new primary console by default. If you have any other systems with your accounts on them, you might need to deregister those as well.
If you don’t have access to the old system, you’ll need to deregister it online from the Nintendo website.
Step 3: After your Switch OLED is registered as your primary console, you can head into the eShop to manually re-download all your games tied to the account you want to use. Select your User Icon in the top right and then Redownload to be taken to the list of games.
To acquire your saved data, navigate to System Settings and then Data Management -> Save Data Cloud -> All Save Data. Here, you can select the games you’d like to re-download the saved data for. Just keep in mind not every game supports this option, but most do.


