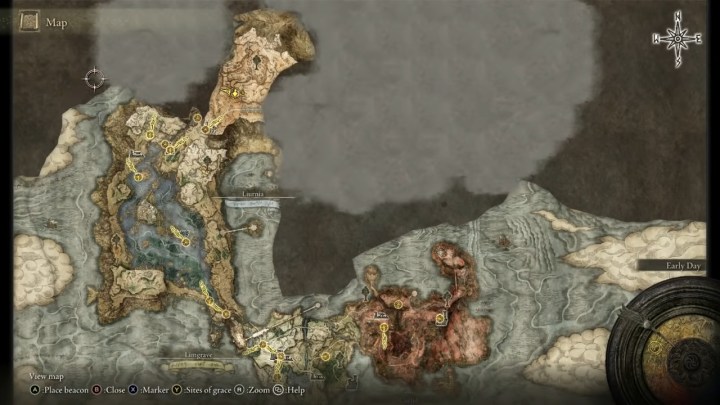
The mere concept of a map in a Souls game was a comical fantasy prior to Elden Ring. In those more linear — yet sprawling and intricately designed — games, a map would not only trivialize most of the sense of wonder and exploration but also cut out the satisfying moments of opening up a shortcut leading back to a familiar place you never expected. Because of the scope of the world in Elden Ring, it would be cruel to make people try to navigate this incredibly vast world without some form of guide. So, for the first time in a Souls game, FromSoftware has given players access to a map — although it comes in an incomplete form.
- All Limgrave map fragment locations
- All Weeping Peninsula map fragment locations
- All Caelid map fragment locations
- All Liurnia map fragment locations
- All Altus Plateau map fragment locations
- All Mountaintops of the Giants map fragment locations
- All Siofra River map fragment locations
- All Deeproot Depths map fragment locations
- All Ainsel River map fragment locations
To fully utilize your map, you will need to find fragments that fill in the details of specific areas on the map. Otherwise, you only get a vague outline of the area you’re in. Even with the fragments, it’s still up to you to go out and explore the area to add in important points of interest, but having a good lay of the land can make finding these places much easier, especially if you’re seeking all the optional dungeons or trying to hunt down certain items. There are 19 map fragments in total to fully reveal the vast world map of The Lands Between, and we’ve charted your course to finding them all in Elden Ring.
See more
- What are Evergaols in Elden Ring?
- Fastest way to farm runes in Elden Ring
- How to duplicate Remembrances in Elden Ring
All Limgrave map fragment locations

Where better to start than the starting zone of Limgrave. You will almost certainly stumble upon this map fragment just following the critical path, but if not, you can find the Limgrage, West fragment in the Gatefront Ruins. It is right in the center of the camp of soldiers, so either sneak or slash your way to it.
Limgrave, East is off in Mistwood. There isn’t a particularly close Site of Grace, but if you follow the main road north from Fort Haight West, you will ride right up to it as you’re passing the minor Erdtree on your map. It’s very close to the Siofra River Well if you’ve discovered that area.
All Weeping Peninsula map fragment locations

There’s only one map fragment for this entire zone, and it’s quite easy to get to once you make it across the bridge. Just follow the road you enter on straight south, or pick it up from the Castle Morne Rampart Site of Grace, and it will be on the west side of the road before the massive clearing leading up to Castle Morne itself. Just be careful if you haven’t gone this far before, because there’s a giant archer ready to snipe you once you step in range.
All Caelid map fragment locations

Moving east from Limgrave, Caelid has two more maps to collect. We’ll start with the Caelid map first, which uncovers the southern section of the region. The best way to reach it is to mount up on Torrent and start riding down the main road south from the Smoldering Wall, past a couple of Sites of Grace, right until the road forks. The map will be right at the fork, but be quick about snagging it or some giant bird enemies will come down to ruin your day.
On the near opposite side of the region is the other map fragment: Dragonbarrow. If the name didn’t spell it out for you, this area is quite perilous thanks to a bunch of dragons living there. Reaching this area isn’t too convenient. If you’ve teleported and found the Bestial Sanctum, you can ride down, cross the bridge, and travel past the Erdtree and west right up to the map fragment. If not, you will need to pass through Sellia, Town of Sorcery, cut across to the road, and grab the map straight north of the Sellia Crystal Tunnel.
All Liurnia map fragment locations

After getting through, or around, Stormveil, you can start exploring Liurnia. The Liurnia, East map is right in the beginning section of the flooded region, due north of the Liurnia Lake Shore Site of Grace. There will be a few mobs around, but nothing too dangerous.
Liurnia, North is the next in line as you navigate the swampy zone. Following the Sites of Grace northwest, cut north once you hit the Boilprawn Shack toward the Academy Gate Town. The map fragment is in view from this Site of Grace.
The last part of this map is quite out of the way. Liurnia, West is up on the land above the sunken section on the west, meaning you will have to go all the way north, find your way up out of the pit, and then ride back down south from Caria Manor and Seluvis’s Rise. It will be just a bit south of Kingsrealm Ruins near the Northern Liurnia Lake Shore Site of Grace.
All Altus Plateau map fragment locations
Assuming you take the main path into the Altus Plateau via the Grand Lift of Dectus, follow the path ahead of you and veer north when it splits, grabbing the Altus Highway Junction Site of Grace on your way. Just keep going north along this path and the map will be on the west side undefended.
Way over on the west side of this region, the Mt. Gelmir map is perhaps the trickiest to get. Not only do you need to travel all the way over to Volcano Manor, which is a very dangerous lava zone, but the map itself is behind a boss encounter you need to overcome. After dropping into a boss area, which we won’t spoil, you will be able to proceed forward and grab the map once you overcome your foe, but don’t let your guard down — another enemy is waiting in ambush.
Finally, we head to the city itself for the Leyndell, Royal Capital map. This one, if you’re not ready for a massive challenge, requires some quick movement on Torrent to reach unscathed. Instead of going north from the Altus Highway Junction like we did previously, go farther east and up the massive stone stairs. Not only will there be a ton of enemies waiting to try to trip you up but also two Tree Sentinels waiting at the door at the top. Thankfully you can rush past them, but still be careful because one unlucky hit can knock you right off your mount and into a bad situation. Make it through the door and you’re in the clear once you touch the Outer Wall Phantom Tree Site of Grace just a step or two away from the map fragment.
All Mountaintops of the Giants map fragment locations
The last above-ground region is the Mountaintops of the Giants, reached via the Grand Lift of Rold. The first map, Mountaintops of the Giants, West, is just a short trip north from the entrance to the area. It’s just north of Zamor Ruins, and right next to the Zamor Ruins Site of Grace.
The Consecrated Snowfields map is, you guessed it, in the Consecrated Snowfields. If you pop over to the Inner Consecrated Snowfield Site of Grace, all you need to do is cross the river to the north and you will run right up to this bit of the map.
The final map fragment here is the Mountaintops of the Giants, East. You will need to navigate your way through the snowy mountains a bit until you can curve around west by the Shack of the Lofty and over to the Albinauric Rise area. We recommend staying on the south side of the river until you hit the Inner Consecrated Snowfield Site of Grace before crossing north since the map fragment is almost a straight shot between there and Ordina, Liturgical Town.
All Siofra River map fragment locations

There are two map fragments in this area, but you need to come at each from a different angle. The first, Siofra River, is the easiest. By heading down from the Limgrave entrance, just head south through the zone until you hit the Siofra River Bank Site of Grace. Directly ahead to the east, in the middle of a slightly sunken island, is the map just before the Hallowhorn Grounds.
The other map fragment, Mohgwyn Palace, can only be reached via a special teleporter hidden in the Consecrated Snowfield or by completing a certain NPC’s quest line. While getting there is difficult, finding the map is simple. All you need to do is follow the checkpoints until you hit the Dynasty Mausoleum Entrance Site of Grace. From here, the map will be on the body near some stone ruins.
All Deeproot Depths map fragment locations
There’s just one map for the Deeproot Depths, and it is right in the center of the area. It is almost triangulated by the Deeproot Depths, Across the Roots, and The Nameless Eternal City Sites of Grace. Just rush through the water to the central area and pick it up off a corpse on some stairs.
All Ainsel River map fragment locations
Entered from Liurnia, this area is almost completely linear, so just take your time going through the zone until you hit an area with some ruins and a big monster floating overhead shooting purple projectiles at you. Avoid them and rush to the building directly under it as fast as you can to grab this map.
A little deeper in, following the river running north from the last fragment, find the Nokstella Waterfall Basin Site of Grace and spin around. There’s a narrow river you can follow going southwest right to the Lake of Rot Shoreside Site of Grace. The map is south from here on the shore of the deadly red waters.


