
Fallout 76 arrived at the end of 2018, bringing multiplayer to the beloved franchise. The game started on bad footing but has greatly matured since. Now with the massive Wastelanders content update live, Appalachia feels less barren than before. Human NPCs are here to extend the storyline and cause even more havoc. That said, now is the perfect time to jump into what remains of West Virginia.
Because Appalachia is so massive, stepping outside Vault 76 may be a bit overwhelming. This isn’t Fallout 4. You can’t go home and rebuild. You must not only make a home, but gather resources to stay alive, stay healthy, repair your armor and weapons, and so on. Thirst. Hunger. Caps. Wood. They’re all major gameplay components.
To help ease the transition from pampered vault dweller to expert wasteland survivalist, here are tips for newcomers just now stepping out into the wild. It’s both a scary and fascinating place to explore, and we’re here to help.
Further reading
- The best MMORPGs
- Fallout TV series coming to Amazon from Westworld creators
- The best Fallout Shelter tips and tricks
Avoid striking back if possible
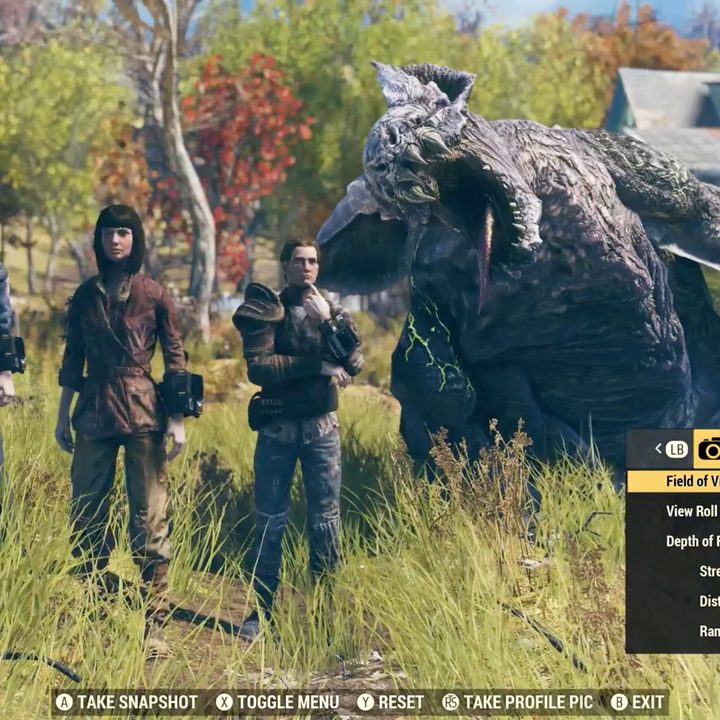
The player-versus-player component unlocks at Level 5. Because you’re fresh meat in an untamed world, some of the other 23 players — likely higher up the experience ladder — may hit you to initiate combat. If you strike back, the duel starts. If you’re slain, any resource you collected until then falls to the ground in a paper “death” bag and is scooped up by your opponent.
Unfortunately, you may encounter this issue anywhere unless you opt for the Fallout 1st subscription, which eliminates these pesky players and places you on a private server. You’ll also encounter these aggressive “griefer” players invading your C.A.M.P.
The problem here — outside the mosquito-like annoyance — is that you won’t be immune by refusing to engage. Instead, each attack has reduced damage, but the player will eventually kill you. Even more, some mutations automatically strike back, so you’re out of luck in that aspect.
To strike back or not is a good question. Hopefully, ignoring those taunts will leave your attacker bored and running off to terrorize someone else. Hopefully.
But don’t take this tip the wrong way: Not every player is out to cause grief. That leads us to the next tip.
Team up

Although human NPCs now reside in Appalachia, they can’t join your party as seen in Fallout 4. Instead, you must socialize with other players on the server. How you choose to interact with these people is ultimately up to you, but if you want to expedite base building, spend less on fast travel, and increase your chances of survival, you should make friends — especially when there are other aggressive players in the area.
If you want to level up fast, having other players in your party is vital. For instance, blast zones are great spots for gaining experience, but they’re tough for low-level players. Each party member must land at least one blow on the opponent to receive team-based experience.
And honestly, having friends in a team is just fun. Appalachia is a huge place where you can take group photographs, share adventures, and sit around your C.A.M.P. playing instruments.
Use the Overseer’s camp
You’ll find the Overseer’s camp right after you emerge from Vault 76 and progress down toward the broken road. This spot serves as your hub for the beginning portion of the game. Don’t feel pressured to start building a C.A.M.P. too early since it requires lots of resources.
Instead, use the Overseer’s camp to your advantage by leveling up, refining your arsenal, equipping some good Perk cards, and collecting as many resources as you can before venturing farther out into the map and looking for a place to establish your base.
Pay close attention to hunger and thirst
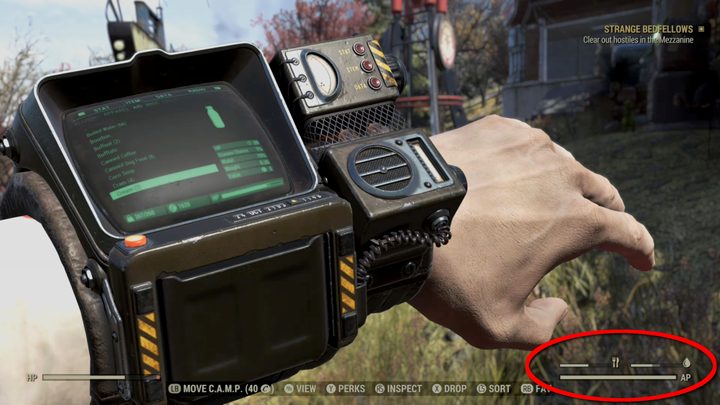
This isn’t Fallout 4 where eating and drinking simply provide buffs and health restoration. Player characters absolutely must eat and drink to survive. That means raiding every abandoned store, house, hideaway, and so on to collect the essentials. That also means keeping an eye on the hunger and thirst levels displayed in the bottom right corner.
Items like canned dog food, Cram, crispy squirrel bits, iguana on a stick, pumpkin pie, Salisbury steak, and other edibles are great sources to fill that tummy. Boiled water, purified water, and the various Nuka Colas are great for quenching your thirst without any status issues.
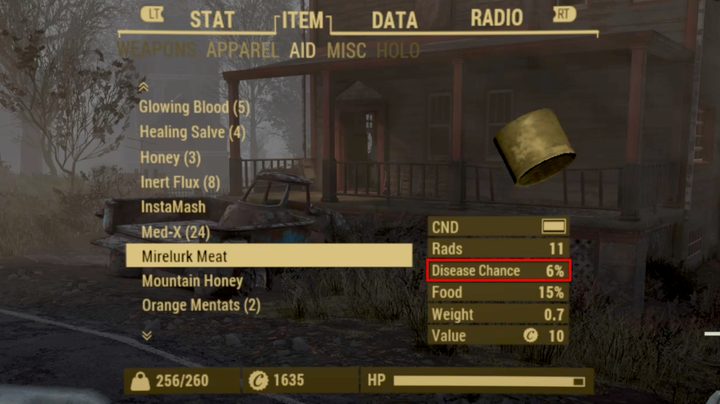
If you harvest raw meat, like mirelurk meat, be sure to check its Disease Chance percentage before taking a bite. Eating uncooked meat could bring on a disease you won’t want — especially if there’s no Disease Cure on hand. Raw meat and veggies usually spoil after a certain time, but cooking slows down the rate.
Likewise, don’t drink water from fountains and so on. Instead, collect and boil at least two servings of dirty water. All you need is some wood and a cooking station, and you’re good to go. You’ll still get slight rads from drinking boiled water, but it’s a lot better than what happens if you don’t.
Also, obtain and learn all the recipes you can. Each item on the menu provides different effects, like restoring HP, increasing AP regeneration, increasing your carry weight for a spell, and so on. Recipes you collect and don’t need can be sold for caps.
Always gather wood
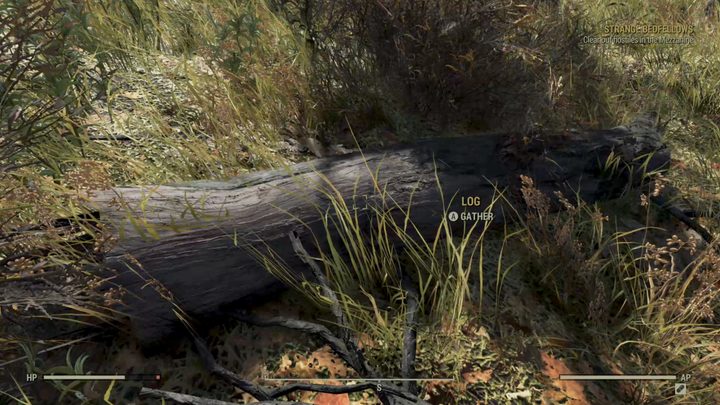
Always. See that log on the ground? Grab the wood chunks. Wood is the foundation of cooking, boiling, and building a C.A.M.P. Wood can also be obtained from lumber mills, scrap yards, piles in abandoned trucks, piles stacked up against tents and houses, and so on.
Loot loot loot!
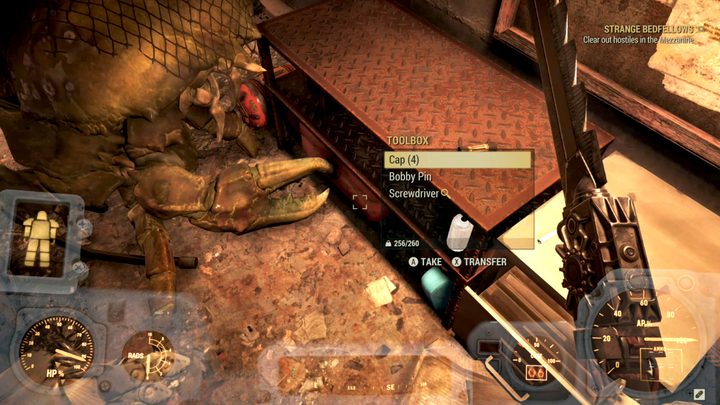
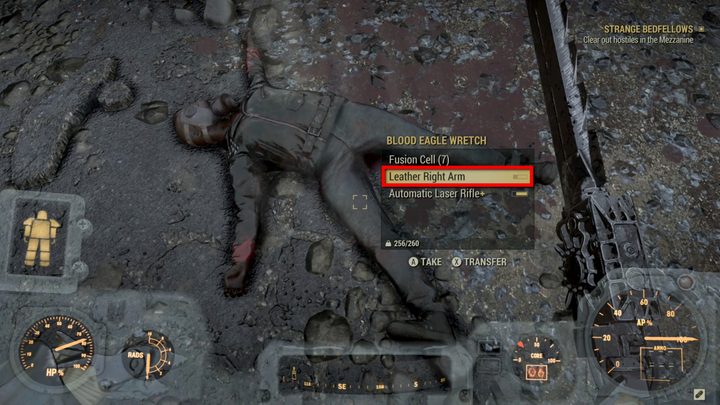
Every resource found in Appalachia can be broken down and used later for weapons, armor, and C.A.M.P. construction. Given you can pick up most objects ranging from glass jars to armor, grabbing everything possible is a must.
But you can’t carry everything you find. Eventually, it all weighs you down, slowing your speed and preventing fast travel. To help alleviate this issue, find a workbench or crafting station to break it all down — junk, weapons, and armor. Scrap duplicate weapons too.
If you’re seeking specific resources for building and repairing, you can tag the missing component at a workbench or crafting station. After that, any lootable item with your missing resource is marked with a magnifying glass, like the Screwdriver shown above.
After that, move on to our next tip.
Use Stash Boxes often
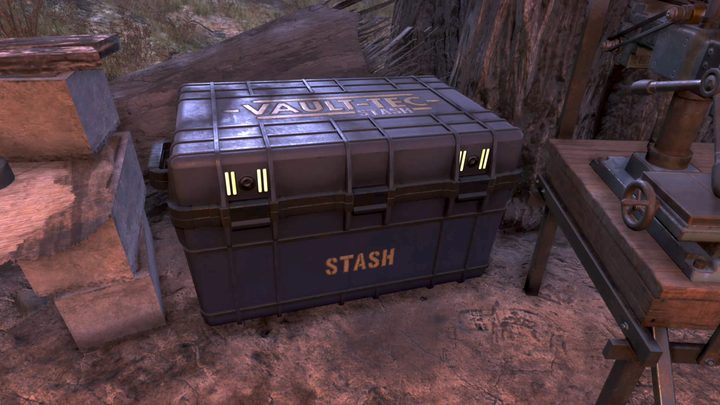
While you’re filling your knapsack with everything from coffee makers to pitchforks, take some time to stop by a Stash Box and dump your junk! Don’t wait until you’re encumbered because then you’ll have to drop some of those precious resources — or hope you don’t get ambushed as you slowly make your way to the nearest Stash Box.
Here’s where you can find some of the public Stash Boxes:
- All Red Rocket stations
- All train stations
- Overseer’s camp
- Abandoned Bog Town
- Berkeley Springs
- Big B’s Rest Stop
- Flatwoods
- Grafton
- Morgantown
- 24 other locations
Keep in mind that Stash Boxes do not provide infinite storage. The current maximum capacity is 800 items.
Find body armor fast
To the left of the vault door is a Responder Corpse with a pistol and some ammo you can loot. However, simple clothing won’t protect you against everything lurking out in the wild — players included. Your best defense is to find some armor fast.
Power armor is great too, but the components are harder to find than common body armor and extremely heavy. That means you can’t loot every stack of power armor you find. Disappointing, we know, but your character can only hold so much weight at one time.
Also, keep in mind that collecting power armor in your stash takes up loads of space. You can reduce the used amount by placing all components on a frame first and then stash the entire combination.
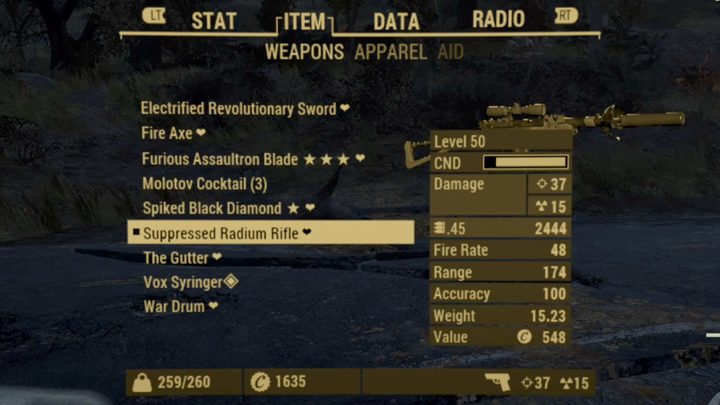
Repair repair repair!

Weapons and armor conditions deteriorate with use. Push a worn weapon too far and it breaks, leaving you running into the woods. That means you need to pay close attention to the condition of all weapons and armor by using the status indicator next to the item in your Pip-Boy.
To make repairs, you’ll need to collect copper and aluminum, plenty of which can be scrapped from various houseware items, tools, and duplicate weapons. They’re the two main ingredients, although repairs can also demand steel, adhesive, springs, and other scrapped items.
Ultimately, this tip circles back to “always loot loot loot” because most lootable items have a resource you need to repair weapons and armor.
Sell sell sell!
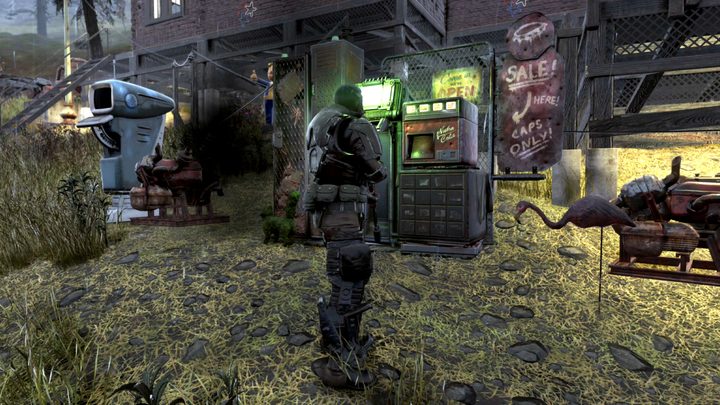
Bethesda introduced player vending in 2019. That means you can sell your excess junk for much-needed caps. To get started, just open up the crafting menu within your C.A.M.P. and locate the Vendors tab.
A vending machine requires three Steel, five Wood, and a small generator producing an electrical output of three.
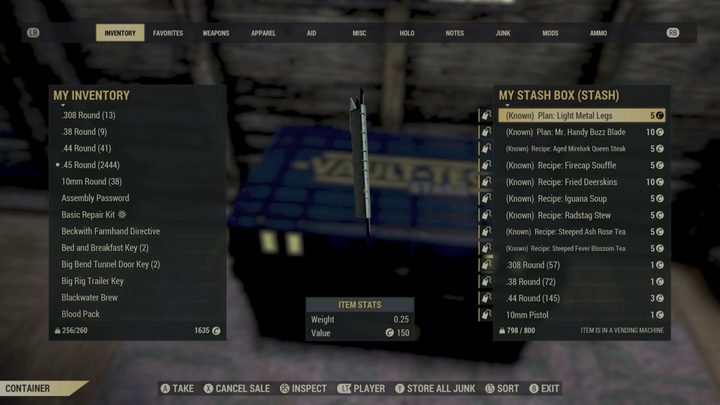
Keep in mind that all items sold through the Vending Machine still remain in your Stash Box until they’re purchased — they’re not stored in the machine itself. These items have a price tag icon on the left and the caps price you set on the right.
Other players selling in-game goods have a “V” symbol in place of the typical C.A.M.P. icon on the map. Unless this player is a listed friend, fast-traveling to these vendors will cost you caps.
Save caps with fast travel
With a map four times the size of Fallout 4, you’ll need this feature to travel across Appalachia. Sure, exploring the map is awesome after you first arrive, but by the time you uncover every inch of West Virginia on foot, walking from one location to another can be time-consuming, repetitive, and downright boring.
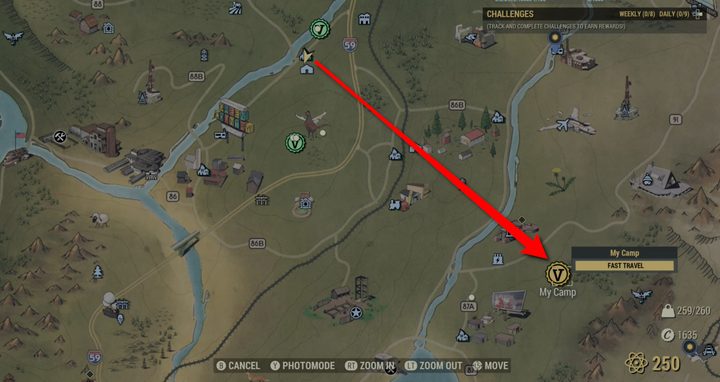
Fast travel requires caps. If you’re in Big Maw and need to get to Camp Adams, that’s an extremely long walk — a perfect fast-travel scenario. A good rule of thumb is to have your C.A.M.P. centered in the middle of the map, like somewhere around Summersville, to reduce the caps cost.
However, if you have friends, fast-traveling to their C.A.M.P. costs nothing. Thus, if you fast-travel from Big Maw to your C.A.M.P. to a friend’s C.A.M.P. located near Camp Adams, your caps expense is far, far less or nothing at all. You can also use Vault 76 as a free hop to reduce your overall cost. Non-player C.A.M.P.s cost caps, however.
Ultimately, the farther you are from your destination, the more you’ll spend, and caps are pretty hard to obtain. Here’s a good sample of what to expect if you’re fast-traveling from Summersville:
- Top of the World: 9 caps
- Abbie’s Bunker: 30 caps
- Eastern Regional Penitentiary: 14 caps
- Wavy Willard’s Water Park: 22 caps
- Riverside Manor: 7 caps
- Garrahan Mining Headquarter: 17 caps
- Beckley: 20 caps
- Johnson’s Acre: 23 caps
While that doesn’t look expensive on paper, it all adds up when you’re continuously traveling across the map and you only get two or three caps here and there.
Pick stats that cater to your gameplay
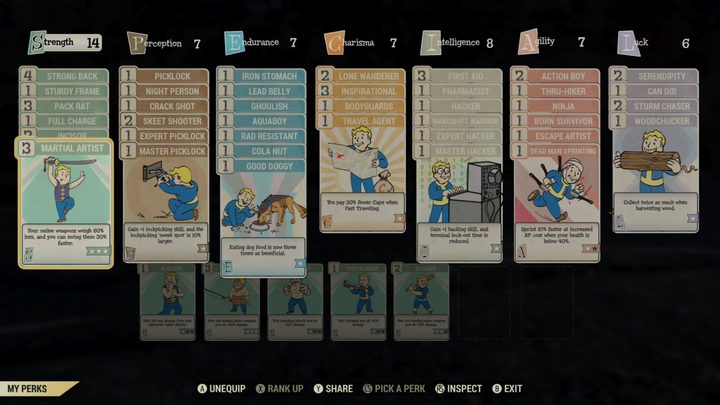
In the beginning, each S.P.E.C.I.A.L. attribute has one point. With each level gained, you can assign one additional point to any one of the seven attributes. Once you hit Level 50, you do not gain additional points. Instead, you can redistribute one point with each level gained.
As these attributes increase early on, players unlock Perk cards. Each card costs one or more attribute points, thus a player can equip multiple cards under each. They rank up as well but consume more attribute points in the process.
With all that in mind, cater your attribute points and Perk cards to your gameplay style. If you’re a melee-style player, as shown in the screenshot above, focusing on Strength and cards like Gladiator and Incisor may be beneficial. The Martial Artist perk reduces melee weapon weight.
Other great cards to consider are Strong Back, Picklock, Good Doggy, Lead Belly, and more. What’s great about this system is that you can change the gameplay without starting over.
Carry a different backup weapon
There are two types of players: Ranged and melee. One relies heavily on guns while the other sticks to swords, machetes, and whatnot. However, loot is loot. Players grab both weapon types to sell, use, and break down as scrap.
For ranged players, keep a melee weapon. There will be times when up-close-and-personal combat doesn’t call for a gun. Even more, ammunition isn’t unlimited, and running out during a Molerat raid isn’t exactly ideal.
The same rule applies to melee players. Keep a gun or two on hand for long-range attacks. A good example is when players must shoot down a moving cargobot to move a quest forward. You certainly can’t damage a Scorchbeast with a sword while it’s circling in the air either.
In both cases, carry multiple weapons. Sure, they weigh you down, but a broken sword or gun in the middle of a fight can lead to big problems you can’t escape.
Replace your favorite weapons often
While you can modify and repair weapons, you don’t want to use the same Level 5 sword throughout your adventures across Appalachia. As you wander out from Vault 76 and the Overseer’s camp, enemy levels increase. There’s nothing wrong with preferring a Black Diamond over a lead pipe, but eventually, it will be ineffective.
There is no means of “leveling up” a weapon. Instead, you must loot an identical weapon at a higher level or make one from scratch if you have the blueprint. In both cases, you must start over mod-wise.
Level 50 appears to be the cap for both weapons and armor.
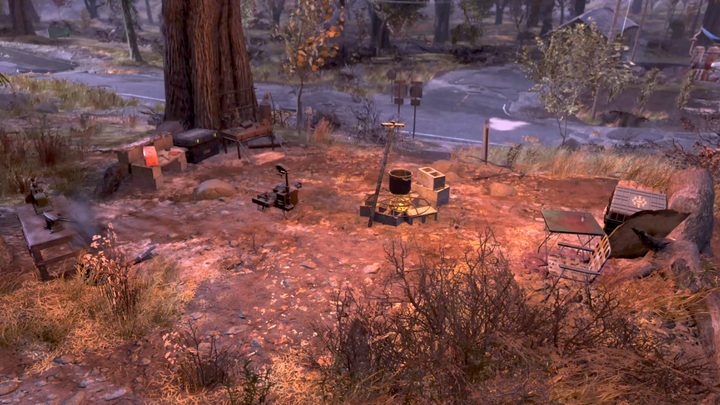
Choose your C.A.M.P. spot wisely
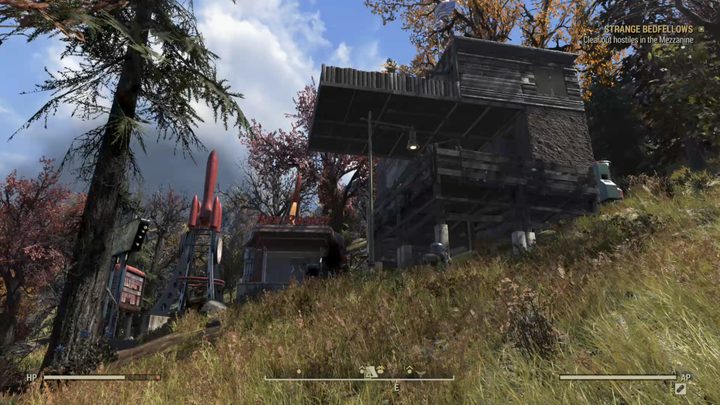
Before placing your first C.A.M.P. consider the surroundings. You don’t want to move in next door to ghouls or mutants who continuously invade and damage your home. But you should also reside somewhere close to resources so you’re not wandering for miles looking for wood chunks.
For example, the C.A.M.P. shown above resides just north of Summersville. The area has logs for collecting wood along with various berries. Across the pitted road is the Tygart Water Treatment plant that supplies some lootable resources. The Poseidon Power Substation and Summersville is just a short walk south.
Keep in mind that you can always move your C.A.M.P. wherever you choose, but for a cost. The farther you move away from your current position, the more caps you’re required to spend.
Build an actual bed
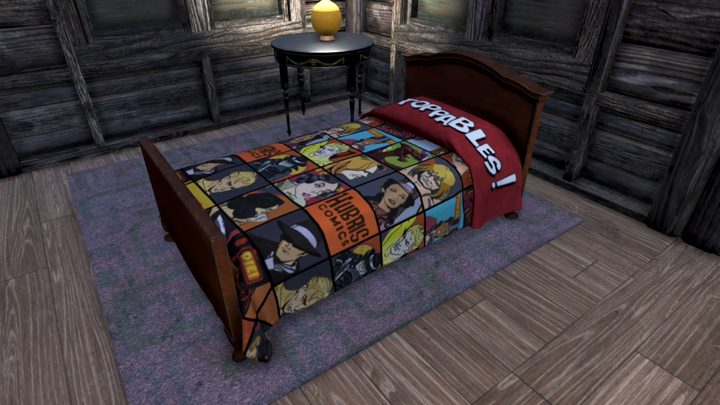
One of the first plans you receive in the Overseer’s camp is for building a bed. This is an important necessity, as sleeping on the ground, on a mattress, or in a sleeping bag increases your risk of contracting a pesky disease. Sleeping in a bed also regenerates HP, and can give you a Well Rested perk that adds a 5% bonus to the XP you earn.
If you can’t build a bed right away, you can find clean beds in the Flatwoods church.
Avoid public events and claiming public workshops
If you’re just getting started on your adventure into the nuclear wasteland, you might want to avoid public events and claiming public workshops. These can trigger waves of enemies along with other tasks that can quickly result in your death.
Playing with a group or tackling these tasks with other survivors is recommended, but if you’re fresh from the fault or playing Fallout 76 solo, just be aware of what you might be signing up for.
Use diluted solutions when possible
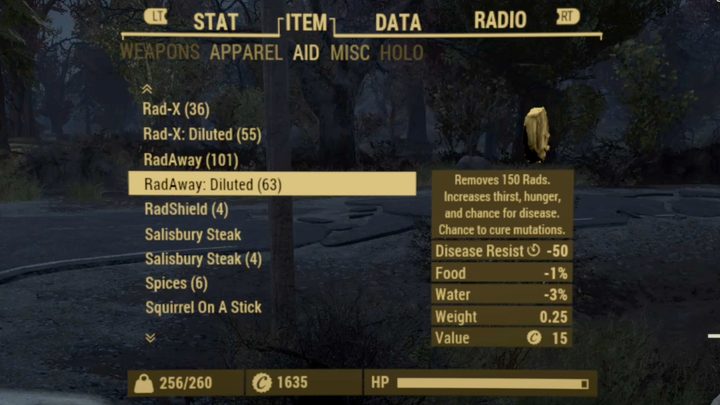
Stimpacks replenish health (initial +40% burst, +20% slow) while RadAway flushes out radiation (-300). Rad-X adds radiation resistance (+100) for 10 minutes. Great stuff to keep you safe and alive in a mutant-infested Appalachia.
In some cases, you don’t want to shoot up with a whole Stimpack to recover a sliver of health — that would a waste. Instead, a diluted version can provide the healing you need without overkill.
For instance, a diluted Stimpack knocks the burst and slow regeneration rate in half. A diluted RadAway solution only removes 150 Rads while a diluted Rad-X adds a +50 Rad Resist for 10 minutes.
Play instruments
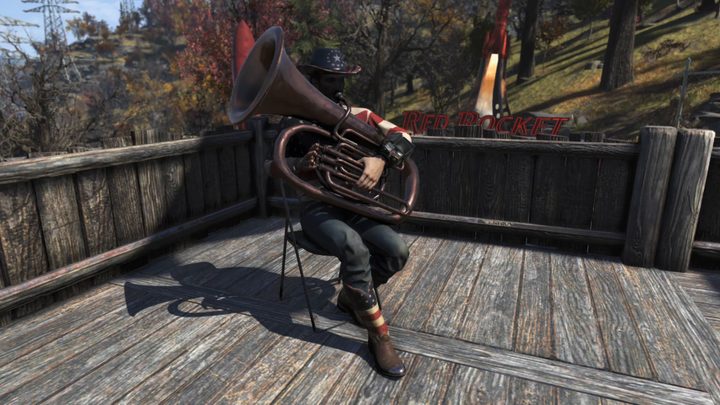
Interactive musical instruments are available all across Appalachia. Playing them for at least 30 seconds will give you an interesting perk called Well-Tuned, which regenerates your AP 25% faster for the next hour. There are 10 in all.
To play an instrument at your C.A.M.P., you can construct five using the Acoustic Instruments blueprint. Two others can be built with the Pianos plan while a single Tuba is built from the Wind Instruments plan.
Stay out of blast zones
As stated earlier, blast zones are a great way to gain experience fast. Team up with a few friends and you’ll shoot up the XP ladder in no time.
But if you’re just finding your way across Appalachia, absolutely do not follow anyone in. Don’t even let that big red circle on the map tempt you. Just stay away, as the recommended level is 50 and above.
Even if you’re roaming solo at Level 60, the multitude of opponents within the thick fiery air can take you down rather quickly. Don’t be a hero. Be smart and wait a while before checking out what lurks under the fallout.


