How to make an iron golem in Minecraft

One of the joys that only a game as open as Minecraft can provide is a sense of pure wonder and discovery. The world itself is a randomly generated wonderland of different biomes, creatures, materials, and secrets. As you explore, you're likely to stumble upon a village that was built without your input. Home to peaceful villagers, villages would normally be easy pickings for you, or even the natural enemies that appear at night, to completely devastate. However, they have a secret weapon.

Related Videos

Difficulty

Moderate

Duration

30 minutes

What You Need

  • Stone pickaxe or better

  • Crafting table

  • Cobblestone

  • Iron Ore

  • Pumpkin

Iron golems are passive by default, but they patrol villages and will attack anyone, or anything, that attacks them or a villager they're protecting. These giant hunks of metal are tough customers, even for well-equipped players. In a way not intuitive to the normal method, there actually is a way to spawn an iron golem for yourself. If you want to have one of these gentle giants on your side, here's how to make an iron golem in Minecraft.

Further reading

An iron golem in a village.

How to make an iron golem

Making an iron golem will take a good deal of effort, but the end result is a very worthy ally. With one of your own, you can leave them to watch over your own base while you're away, or have them protect a nearby village. Here's how to spawn your very own iron golem.

Step 1: Spawn or load up a survival world in Minecraft.

Step 2: Collect wood and stone to craft a stone pickaxe, or any pickaxe at or above that level.

Step 3: Craft a Crafting Table and either put it in your base or keep it with you.

Step 4: Collect eight cobblestones and use them with the Crafting Table to make a furnace.

Step 5: Go mine Iron Ore until you have 36 or more raw iron ore.
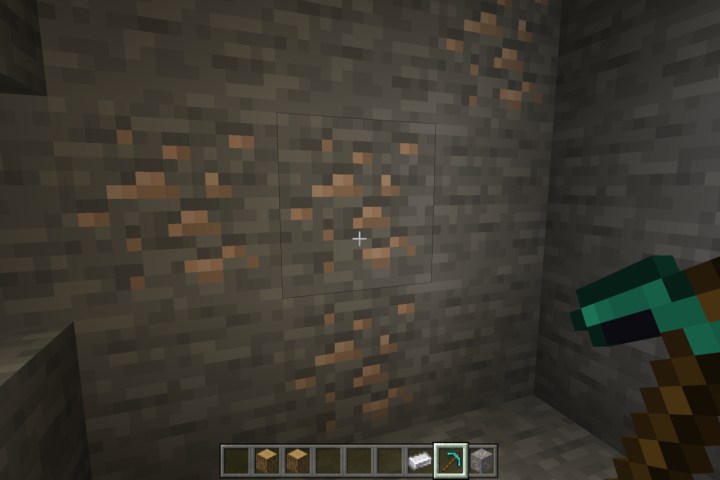
A bunch of Iron Ore in a cave.

Step 6: Smelt all your raw iron ore into iron ingots.
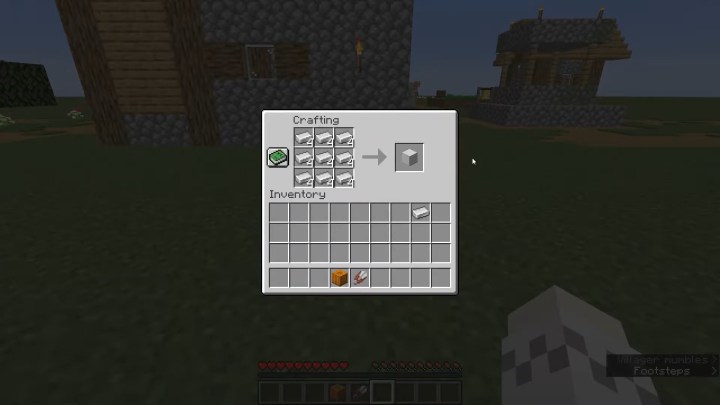
Turning iron ingots into a block.

Step 7: Full up every square in the Crafting Table with iron ingots to create iron blocks. It takes nine ingots to create one block, and all 36 ingots will give you four blocks.

Step 8: Find or grow a pumpkin and collect one.

Step 9: Turn the pumpkin into a Jack-o'-Lantern by using sheers on it and then combining it with a torch in your crafting menu.

Step 10: Find the area you want to build your iron golem and place your first two iron blocks vertically on the ground.

Step 11: Place the remaining two iron blocks on either side of the top block to make a T shape.
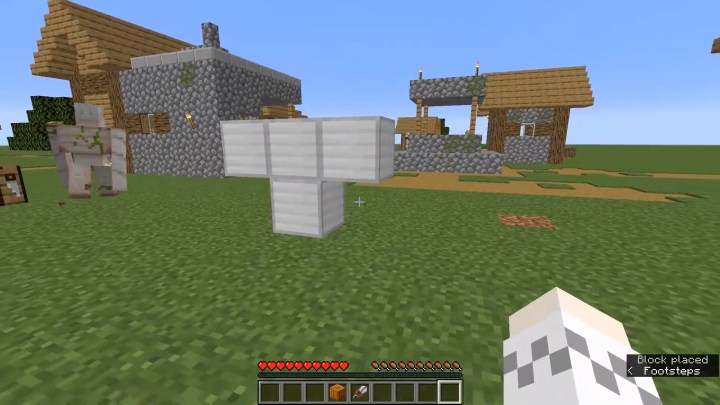
Building an iron golem in a village.

Step 12: Finally, place the Jack-o'-Lantern on the very top to be the "head" of your iron golem.

Step 13: Once all the pieces are in place, as long as the Jack-o'-Lantern is the final item placed, the iron golem will spawn.

Once you've created your own iron golem, unlike ones in the wild, they will never attack you. Even if you hit it accidentally, or on purpose, they won't become aggressive toward you and are always tame. Additionally, if you want to know how to heal an iron golem, all you need to do is use an iron ingot on them to restore some health.

Editors' Recommendations

The best traits in Hogwarts Legacy
A teacher teaches students in Hogwarts Legacy.

For the first time ever, you can not only create your own witch or wizard and enroll as a student of the titular academy in Hogwarts Legacy, but you can also customize them with tons of clothing and gear options. As with most RPGs, the gear you collect from various chests and as quest rewards will have their own stats associated with them, but you also have the ability to further improve your equipment with traits. This is a fairly in-depth system, so if you've been slacking on your studies, we'll walk you through everything you need to know about traits and which ones are the best in Hogwarts Legacy.
How to get traits

Traits in Hogwarts Legacy are extra buffs you can apply to your gear. Each piece of gear, based on what rarity it is, will have trait slots of different levels that you can weave your traits into. Traits can be either offensive or defensive, but in various ways.

Read more
How to unlock augments in Fortnite
Fortnite

Every new chapter of Fortnite is a massive event. While seasonal changes bring plenty of minor tweaks and additions, it's almost always when a new chapter rolls around that major overhauls or new mechanics are introduced. Fortnite Chapter 4 was no exception, and aside from the extreme changes the island underwent, it brought one very important change to gameplay that wmakes a huge difference when going for that illusive victory royal (it isn't easy to win Fortnite, after all).

Augments, well, augment the game. There are a few challenges that somewhat introduce what these are, but they leave out almost all the important details for you to find out on your own. Augments need to be considered, and deeply understood, not only for when you get them yourself but to know what new tricks your opponents could have up their sleeves. Before you get taken by surprise, here's a complete breakdown of how to unlock augments and how they work in Fortnite.
What are augments?
Augments, or Reality Augments, are essentially a new perk system introduced into Fortnite. There are currently 22 augments in the game, but with more to come in future updates. You can get access to multiple augments during a single match, but augments do not carry over after a match is finished, whether you win or lose. These perks can range from modifying certain weapon types to granting buffs for performing actions, and much more. There are no bad augments, so you will want to get as many as possible.

Read more
Fortnite Guardian Shield: locations and how to use
Guardian Shield in Fortnite.

In January, Epic Games introduced a handful of new changes, including the removal of many Christmas-themed items, and its first new item of 2023: the Guardian Shield, which adds another layer of strategy when used correctly. This new item is tied to a series of in-game challenges, incentivizing players to give it a try. But where can you find the Guardian Shield and how does it work?
Where to find the Guardian Shield

Unfortunately, there isn't a way to guarantee getting a Guardian Shield, as they appear as random drops from chests across the map. With that in mind, we suggest visiting high-traffic areas that contain lots of chests -- preferably spots with Oathbound Chests. These are the large white chests that contain rarer loot and can be found in main hubs that aren't covered in snow, such as The Citadel. Regular chests yield Guardian Shields, too, though. We had luck finding them at Lonely Labs, but other areas contain the Guardian Shield, as well. You can also pick one up from eliminated enemies.
How to use the Guardian Shield

Read more