Skills and perks play important roles in The Division 2. They make your life easier on the dangerous streets of post-apocalyptic Washington, D.C., and oftentimes they’re the difference between life and death. Even if you have great gear and deadly weapons, you’ll still need an assist from the unique Division agent skills from time to time — probably more often than you’d like to admit. Our Division 2 skills and perks guide details all the important skills and the overarching systems surrounding them.
See more:
The Division 2 skills and variants

There are eight skills in The Division 2, and three more added with the Warlords of New York expansion, each with three to four variants. While all skills are helpful, some are built for offense while others are made for defense. You can only have two skills equipped at once, though. Once you unlock more than a few, you’ll have some choices to make.
1. Pulse

Pulse is a gadget that scans the area and highlights enemies. It can be useful not only before initiating firefights, but when enemies start to scramble. Pulse has two additional variants. Remote is a deployable gadget that will check for enemies on loop, making it a worthwhile upgrade since it’s not just a one-time scan. Jammer, meanwhile, sends out a pulse that disables hostile electronics.
Pulse is a neat skill, but once you play The Division 2 for a while and start to become familiar with enemy movements, it’ll be one of the least desirable skills.
2. Turret

The Turret is exactly what it sounds like, a small-mounted gun that shoots automatically at nearby enemies. Even in its default state, Assault, the Turret can be used effectively all throughout the campaign. We cannot count the number of times deploying a turret has saved us during boss fights.
The Incinerator variant shoots fire rather than bullets. It’s helpful when you’re near a cluster of enemies and to keep enemies from approaching your position. The Sniper variant is fitted with a long barrel and can be manually directed to fire at specific enemies, leading to one shot skills.
3. Hive

The Hive is a multipurpose skill, but its main use is for helping out allies. If you’re a solo player or haven’t entered the Dark Zone, Hive isn’t practical. Its first variant, Restorer, repairs allies’ armor. The Stinger variant deploys micro-drones that attack nearby enemies to create a diversion (read: not as powerful as turrets). The Reviver variant brings downed allies back to life, and the Booster variant sends a stimulant to allies that boost their combat stats.
4. Chem Launcher

Chem Launcher is a multipurpose defensive/offensive skill. Its first variant, Reinforcer, sends a gas cloud that bolsters ally armor. The Firestarter variant puffs a cloud of highly combustible gas. Shoot at it and the area will explode. The Riot Foam variant builds gross looking foam that can cake onto enemies and leave them unable to move or fire their weapon.
The Oxidizer variant sends pretty looking corrosive gas that messes with enemy armor and skills while slowing dealing damage. Chem Launcher, especially the Firestarter and Oxidizer variants, can be quite useful in tough boss fights.
5. Firefly

The Firefly flies like a, well, bug through the air and blinds nearby enemies with its default Blinder variant. Burster, one of its variants, is one of the neater skills in the game. It attaches small explosives to multiple targets. When those unsuspecting enemies near one another, the explosives start to go off.
The Demolisher variant damages weak points, causes nearby environmental objects like gas canisters to explode, and eliminates enemy skills. Firefly, and particularly the Demolisher variant, is a great secondary skill to pair with a Turret or Chem Launcher.
6. Seeker Mine

The Seeker Mine is a small ball that gravitates towards enemies and then explodes. Its Airburst variant sends the explosive charge upwards rather than outwards, and the Cluster variant breaks off into several smaller mines to target numerous enemies. Cluster is the way to go with the Seeker Mine.
7. Drone

Drones, by default, are like moving turrets. The Striker Drone gets a line on targets and rapidly fires, circling around your position. The Defender variant deflects incoming fire. The Bombardier is a bit different in that you have to choose two points. After placing your targets, the drone will deploy small explosives at the midway point between the spots. The Fixer drone restores ally armor, so it’s only useful when playing in a squad.
8. Shield

In a pinch with enemies closing in, the Shield skill can save your life. The first variant, Bulwark Ballistic, creates a full body shield to carry with you. The catch is that you can only use pistols while holding the shield. The Crusader variant doesn’t cover your whole body, but it does let you use your primary weapons while holding it. The Deflector variant lets you turn enemy fire back on them, as bullets bounce off of it towards a selected target.
9. Sticky Bomb
Back from the first game in the series, the Sticky Bomb works just like you remember. Toss it out to stick on any surface — or better yet, any enemy — and trigger the detonation manually. You can choose between an explosive variant, which does exactly what it sounds like, one that burns targets in an area, and an EMP version to disrupt targets.
10. Trap
Trap is a throwable that breaks apart in the air, creating a bunch of smaller mines that litter the ground. They act just like proximity mines, triggering whenever an enemy steps on them. They can cause shock or explode into shrapnel to damage enemies, but they also have a Repair variant that will heal you and your teammates.
11. Decoy
The last skill is another basic yet very useful one. Toss out this little buddy to project a holographic version of yourself to draw enemy fire. Technically, it doesn’t match your agent and just looks like a generic soldier, but it is still good enough to fool your enemies. There’s no variant available for this skill.
How to unlock skills in The Division 2
After finishing the intro mission, you’ll unlock your first skill point, which can then be given to the Quartermaster for one of the eight skills listed above. Future skills only unlock by completing main missions, but you’ll have all of them unlocked about midway through the campaign. The Quartermaster can be found stationed at the White House.
Which skills to unlock first

We suggest unlocking either the Drone or Turret skills first, simply because they will give you the best results while your build is still currently a work in progress. Unlocking the Drone or Turret first is even more important if you’re planning on playing solo. If you’re playing with friends, though, you can probably get away with mixing it up so your squad has more differentiated skills at your disposal.
We suggest unlocking and their default variants in this order: Turret, Drone, Seeker Mine, Shield, Firefly, Chem Launcher, Hive, Pulse.
How to get mods and use them

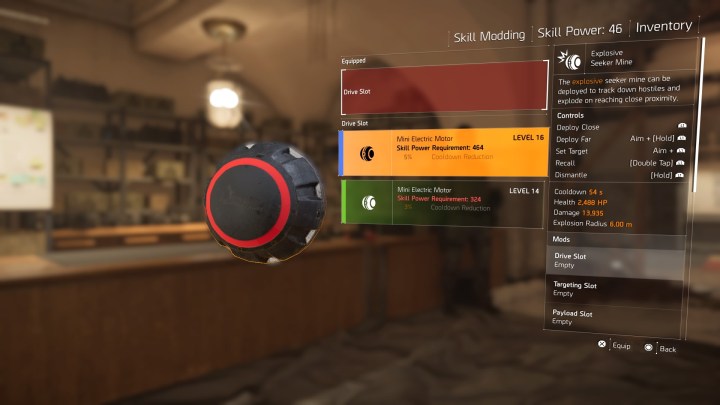
Skills, like weapons, have modding capabilities. Skill mods can be picked up from loot drops. Around level ten, you’ll start to see random skill mods crop up at vendors. You can also craft Skill mods by acquiring blueprints which are earned from completing missions, and found throughout D.C.
Skill mods can increase the rate of fire or efficiency for skills, as well as provide other benefits such as reducing cooldown, which is important because all skills need to cooldown after use. You’ll see a countdown, that can last upwards of two minutes, in place of the skill icon on your HUD when it’s cooling down.
Check periodically to see which mods you have available. All mods help, so it’s worth equipping what you have to make your skills stronger.
What is Skill Power?

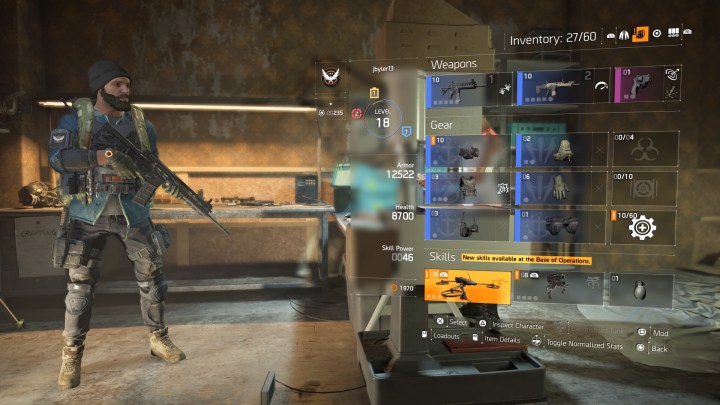
Below your armor and health values in the character menu is a value called “Skill Power.” Skill Power starts at zero and can go into the thousands. Basically, the higher your Skill Power, the better your skills will perform. Base damage will go up, healing power will increase, and cooldown will reduce as your Skill Power rises.
It’s important to note that the gear you equip can actually affect your Skill Power, particularly when it comes to Brand Sets. Brand Sets come into play with higher tier gear (specialized and above). Each piece of like-branded equipment up to three provides a percentage bonus for a certain stat. Skill Power is one of the key stats affected by brands. Cooldown for skills can also be decreased through Brand Sets. So Skills and gear intertwine more than it may initially seem.
The best perks

Along with Skills, the Quartermaster hands out Perks. The first perk you receive lets you carry two primary weapons. After that, it’s up to you which perks to spend your SHD Tech on.
Perks near the top of the grid are naturally more essential. For instance, the Restock perks refill your armor and grenade kits when in safe areas. You certainly need both of these perks as soon as possible. You also should prioritize unlocking all three Armor Kit perks, so you can carry the maximum of six kits, and if you don’t want to constantly mess with your inventory, increasing your backpack space is a must.
We also suggest grabbing all five Accolades perks, as they increase experience earned for a variety of feats such as headshots and multi-kills. After purchasing the essentials, you can move onto acquiring attachment perks, such as extended mags, scopes, and grips for better accuracy. Weapon mods can turn a good gun into a great gun, so these perks are important as you move into the back half of the campaign.
How to get SHD Tech

SHD Tech (pronounced shade tech) is the currency for both perks and additional skill variants. You can earn SHD Tech by completing certain SHD Tech side missions, main missions, in SHD Tech Cache drops, from Control Points, and from leveling up. Each time you level up, you earn one SHD Tech. The cache drops in each area will be marked on your map after interacting with the computer in the Safe House.
Though it’s possible to rack up a surplus of SHD Tech, keep in mind that each Skill variant costs five SHD Tech, a full side mission’s worth. Higher tier perks also cost several SHD Tech. Since you have to balance SHD Tech between both perks and new skill variants, it’s possible to run out without even going on a huge spending spree.
After you unlock the essential armor and restock perks we’ve listed above, we suggest purchasing whichever skill variants you desire first before allocating more SHD Tech towards “frivolous” perks such as increased backpack space.
Remember, enemies use skills, too
Just because you’re a fancy Division agent, it doesn’t mean you have more tools at your disposal than the competition. Armored enemies (blue, green, yellow tier) can use Skills, too. We’ve seen them deploy turrets, send RC cars with bombs or circular saws attached our way, and use the Chem Launcher. Whenever up against an enemy with tech capabilities, we highly suggest focusing your energy on eliminating them. It’s not fun, nor easy, to be on the receiving end of Division agent gadgetry.
Editors' Recommendations
- Where to find the Unmaking Arrow in Dragon’s Dogma 2
- The best skills for each Vocation in Dragon’s Dogma 2
- The best weapons in Helldivers 2
- The best Far Cry games, ranked
- Best cooking recipes in Avatar: Frontiers of Pandora

