The world and culture of the Vikings are notoriously brutal. These historical figures were among the toughest people in history, so even a simulation of what life was like in Valheim is going to make even surviving your first day a struggle. Your character is plopped into the 10th realm of reality, a land unknown and feared even by the Gods, with nothing but your determination to tame the wildlands.
Your main company in Valheim are the creatures and bosses skulking the forests, and the only thing they’re good at teaching is how to die a painful death. Aside from them you also have the environment and basic human needs to worry about. Death can come swift or slow, but with our beginner’s guide, you can overcome the initial hurdles Valheim puts in front of you. Once you get your bearings, it will become clear why this game has become such a hit among survival game fans.
Further Reading
First priorities
Get a hammer and pickaxe
Just like the best survival games, every world you load into in Valheim is generated upon you spawning in. That means you’ll have easier access to some things, while others will be harder to come by, depending on your luck of the draw. No matter what, you should never be too far away from the basic sticks and stones when your character first wakes up. Pick a fight with the smaller trees, wailing on them with your fists, to collect wood, and pick up all the small rocks in the dirt you can spot. Grab a nice collection as fast as possible and then go into your inventory to craft yourself a hammer and an axe first. The hammer is necessary for building your first shelter, and the axe to make gathering wood, one of the most important resources, much quicker. The hammer requires three wood and two stones, while the stone axe will set you back five wood and four stone.
Build a workbench and a base
With your trusty hammer, you can now create a workbench. A workbench not only allows you to craft a ton of new, and much more useful items, but also lets you start building your base. The area you can build is tied directly to where you place your workbench, which you will see as a large ring when choosing where to build it, so pick a spot close to resources like trees. The workbench only takes 10 wood, so it is very cheap to make.
Once you’ve picked out your spot and dropped your workbench, you need to build your base before you can use it to make any of those new tools. Even if you could use the workbench out in the open, we would never recommend doing it that way. A good base alone will extend your life expectancy by huge amounts. Using your hammer again, and within the radius of your workbench, you can now build foundations, walls, roofs, beams, and everything else for a strong home.
Building is easy, with all parts rotatable and magnetically connecting to fit together. It’s up to you how much time you want to invest in your base right now, but we recommend you at least have a fully enclosed and secure structure before moving on. You technically only need to cover your workbench in a roof and three walls to use it, but as you’ll see later in this guide you will be glad to have a strong base soon.
Two points to remember when building your base. The first is to make yourself a door. You obviously want to be able to go in and out, right? Second, and much less obvious, is to leave a gap in your roof. You will be putting a fire inside your base, and without any place for the smoke to escape, it can build up inside and actually kill your character. Yeah, this game is that brutal. Alternatively, you could exploit the system a little by building a fire right outside your base. The heat will still carry through the wall, but if it rains you’ll be out of luck.
Your final touch for your base is the bed. Just like any other survival game, your bed is how you set your spawn point in Valheim, as well as rest to skip past the night. At this point, night is probably upon you, so being able to jump to the next morning will be quite useful.
Go on the hunt
After your basic tools and shelter situations are set, next comes dealing with hunger. You had a lot to take care of on your first day, so your character is no doubt very hungry at this point. While you were gathering your basic wood and stones, you may have come across some berries, mushrooms, or even animals. These are your primary food sources, but again Valheim shows its teeth with a brutal new system. For whatever reason, your character, like a picky child, refuses to eat the same food twice in a row. Even if you have a stack of cooked meat and are on the brink of starvation, you will not be able to gorge more than one at a time before waiting for a cooldown. Thankfully, each type of berry and meat counts as a different type, so as long as you have a varied diet you shouldn’t have to worry about it too much.
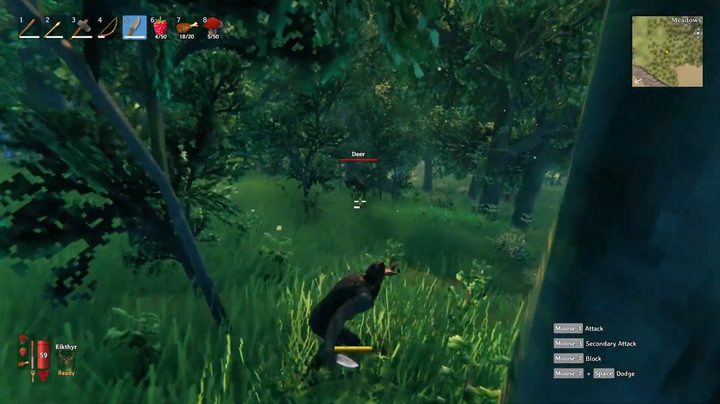
If you can alternate between berries and mushrooms then you are free to fill up while preparing to hunt the good stuff: Meat. Start by building yourself a cooking station so you can prepare them once you return with a haul of raw meat. Cooked meat will not only fill you up, but also grant faster health regeneration. Your three main targets for getting meat will be wild boar, deer, and the frog-like Necks. Boars are the most dangerous of the lot and will fight back when hunted, while deer are the opposite and will turn tail and run at the first sign of danger.
Make yourself a bow at your workbench for ten wood and eight leather scraps, and a bunch of arrows for eight wood a piece to get started. If you are fortunate enough to have found some silver, a spear is a great backup weapon, especially if some boars get too close. They cost five wood, one silver, and two feathers to craft. If silver is still too precious, a stone axe or flint knife are solid alternatives. You will eventually want to upgrade your weapons and make stronger versions once you get better materials, but for basic hunting, these do just fine.
Horde materials
Materials, namely wood early on, will be essential for just about everything from crafting tools and weapons to expanding your base. You’ll want a ton of it, and aside from your axe, the next thing you’ll want is a chest. Chests let you store way more stuff than you can carry on your person before your weight goes over 300 and you become encumbered. Hitting that weight slows you to a crawl, but also stops your stamina from coming back, so make a couple chests in your base to dump all your wood, stone, and other resources into so you’re not lugging it all around.
It is worth it to take a day or two just gathering these basic materials, wood, stone, and flint at least, and filling up some chests. Nothing breaks the flow of progression or is more annoying when you’re about to get an awesome new weapon, than having to go pick up more stones or chop down another tree just for more materials.
Learn how to navigate
Once you’ve gotten your footing in the world, have a nice base, a bed, and some weapons, you’re ready to start seeing what the world of Valheim has in store for you. You have a map, and you’ll have been introduced to the raven named Hugin right at the start who tells you where you can find the first boss named Eikthyr. Don’t go straight for the boss just yet, though. There are plenty of things to learn about exploration before getting to that challenge.
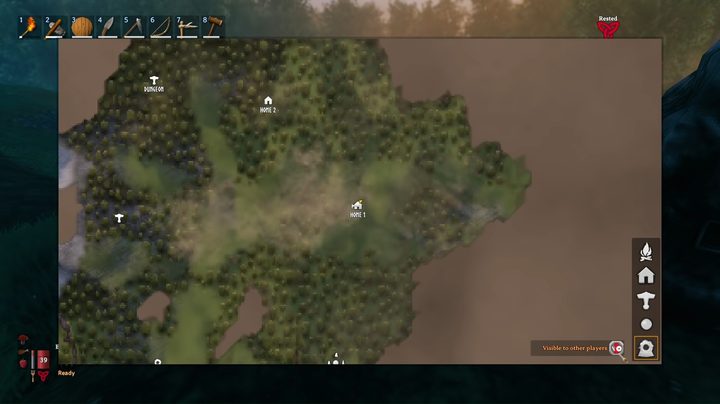
Your map menu is very useful if you use it properly. It will show you all the places you’ve been to, and you can set your own markers anywhere you like using the icons on the edge. Put these down and rename them to remind yourself of points of interest.
Unless you’re really feeling confident, or are actively trying to get into a fight, exploration should be done during the day. Aside from visibility being much higher, more monsters appear when the sun goes down. Plus as you get further and further into the forest, the more dangerous the enemies get, so encountering more of them is only going to make your adventuring more difficult. This early on, you shouldn’t go so far that you hit colder biomes, or the Black Forest in particular. The Black Forest is teeming with high-level monsters that can wipe you out in a few hits, and cold regions are just as deadly without proper gear to keep you warm.
One last warning is to stay out of any dungeons and caves you encounter. These will be important later, but until you’re decked out with way better gear you should just mark them on your map and leave them be.
Set up outposts
The 10th realm in Valheim is really, really massive. It’s so big that having one single base isn’t going to be convenient for very long. Your travels and adventures will eventually take you so far that you can’t get to and from your base in a single day and you’ll need new places to rest on the way, so creating or repurposing structures across the map will make your life that much more convenient. These outposts don’t need to be as fully decked out as your main base, and trying to build all of them up to that level isn’t worth it anyway, but building a workbench, bed, fire, and maybe a chest or two will serve you well.
You can always build your outposts from scratch, just as you did your initial base, but you can also repair and build off of some abandoned structures you will run into around the map. It can save you some time and resources to just put a workbench down by one of these, fill out whatever missing bits there are, and calling it good. Remember to also use your map markers to pin these outposts for future use.
As a note, later on, you will be able to make special portals that you can place between your outposts and main base to instantly warp between them.
Face your first boss

Now it’s time to take on the first boss Eikthyr. You will already have their location, the Mystic Altar, but need to have two deer trophies to summon them. If you’ve been hunting a decent amount then you should have picked up a couple of these at least by this point. With those, plenty of meat and berries, and your weapon of choice, travel to the location on your map to find the altar. Use the deer trophies and summon Eikthyr.
In a rare instance of compassion, this first boss isn’t actually that tough. If you stay at range you will mainly just have to worry about his lightning strike and AOE attack. Just keep away from his massive antlers and work his health down over time. If you do happen to die, everything you were holding will remain on the spot you were killed and a marker will be placed on your map. From the last bed you slept at, you can then collect everything you dropped from the gravestone, plus get a temporary buff called “corpse run” that makes you run faster and use less stamina to help you recover your items.
Defeating this first boss is required to unlock the Antler Pickaxe, which you can use to finally start mining metals to craft way better tools, weapons, and armor.
Final quick tips
We’ll end with a bunch of smaller tips that don’t really fit any other category but are important to know either way.
Stay rested, warm, and dry. Getting too tired, cold, or wet will debuff your character, and with things already stacked so high against you, that’s the last thing you need. Always get a good night’s rest in your base, next to a warm fire, before taking on the day.
Always dodge roll in combat. It uses stamina, of course, but is the only reliable way you have to avoid damage during a fight.
Your skills are upgraded the more you use them, not by any leveling mechanic. If you want to get better at something, do it more. But, if you die, you will lose some of that experience.
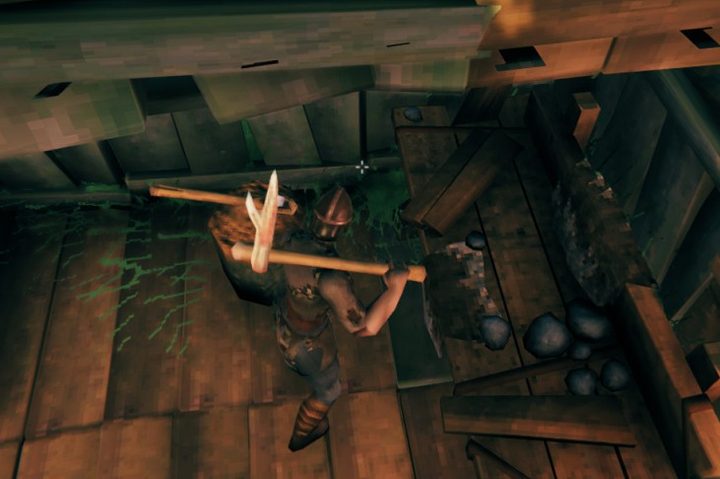
Watch out for falling trees when collecting wood. Those massive trunks crashing to the ground aren’t just a visual flair. If you’re caught under one when it comes crashing down to earth you might feel like quite the fool having to walk back to your grave.
Buy the Magingjord. At the moment there is no way to make your inventory any larger in Valheim, but you can increase your carrying capacity from the base 300 to 450 with this item. If you find Haldor the Merchant and can manage to scrape together the 950 gold this item costs, it is well worth paying for.
If you just want to have some fun while playing single-player, why not mess around with some cheats? If you bring up the command menu and type in “imacheater” you can access a bunch of fun cheats to mess around with. You can do all the classics like turn on God-mode, spawn monsters, start events, raise your skills, go into creative mode, and more. Obviously, you can’t do this in a multiplayer server, but are fun to play with on your own.