
Where to find diamonds in Zelda: Tears of the Kingdom

Diamonds are one of the best resources in The Legend of Zelda: Tears of the Kingdom, as they sell for 500 Rupees and offer 25 attack power when fused to weapons. Since they’re so valuable, they’re tricky to find, with only a handful of ways to get your hands on them.

In this guide, we’ll show you how to find diamonds in Tears of the Kingdom.

Where to find diamonds

Link next to Shrine in Tears of the Kingdom.

Shrines

There are five Shrines in the game that reward you with diamonds. These Shrines are different from the rest and feature Rauru’s Blessings, which play differently than you might be used to. We won’t spoil them here, but we will list the five Shrines that yield diamonds:

  • Yomizuk Shrine
  • Jochi-ihiga Shrine
  • Mayaotaki Shrine
  • Sihajog Shrine
  • Maoikes Shrine

After completing a puzzle to enter each Shrine, you simply need to approach the chests to acquire a diamond.

Chests

Likewise, you can collect diamonds from chests around Hyrule. There’s a chest containing a diamond under Hyrule Castle and you can find it under a floor grate. But be sure to keep your eyes peeled as you play since there are many chests in the game, some of which contain diamonds.

Talus Enemies

The Stone Talus in Tears of the Kingdom.

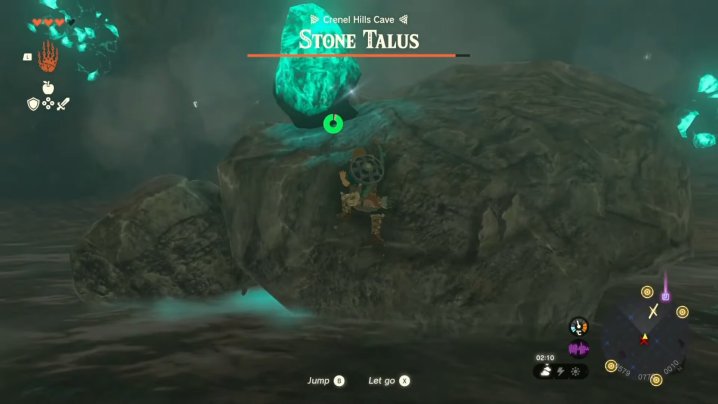
You can also defeat Talus enemies around the map for a chance at earning diamonds. The drop rate is low, but it’s yet another method you shouldn’t skip. These are found all around the map, some of which are inside caves.

Ore Deposits

Speaking of which, you can find Ore Deposits containing diamonds inside caves around Hyrule. Of course, the drop rate is low, but you’ll have a higher chance if you smash Ore Deposits with a yellow glow.

Editors' Recommendations

Joseph Yaden
Joseph Yaden is a freelance journalist who covers loves Nintendo, shooters, and horror games. He mostly covers game guides…
All weapon Passive Abilities in Zelda: Tears of the Kingdom
Zelda holding the decayed Master Sword in Tears of the Kingdom.

Thanks to the weapon durability system returning in The Legend of Zelda: Tears of the Kingdom from Breath of the Wild, you will be swapping out weapons all the time. At first, you will only be concerned with having something to defend yourself with, but eventually, you will acquire a nice stash of tools to dispatch your many foes. At this point, you will start comparing damage numbers, but that's not the only factor you should consider when deciding which weapon to wield. Passive Abilities are granted to some weapons that give them a special trait that can make them more useful than they seem at first. To better understand your arsenal, here are all the Passive Abilities in Tears of the Kingdom and what they do.
All Passive Abilities

Passive Abilities are buffs that a specific weapon can come with to give it an edge of some form. You can see the name of a Passive Ability under a weapon when you're quick-switching, or examining a weapon in your inventory. There are 15 possible Passive Abilities in Tears of the Kingdom that are well worth learning about. Also know that if you fuse a weapon with a Passive Ability, it will transfer over to your new fused weapon, so don't worry about losing any buffs by fusion.
Breaking Point
- Damage increases when the weapon is close to breaking.
Charged Attack Stamina Up
- Consumes less stamina for charged attacks.
Demolisher
- Weapon is usable for breaking cracked walls and rocks.
Desperate Strength
- Damage increases when you only have one heart.
Extra Durable
- Weapon does not break easily.
Fuse Recycling
- Materials fused with the weapon can be reused again and again.
Gloom Toll
- Weapon Contains Gloom.
Improved Flurry Rush
- Increases the power of Flurry Rush.
Quick Charge
- Enables quicker charged attacks.
Revitalized Sword of Legend
- Exclusive to the Master Sword - allows the Master Sword to regain durability over time.
Strong Fusion
- Enhances the fused Material's power but does not add as much durability.
Water Warrior
- Increases attack power when the weapon gets wet.
Wind Busrt
- Weapon produces a strong wind.
Wind Razor
- Creates vacuums when performing an attack
Zonaite-Powered
- Increases attack power if the weapon is fused with a Zonite device.

Read more
Zeldas: Tears of the Kingdom players are creating an industrial revolution
Link with a created mining rig in Tears of the Kingdom.

I expected a lot of cool contraptions to be built when Nintendo revealed that The Legend of Zelda: Tears of the Kingdom, the long-awaited sequel to The Legend of Zelda: Breath of the Wild, was going to have a full crafting system. What I didn't expect, though, was that fans would bring a full-on industrial revolution to Hyrule using Ultrahand.

In this new open-world Zelda title, players are given the ability to put together doohickeys of all shapes and sizes. Whether you're making a caveman-style hammer by attaching a simple rock to a stick or a flying boat with a turbo-fan engine to take flight, there seems to be something for every class of player to mold from their imagination. But some players are going even further, creating machinery that calls back to history's own evolution.

Read more
Zelda: Tears of the Kingdom’s story and ending explained
Link and Zelda under Hyrule Castle.

The Legend of Zelda series has always been known for its heroic fantasy stories, even if some of those tales follow a simple hero’s journey structure. But Tears of the Kingdom takes the franchise’s narrative ambitions to a new level. It tells a sprawling epic that spans eras, digging into the lost history of Hyrule. It’s an important installment for the series -- one that’s sure to confuse the heck out of anyone who fancies themselves a “Zelda timeline” historian.

With all the time-jumping shenanigans and the heaps of lore, it can be a little hard to keep the events of Tears of the Kingdom straight. Whether you’re looking to clarify some story beats or are just interested in seeing where the tale goes, we’re here to help with a rundown of both the basic story and ending of Tears of the Kingdom.

Read more