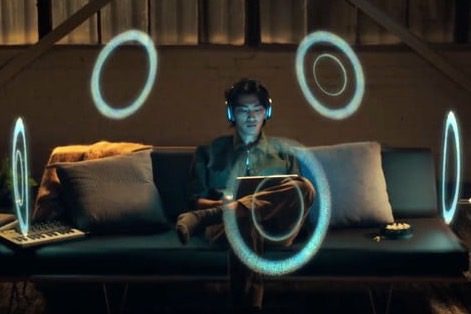
Apple's Spatial Audio is a feature you might not be well acquainted with, but its ability to deliver immersive surround sound is well worth taking a listen. When you connect your AirPods, or other compatible headphones, the audio is delivered in a 360-degree hemisphere around the listener for an immersive experience.
Additionally, with the head-tracking feature that uses motion sensors in the headphones, the experience is further enhanced by making it seem as though the sound is anchored in the place that it's coming from, such as your TVs speakers -- turn your head to the left and the sound stays front and center. Whether you're listening on your phone, or you connect your AirPods to an Apple TV, it delivers a more cinematic experience, perfect for big sound whether you're at home or on the go.
Normal Spatial Audio tracks your head movements, sure, but it can only do so much. For a much more accurate version of the technology, you need to program Personalized Spatial Audio on your device. Fortunately, Apple makes this quite easy as long as you have all the right hardware. Here’s exactly what you need to do to upgrade your Spatial Audio experience.
How to enable Personalized Spatial Audio
Step 1: Make sure you have the right devices and updates. This is going to be the hardest part for many people because there are a number of requirements based on what device you tend to listen to movies or music with.
First, you’ll need a newer version of AirPods. The first- or second-generation AirPods Pro will work, as will the AirPods Max and the AirPods 3rd-gen or later. Beats Fit Pro, Beats Solo 4, or Beats Studio Pro also have the necessary technology to support it.
Then, you’ll need a device to play your audio from. That has to be either an iPhone with iOS 16 or later, or an iPad with iPadOS 16.1. You could also use an Apple Watch with watchOS 9, an Apple TV with tvOS 16, or an M1/M2 Mac with macOS Ventura or later, or the Vision Pro with the latest version of visionOS.
Finally, you’ll need an app that supports the capability like Apple Music and audio files that include Dolby Atmos, usually signified by the Atmos logo next to a song or title. With all that set up, the next steps shouldn’t be much of a problem.
Step 2: On your Apple device (it’s very highly recommended to use an iPhone unless you have a patient partner who can hold your iPad), head to Settings. Go to Bluetooth to manage your linked AirPods or similar device. Make sure they are connected. If they aren’t connected, popping open your charging case nearby typically forces a connection.

Step 3: Select the blue “i” next to your earbuds to open up their settings menu.
Step 4: Under the Spatial Audio section, select Personalized Spatial Audio. In the next screen, select Personalize Spatial Audio…
Step 5: For this next part, it’s a good idea to be alone and have some space, next to a simple environment like a wall with good lighting. Select Continue to get started. Then, select Start front view capture.
This will turn on the camera and facial recognition, the same tech used to create your Face ID profile and the updates that we saw during COVID-19. Once the app recognizes your face, move your head in circles so your iPhone can get a look at it from all angles and get a good idea of what’s needed.

Step 6: The next part is a little trickier. Select Continue, and you’ll be prompted to start ear analysis, beginning with your right ear. This is going to be more difficult for those with long or shaggy hair, so make sure your hair is tied or brushed aside to get a good angle and remove anything that may obstruct the view (don’t wear your AirPods during this step, for example).
Hold your iPhone 10 to 20 inches away from your right ear, roughly level to it. When the iPhone identifies an ear, it will make a small pinging noise. This can take several tries, as ear-recognition technology doesn’t seem quite as intuitive as Face ID. Once your ear is recognized, move your iPhone about 45 degrees right while slowly moving your head to the left. The idea here is to create a scan of the shape of your ear that Apple can use for personalization data. If it doesn’t work at first, just keep rotating your iPhone and head until you hear the confirmation noise.
Step 7: Repeat the step with your left ear as prompted. All the same instructions apply. Again, don’t worry if you have to try a couple of times to get the positioning right.
Step 8: Your profile should now be complete and saved. You can visit your Bluetooth settings and disable your personalized version of Spatial Audio any time that you want.
Step 9: If you feel a little nervous about Apple getting such a good look at your head and ears, it may not be as bad as you think. Apple designed this technology to keep profile data on your phone, and the actual images aren’t saved. The data will sync to your other Apple devices via iCloud with end-to-end encryption, so you don’t need to do the steps over again.