 Ring, makers of a massive array of smart-home security products, has launched a new video doorbell. Ring’s Video Doorbell Wired is being touted as Ring’s smallest and most affordable video doorbell, putting it now in reach of more people who want to keep an eye on their kids or Amazon packages. Now with a dedicated wired design that lets you replace an old-school ding-dong doorbell, this wired version means you don’t need to worry about recharging batteries.
Why add Ring Video Doorbell Wired?
Ring Video Doorbell Wired is much smaller than other battery-enabled Ring doorbells. That’s because this design eliminates the battery entirely, since your doorbell is hardwired to your home for power. This allowed Ring to design a doorbell that’s much slimmer and with a smaller profile than its other video doorbells, meaning it fits more easily on the trim around your door, where many of us have older doorbells wired and installed now. Wondering which doorbell is for you? Read our Ring Video Doorbell Wired vs. Ring Video Doorbell 3 comparison.
Afraid of wiring? Don’t be!
If you’re thinking, “Ooh, wiring! I can’t do that,” the truth is, you can. Doorbells often use extremely low-voltage wires, and once you turn off your power on your breaker panel, it’s actually very easy to connect a new doorbell since it’s often just a couple of wires.
How to install a Ring Video Doorbell Wired
Having installed several video doorbells in the last few years, we can confidently say this is not a difficult job. You do need to know your existing wiring is connected and functioning, so from here on in, we’ll assume you already have a working basic doorbell. We will also assume here you’ve already visited Ring’s website to check if your existing setup and wiring are compatible with the product.
 Step 1 – Turn off power at the breaker
 Step 1 – Turn off power at the breaker
Depending on how diligent and organized you and/or your electrician are, you may already know which breaker shuts off your doorbell. It may take some trial and error to find, but ensure the power is off: Your doorbell shouldn’t ring when you hit the button if the correct breaker is off.
Step 2 – Prep for your new chime
 Step 2 – Prep for your new chime
You’ll be bypassing your old doorbell’s bell or chime with the new Ring Video Doorbell Wired.
Find the Ring Jumper Cable, which will be how we bypass and disable your existing doorbell chime. It needs to be installed before you install your Ring Doorbell. Next, find your old chime and remove the cover (they usually pull off easily).
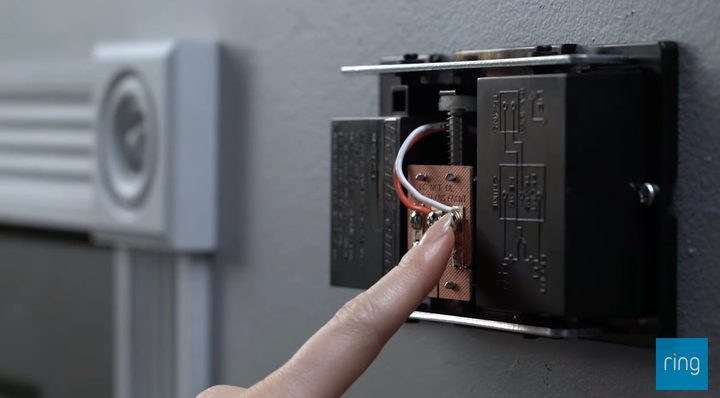
Step 3 – Connect the Ring jumper
Loosen the front and trans terminal screws on your chime, but make sure to keep the existing doorbell wires in place — you’ll be looping in the jumper together with these old wires under the screw heads. Connect one end of the jumper cable to the front terminal and the other to the trans terminal. (It doesn’t matter which wire you connect to which terminal.) Then re-tighten the terminal screws and pop the cover back on.
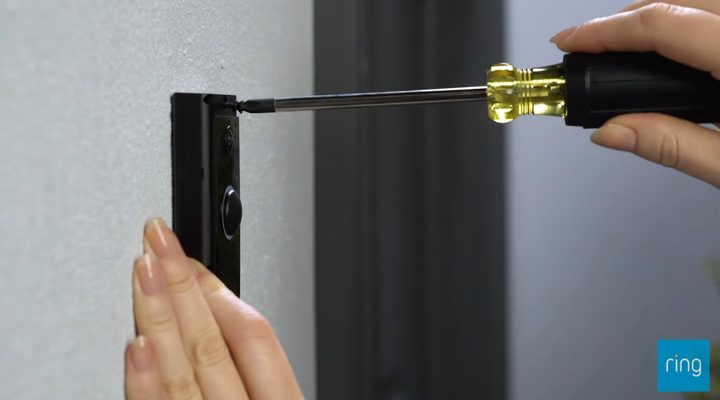
Step 4 – Uninstall your old doorbell
 Step 4 – Uninstall your old doorbell
Next, it’s time to head outside for the fun part. Unscrew your old bell button from the wall or trim and pull it out gently. You’ll disconnect the wires from the two terminals at the back of the bell, but before you do, make sure your wires aren’t so short they could fall back into the wall. If you’re worried, grab some tape and tape them to the wall or tie a pen to them. Ring helpfully includes wire extenders too, if yours are too short to work with.
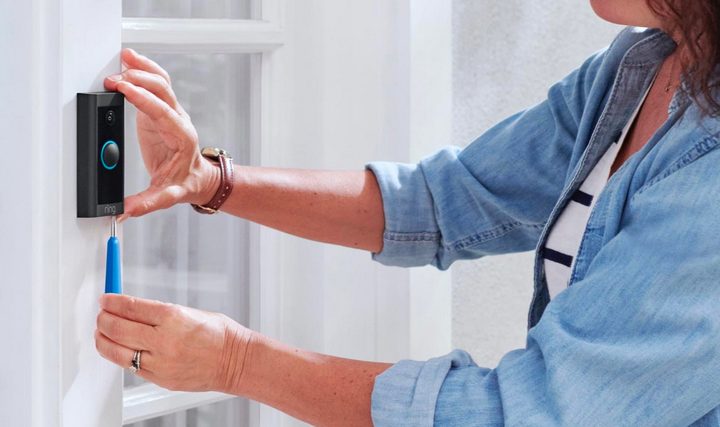
Step 5 – Ready the new Ring doorbell
Gently pull the faceplate off the Ring Wired by pulling it from the lower edge of the plate.
Using your Ring Doorbell base as a template, mark the location of the two mounting holes on the wall.
Step 6 – Prep the base
Depending on what you’re screwing into, you may need to install anchors. On stucco, brick, or concrete, use a 1/4-inch (6mm) masonry bit to drill holes in your wall, then insert the included wall anchors. If you’re installing on wood or siding, you can skip that step.
Step 7 – Connect the doorbell wires
Loop one doorbell wire around each of the screw terminals on the rear of your Ring Doorbell, and then tighten the terminals to hold the wires tightly.
Step 8 – Affix your Ring Doorbell Wired
Mount your Ring doorbell with the two included mounting screws. Hold off on reattaching the face place until you’ve checked the connection.
Step 9 – Restore power
Turn the power back on at the breaker and then go take a look at the doorbell. It may take a moment for your Ring Doorbell to power on, but you should see it light up and hear it start talking. Then, reattach the faceplate.
Step 10 – Set up your Ring Doorbell Wired using the Ring app
The rest of the setup happens on your smartphone using Ring’s easy-to-navigate app. Here, you’ll go to the hamburger menu in the top left corner and choose Set Up a Device. The app will step you through the rest, and in minutes you’ll be connected and online.
Though it’s a lot smaller than other Ring Doorbell models, the new Video Doorbell Wired has a lot of the same features as original Ring Video Doorbells, including 1080p HD video with night vision, two-way audio, motion detection and alerts, and a lot more. A video doorbell is a great addition to your home because it allows you to monitor deliveries, keep an eye on the family’s comings and goings, and provide an added layer of security to your home.