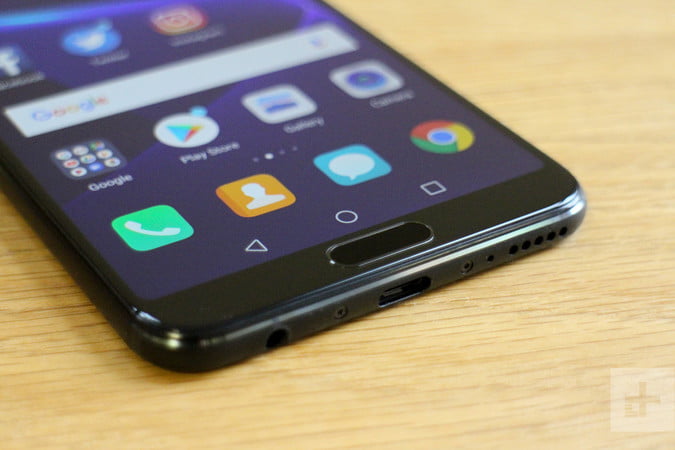
The Honor View 10 packs in an awesome 6-inch screen, a great dual-camera lens setup, and the very powerful Kirin 970 processor. Coming in at just under $500, the device will surely be a favorite among people looking for an excellent midrange phone. And while it’s a pretty sturdy phone with a lovely aluminum body, you’ll still want to pick up a case.
After initially being introduced abroad, the U.S. will finally get a taste of the amazing Honor View 10 starting March 22. Whether you’re new to the Honor family, or an enthusiast, there are a few unique features about the View 10. To help you get to grips with it, here are some of our favorite tips and tricks for the Honor View 10.
Set up Face Unlock
While a lot of Android phones offer a facial authentication feature, the Face Unlock option on the Honor View 10 works remarkably well. With Face Unlock, you can quickly unlock your phone without using an unlock screen password or pattern. Since Face Unlock is not as secure as Face ID on the iPhone X, you can only use it to unlock your phone; if you want to make purchases, you’ll need to authenticate either by fingerprint or password.
Setting up Face Unlock is simple. Go to Settings > Security & privacy > Face unlock. You’ll need to enter your lock screen password to continue. Tap Continue on the Enroll Face screen, then select Allow from the following screen. Make sure your face is centered in the image bubble. Once the camera has captured an image of your face, you’ll see a message saying, “Face successfully enrolled.” Finally, you’ll be presented with the option to automatically unlock your phone or set up a slide to unlock feature.
Enable Navigation Dock
As smartphone displays continue to grow in size, it becomes increasingly difficult to use them with just one hand. Although screen minimization features are common on
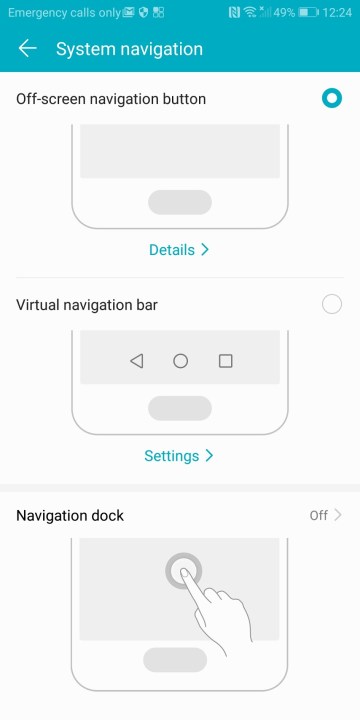
There are two methods to enable the Navigation Dock. The quickest is to tap the Navigation Dock icon in the Quick Settings tray. You can also enable the feature by going to Settings > Smart assistance > Navigation Dock. Slide the Navigation Dock toggle to the right to enable the feature. Once the Navigation Dock is enabled, you’ll see a circular icon appear on the screen. To move the icon, just hold and drag it to your desired location.
The Navigation Dock requires a series of gestures to move about the screen. Any time you want to return to the Home screen, long tap on the icon. To move back, you just need to quickly tap the icon. If you want to see an overview of apps you currently have open, just tap and slide the icon.
Create a PrivateSpace
If you find yourself frequently sharing your phone, the Honor View 10 offers an excellent privacy feature called PrivateSpace. With PrivateSpace, you can easily set up a private account that can only be accessed with a unique password or fingerprint. To set PrivateSpace up, go to Settings > Security and privacy > PrivateSpace. Tap the Enable button followed by OK. You’ll then be prompted to set up a numerical password for the feature; this password cannot be the same as your primary unlock password. Once you’ve entered and confirmed a unique password, you can then tap the Associate button to attach a unique fingerprint.
Once you’ve configured PrivateSpace, you can continue to use your existing account with your primary unlock screen password or fingerprint. If you want to enable the PrivateSpace account, simply unlock your phone with your unique password or fingerprint.
While PrivateSpace is a great feature, it is not compatible with Face Unlock. To take advantage of PrivateSpace, you’ll need to disable the Face Unlock feature.
Lock specific apps
If creating a PrivateSpace account seems a little extreme, the Honor View 10 offers an option that allows you to unlock certain apps on your phone. With App Lock, you can require a password or fingerprint to open any app on your phone. To set up the feature, go to Settings > Security & privacy > App Lock. Use your fingerprint or lock screen password to access a list of apps installed on your phone. You can then easily enable the feature for each individual app by sliding its respective toggle bar.
Use Dual SIM cards
Along with the more expensive Huawei Mate 10 Pro, the Honor View 10 is one of a growing number of U.S. phones that offers dual LTE SIM support. To manage your SIM cards, go to Settings > Wireless & networks > Dual SIM settings. In the settings, you’ll see options for SIM 1 and SIM 2; if you tap on either of these, you can easily change the name of your SIM card. There’s also a slider for each SIM card that will allow you to enable or disable either card.
Once you have your SIM cards labeled you can then use Dual SIM settings. You’ll also have the option to prioritize the SIM used for 4G LTE data service.
Use different camera modes
For a midrange phone, the Honor View 10 packs a pretty impressive dual camera setup. In addition to the 16-megapixel RGB lens and 20-megapixel monochrome lens on the phone, the Kirin 970 chip uses artificial intelligence (A.I.) to identify common settings and makes adjustments to help you get the best photo.
When you open the Camera app, you’ll be met with a pretty standard viewfinder screen. Swipe to your left and you’ll be presented with more than a dozen different camera modes. Swipe right and the Settings menu appears. While most of these modes are pretty standard fare for a
Light painting allows you to add artistic flourishes to your photos. When you select Light painting mode, you are presented with four different scenarios:
- Tail light trails captures the lights of moving cars in the night.
- Light graffiti lets you capture trails of light in static images.
- Silky water captures the flow of moving water in a silky-smooth effect.
- Star track captures the trails of stars and galaxies in the night sky.
Take the perfect selfie
With Perfect Selfie, you can create different settings to retouch your photos. Perfect Selfie works with portraits on both the front and rear camera; it can also recognize you in group shots. To use Perfect selfie, tap the Camera app on the home screen and swipe left to access the Settings menu. Tap on Perfect Selfie and toggle on. Next click Edit personal info; the app will ask you to take several shots from different angles.
Once you’ve taken all of the images necessary for Perfect Selfie to identify you, a collection of different beauty sliders will appear. You can use these to brighten and smooth out your skin, enlarge your eyes, and even make your face thinner. When you’re happy with your selections, click the check icon in the top right menu bar. You can easily make changes at any time by tapping on Set beauty effects.
Add fun photo filters
For fans of the AR filters found on Instagram and Snapchat, you’ll love the photo filters available on the Honor View 10. With more than a dozen fun filters, it’s easy to find one for any occasion.
To use the filters, tap on the Camera app on the home screen. Swipe right on the viewfinder screen to access the different modes. Select the AR Lens mode. In the viewfinder screen, tap on the AR icon on the right hand side of the screen. You’ll see all the different facial filter selections appear.
If you’re using the front-facing camera, you’ll also see a Backgrounds option. This option allows you to use AR filters to change the background in your selfies.
Create two instances of an app
For people with multiple social media accounts, App Twin may be a godsend. With App Twin, you can easily create multiple instances of many popular social media apps.
Before you use App Twin, make sure you have the social media apps you want to clone downloaded on your phone. Once you’ve downloaded the apps, go to Settings > App Twin and enable the apps you wish to copy. Once enabled, you’ll see two icons for each app on your screen or in your app drawer.
Enable voice features
The Honor View 10 offers a pretty impressive selection of voice control features. With these features, you can easily unlock your phone, make phone calls, and even locate your phone if it gets crammed between the couch cushions.
To enable voice control, go to Settings > Smart assistance > Voice Control. Tap on Voice wake up. Press the microphone icon and repeat the wake phrase “Dear Honor” three times. You’ll need to be in a quiet room and say the phrase slowly to get the best results. If the phone has difficulty recognizing your voice, tap Wake up phrase training to record additional voice samples.
If you want to use your voice to make calls, tap Quick Calling and enable the feature by using the toggle. If you want to use the feature to call your contact Jane, for example, you would simply say. “Dear Honor, call Jane.”
The Honor View 10 also allows you to use your voice to find your phone. If you have voice control enabled, all you’ll need to do is say, “Dear Honor, where are you?” Your phone will immediately begin ringing and repeating the phrase, “I’m here,”making it incredibly easy to find that lost phone.


