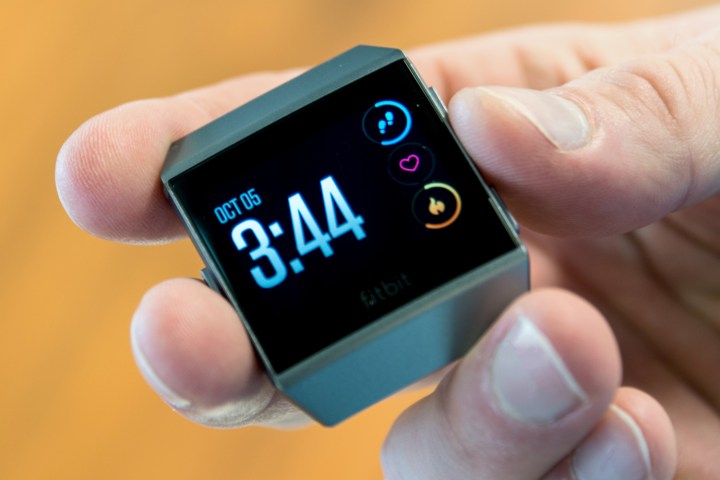
Has your Fitbit device started showing the wrong time? While that's certainly annoying, there's no need to panic. You just need to give your fitness tracker a simple push in the right direction to get back on track.
Unfortunately, you can't change the time manually on Fitbit devices because the watches sync their times based on what time zone the device thinks it's in — emphasis on "thinks." Sometimes this process gets messed up due mainly to the Fitbit battery dying or some similar issue. If your Fitbit is starting to show the wrong time, there are several ways to correct it. Below we've listed the best methods for how to change the time on a Fitbit.

Updating your Fitbit
First things first: Make sure your Fitbit device and your Fitbit app have been updated to the latest edition. First, plug your Fitbit into its charger and open the app. If the app needs to be updated, it will let you know upon launching. Here's how to update the device:
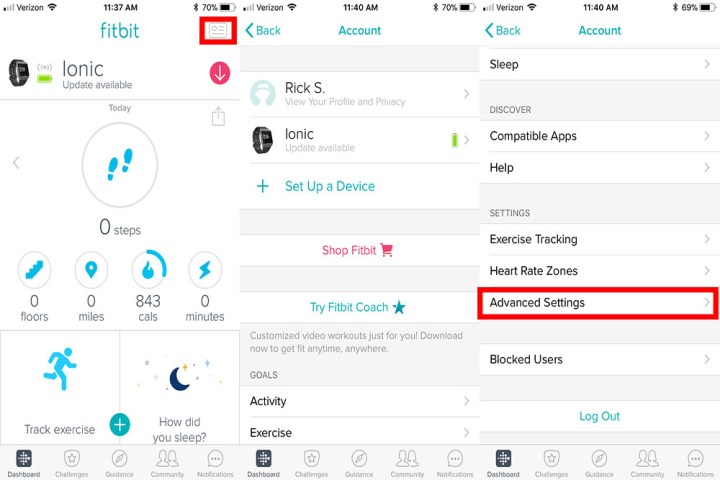
Step 1: Select the Account icon (it looks like a square with text lines in it), and choose the proper Fitbit device, if necessary.
Step 2: After choosing the right device, look for a pink Update (sometimes Update Tracker) bar. If there’s no button, your device is already updated.
If there is a choice to update, select it. Updates sometimes fix time errors after resetting the Fitbit, so it’s a great way to take care of two things at once. The update takes around an hour to complete.
Changing the time zone
If updating your app and device didn’t fix the incorrect time, then you’ll need to make sure its time zone setting is correct. Here’s how to do it.
Step 1: Open your Fitbit app from the appropriate device. It’s generally best for your Fitbit to be close by during this procedure.
Step 2: Choose the Account icon from the Fitbit app home screen. This is located in the top menu section and looks like a square bubble with lines resembling a paragraph of text.

Step 3: Make sure you have the right device selected, if necessary. Now, look for the tab that reads Advanced Settings (sometimes it’s just Settings) and select it.
Step 4: If you’re using the app on an Android or iOS device, you need to take a moment and turn off the automatic time zone feature — this may be the root of your problem.
- For iOS, look for a section called Time Zone where you can switch off the Set Automatically feature.
- For Android, you’ll see an Automatic time zone option that needs to be turned off. If you’re in Windows 10 or Fitbit’s online dashboard, you likely won’t need to do this step.
Step 5: Stay in Advanced Settings and look for an option that says either Time Zone or Select time zone, then choose that option. This allows you to select your correct time zone from a list.
Step 6: Navigate back to your Account window. Look for the option that says Sync Now and select it. Your Fitbit device should now sync and display the time for the time zone you selected. Check to make sure it’s working correctly.

Bonus tip: Changing between 12-hour and 24-hour clock formats
Prefer military time (or not)? You can customize your app to use the 12-hour or 24-hour format. Here's a guide.
Step 1: Fitbit prefers you do this from the Fitbit online dashboard. Log in and select the gear-shaped icon to start.
Step 2: Choose Settings and select the tab that says Personal Info.
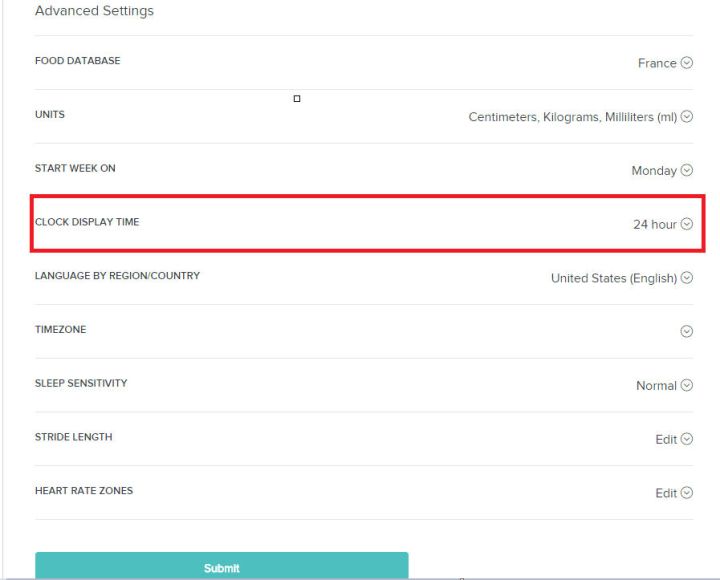
Step 3: Head toward Advanced Settings and look for Clock Display Time. Under this heading, you’ll see a choice to show time in either 12- or 24-hour units. Select what you prefer and choose Submit.
Editors' Recommendations
- How to find your phone number on iPhone or Android
- The most common iPad problems and how to fix them
- How to mirror your smartphone or tablet on your TV
- Best Fitbit deals: Save on Inspire 2, Charge 6, and Sense 2
- How to change your Gmail password


