Sometimes taking a screenshot isn't enough to get your point across when you're trying to share something from your shine new iPhone 15 Pro. While you can take multiple screenshots to help a friend or family member learn how to do something or even just show off your finesse in Genshin Impact, why not just give them a video clip where they can follow the entire process?
The good news is that Apple makes this really easy to do in iOS 17 without the need for any third-party apps. Just like taking a screenshot, screen recordings are automatically saved to your photo library, where you can trim them, edit them, and share them like any other video clip.
Best of all, this feature has been around since iOS 11, which means you'll have a hard time finding an iPhone that you can't perform a screen recording on. You can use this feature record almost anything that you can see, with one important exception; you won't be able to record video from most streaming services, such as Netflix, Amazon Prime, or Apple TV+. If you attempt to do so, you'll see any on-screen info and controls, but the video and audio won't be captured for copyright reasons. This applies to most apps for paid streaming services, although apps like YouTube and Plex aren't affected.
Another small catch is that you can't continue screen recording after returning to the lock screen. While you can start a screen recording from the lock screen and it will continue after you unlock your iPhone, locking your iPhone will immediately stop any screen recordings in progress.
How to set up screen recording on your iPhone
Unlike taking screenshots, there's no magic button sequence to start a screen recording. Instead, you initiate a screen recording session from the Control Center. This means you'll need to ensure the screen recording button is there before you can make a screen recording.
Step 1: Open the Settings app on your iPhone.
Step 2: Select Control Center.

Step 3: Scroll through the list until you locate the Screen Recording option.

Step 4: If Screen Recording appears anyway under Included Controls with a red minus sign beside it, then you're good to go.
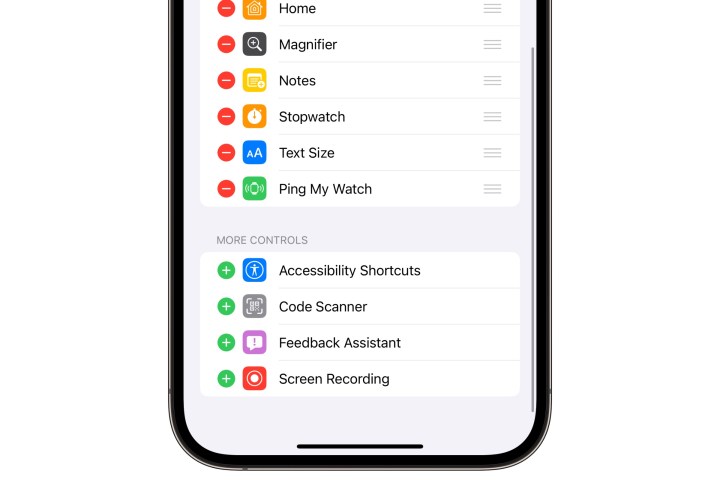
Step 5: If Screen Recording appears further down under More Controls, select the green plus button to add it to Control Center.
Step 6: You can also use the handle on the right side of the Screen Recording option to move the button closer to the top or bottom of the Control Center. To do this, select the three-line handle and drag it up or down the list.
How to record your iPhone screen
Once you've confirmed the Screen Recording button is in your Control Center, starting a screen recording is only a swipe-and-tap away from anywhere on your iPhone.
Note that once you begin recording, everything that appears on your screen will be captured in the video, including any notifications that come in while you're recording. To prevent this, you may want to enable a Do Not Disturb Focus mode before you start.
Step 1: Start by opening the Control Center on your iPhone.
- On an iPhone with Face ID, this is accessed by swiping down from the battery indicator in the top right corner.
- On an iPhone with Touch ID, this is accessed by swiping directly up from above the home button.
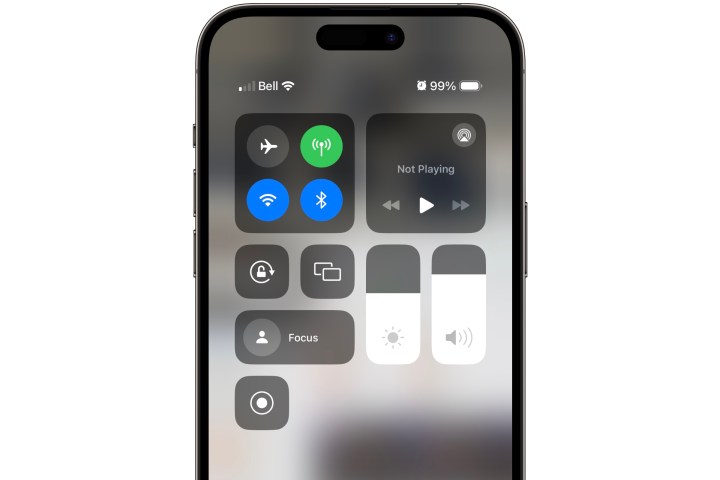
Step 2: In the Control Center, select the Screen Recording button to begin a screen recording. A three-second countdown will appear in the status bar or in the Dynamic Island if you're using an iPhone 14 Pro or any iPhone 15 model.
This gives you time to close the Control Center and get ready before the screen recording begins. Don't worry if you're not fast enough, though, as you can easily trim the video after you're done (which we'll discuss later on).
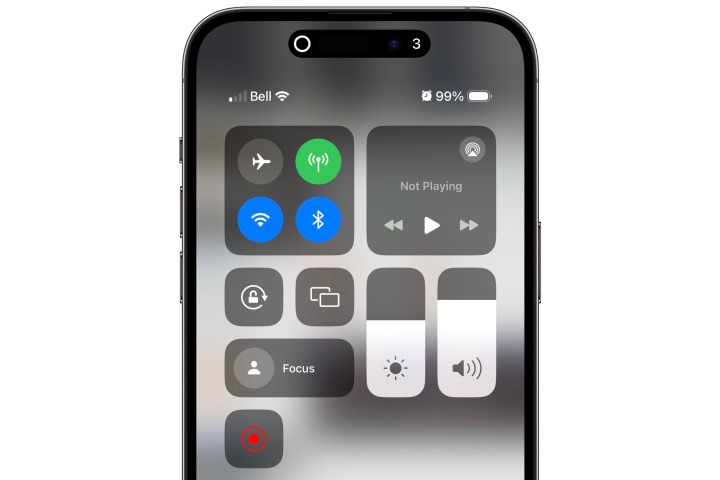
Step 3: Once screen recording begins, you'll see a red timer in the top left corner of the status bar, or a recording symbol in the Dynamic Island if your iPhone is so equipped. Proceed to do whatever it is you want to record on your iPhone.
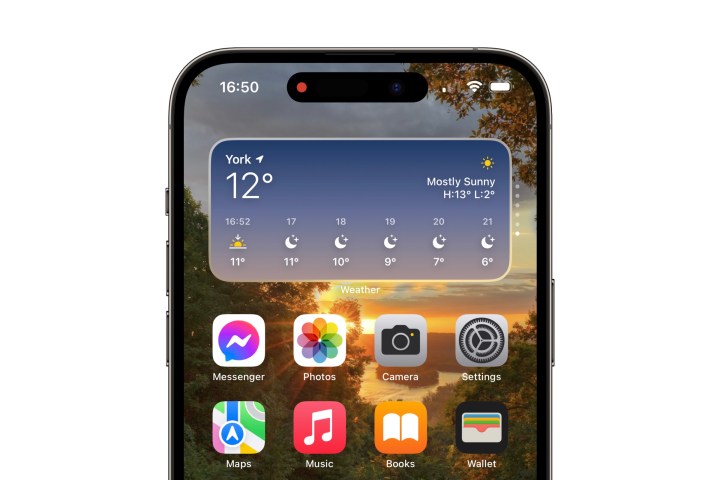
Step 4: When you're finished with your screen recording, select the red timer or the Dynamic Island, depending on which iPhone model you're using.
Selecting the timer will show you a prompt to confirm that you want to stop your recording; select Stop to finish your recording.
Selecting the Dynamic Island on an iPhone 14 Pro or iPhone 15 will pause the recording and expand to show you a stop control. This action will not appear in your screen recording. You can resume the recording by tapping anywhere else on the screen or by selecting the red Stop button on the right to stop your recording.

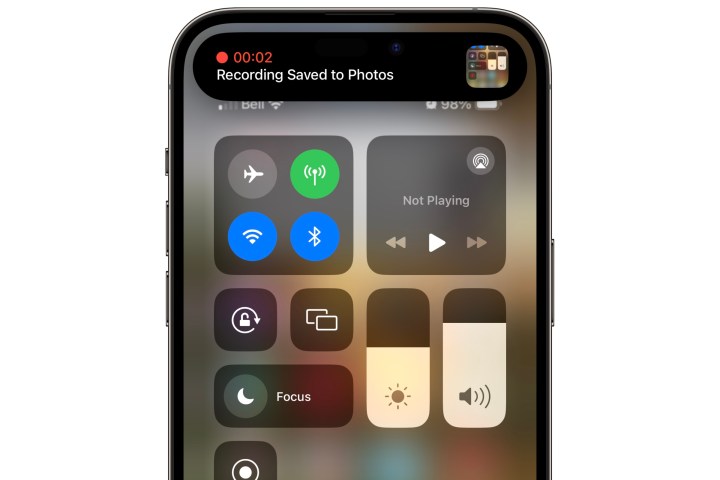
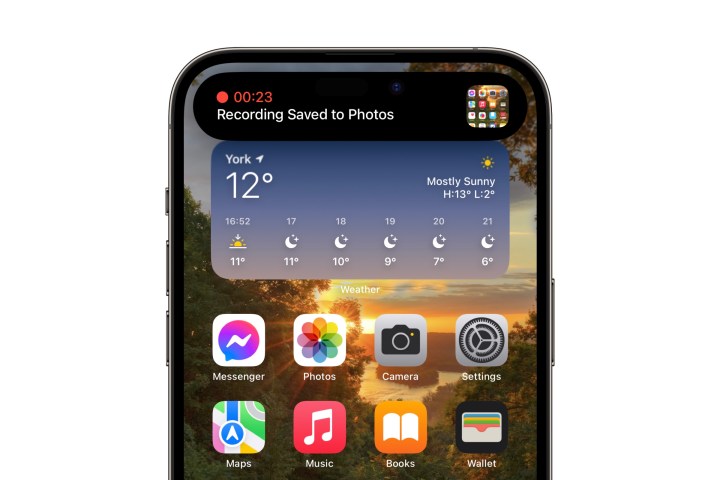
Step 5: Once you stop recording, a notification will appear to confirm that the screen recording has been saved to your Photos app. You can tap this notification to be taken directly to it or dismiss the notification normally if you'd prefer to deal with it later; in either case, the recording will remain in your photo library unless you delete it manually.
How to narrate a screen recording
Your Screen Recording will also capture any audio that's generated by your iPhone, such as gameplay or notification sounds, but it won't record any external sounds. It also won't capture music being played from Apple Music, although other streaming services like Spotify and YouTube Music will come through fine. However, you can also enable your iPhone's microphone if you'd like to narrate your screen recording or capture background audio such as music that's playing from another instrument or device.
Step 1: Open the Control Center on your iPhone.
Step 2: Select and hold the Screen Recording button. Additional Screen Recording options will appear.
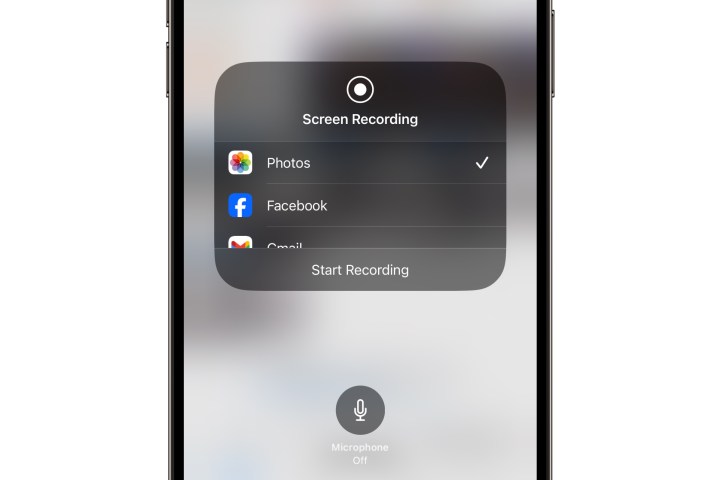
Step 3: Select the Microphone button to enable the microphone.
Note that the other apps shown below Photos on this screen aren't used for screen recordings in the traditional sense. Instead, they're designed to allow you to share your screen during video calls and live broadcasts through apps such as Facebook, Zoom, Google Meet, and Microsoft Teams. In most cases, these only work when you already have a video call or broadcast in progress.
Step 4: Choose Start Recording to begin. The microphone will be enabled during your recording, letting you narrate or add comments to whatever you're recording.
Step 5: Proceed with your screen recording. When you're done, select the red timer or Dynamic Island to stop your recording as described in the previous section.
You can also toggle the microphone on or off while a screen recording is already in progress by opening the Control Center, pressing and holding on the Screen Recording button, and selecting the Microphone button.
Note: Once enabled, the microphone option remains on in future screen recordings unless you specifically switch it off.
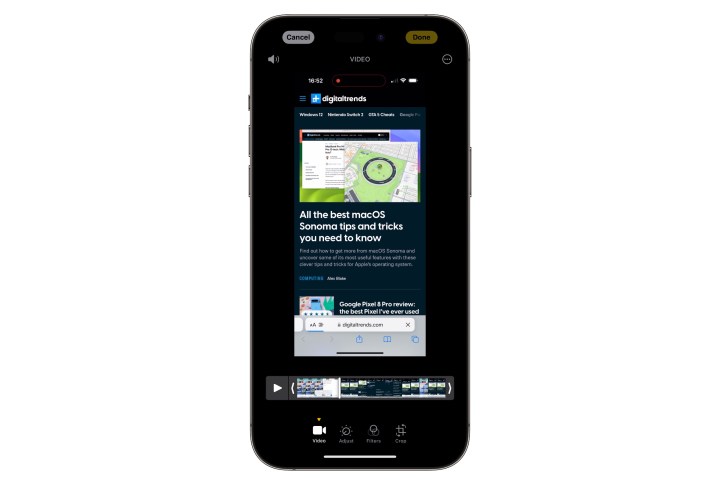
How to edit a screen recording
Your screen recordings will be saved into the Photos app just like a video you've recorded with your iPhone's camera, and they can be edited and trimmed in the same way.
Step 1: Open the Photos app and locate your screen recording. You can also go directly to a screen recording you've just finished by selecting the notification banner that appears when you stop recording.
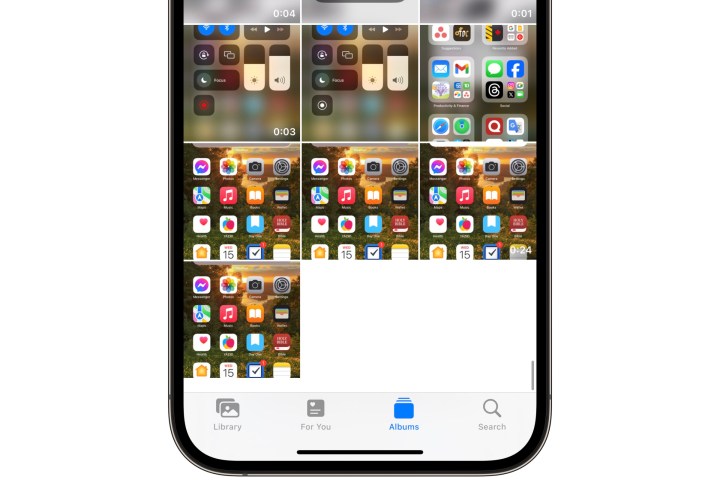
Step 2: Once you've opened your screen recording, select the Edit button in the top right corner.
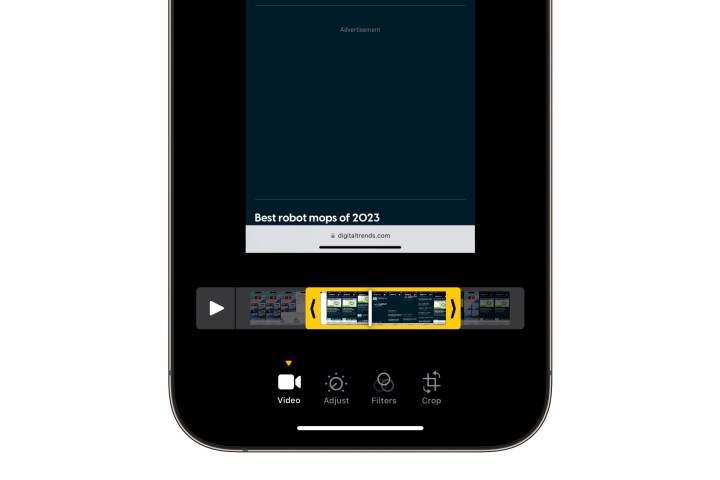
Step 3: In most cases, you'll likely just need to trim your screen recording to take a bit off the beginning and end. To do this, select the arrows at either end of the timeline that appears below your video and drag them to the left or right to adjust the start and end points. A yellow outline should appear around the video.
This can take a bit of precision to get right on some iPhone models. If your finger doesn't quite hit the proper spot, you'll be scrubbing through the video instead. You'll know you're in trimming mode when you see a yellow outline appear around the timeline.
As you adjust the start and end points, you'll see a frame-by-frame preview of your video to help you narrow it down. You can also hit the Play button to play back the trimmed portion.
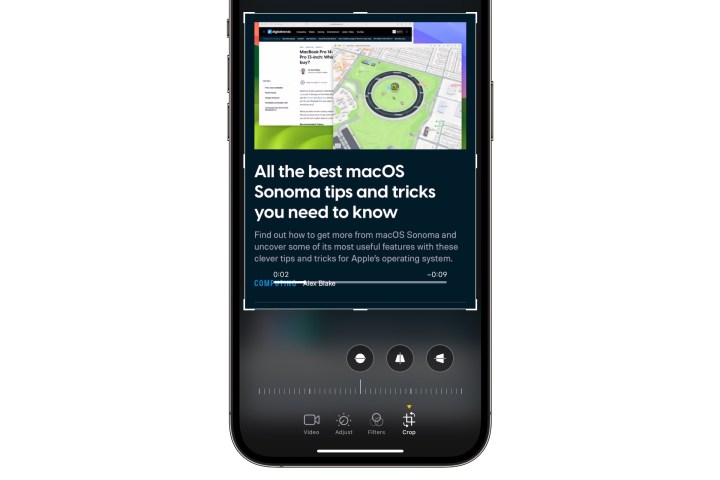
Step 4: In addition to trimming your video, you can also find tools here for adjusting exposure, brightness, contrast, color, applying filters, and cropping. While these won't typically be useful for screen recordings, they're there if you need them.
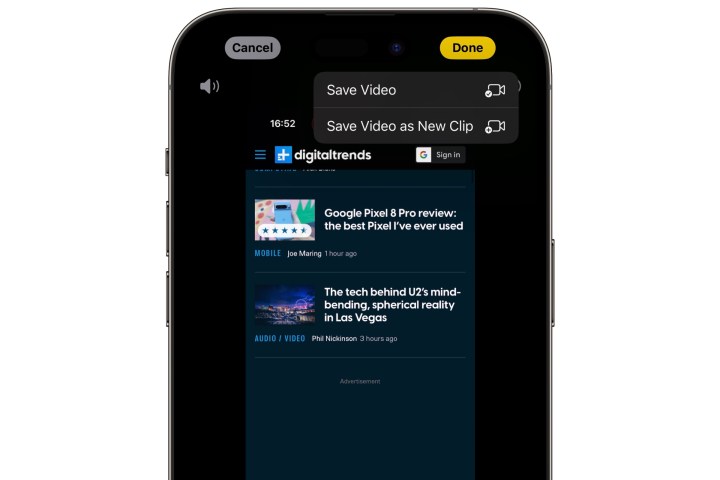
Step 5: When you're satisfied with your edits, select Done in the top right corner and choose Save Video if you want to overwrite the original screen recording or Save as New Clip if you want to save your edited version as a copy.
How to share an iPhone screen recording
Since screen recordings are saved as standard video clips, they can be shared in the same way as any other image or video from your Photos app. Select the Share button in the bottom left corner to bring up the standard iOS Share Sheet, and choose the person or app to which you want to send the screen recording.


