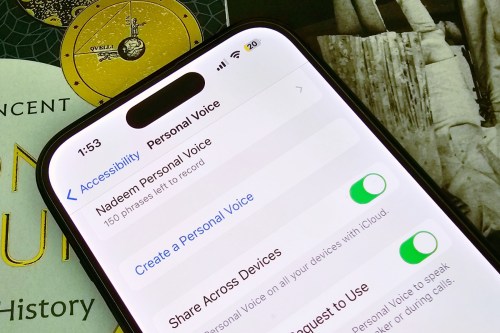
Personal Voice is an accessibility-centric feature in iOS 17 that saves a likeness of your voice, just the way different Siri voices come pre-installed on your phone. It integrates with the in-built Live Speech system and reads out on-screen content or any other data stored on the phone in your own voice.
Apple says the new feature lets “users at risk of losing their ability to speak to create a voice that sounds like them.” For example, people living with ALS, vocal cord haemorrhage, laryngeal cancer, and multiple sclerosis have a high risk of losing their voice. Even excessive use, or misuse of the vocal cords can lead to such a grave outcome.
To address such a scenario, Apple developed Personal Voice so that users can still retain a digital semblance of their real voice and use it to communicate with their friends and family members. It can be used for FaceTime calls, during regular phone calls, and in any assistive app of your choice.

How to create a Personal Voice in iOS 17
You can create a Personal Voice using an iPhone running iOS 17, and even an iPad running iPadOS 17. The only limitation is that it is currently exclusive to the English language. And if you wish to create it using a Mac, it must have one of Apple’s own M-series processors inside.
With that all in mind, here's how to set up the Personal Voice feature:
Step 1: Open the Settings app on your iPhone.
Step 2: Scroll down and tap on Accessibility.
Step 3: On the Accessibility page, navigate downwards and select Personal Voice.
Step 4: As you land on the next page, tap on the option that says Create a Personal Voice.
Step 5: An on-screen pop-up will now explain what this feature is all about and some instructions, as well. At the bottom, hit the blue OK button.
Step 6: Next, you will be asked to set the name for the Personal Voice you are about to record. Once you’ve decided on the name, tap on Continue and proceed to the next stage.
Step 7: You will now see a page that says Check Sound Quality. Here, tap on the red record button at the bottom and read the line(s) that appear in bold text at the center of the screen.
Step 8: Once you’ve recorded the first line, the training system will show a message that says “Moving to the next phrase” above the red recorder button. Then, it will automatically keep giving you fresh lines until you’ve recorded all 150 of them.
Step 9: After all the training lines have been recorded, you will see an on-screen message that says "You’re Done Recording." As you hit the Continue button at the bottom, you will be asked to grant it notification access. Select Allow in the prompt box.
Step 10: Next, you need to plug your phone in for charging and leave it in a locked state for the recordings to process. Once a Personal Voice based on your own vocal likeness has been created, you will receive a notification that it’s ready for further setup.
How to use your Personal Voice
As mentioned above, a notification will tell you when your Personal Voice bank is ready. You can head into the settings and replace the default Siri voice with one that sounds like your very own.
In our testing, it took around nine hours for the Personal Voice to be get processed. We also noticed that the Personal Voice doesn't immediately appear in the Live Speech settings. You might want to reboot the phone or wait a bit for it to pop in the Voices section.
Once the Personal Voice is ready at system level, it’s a fairly simple process and all it takes are a few steps that are detailed below:
Step 1: Open the Settings app on your iPhone and click on Accessibility.
Step 2: On the Accessibility dashboard, scroll down until you find Live Speech.
Step 3: Enable the Live Speech toggle on the next page. Below it you will see the language option under the Voices banner and the corresponding voice in a format like this: English (U.K.): Samantha.
Step 4: As you tap on the Voices option and land on the next page, select Personal Voice appearing at the top.
Step 5: On the next page, you will see the name you originally set for your personal voice. Tap on it and you’re good to go.
Once you have enabled your Personal Voice as your Live Speech preference, it can be used for a wide range of tasks. During voice and FaceTime calls, all the text you type will be read out loud in your own voice. It can do the same job during in-person conversations, as well.
Alternatively, you can also save some of the most commonly used phrases and keep them handy for any kind of conversation in the future. In our tests, we found that the distinct audio signature is replicated well using Personal Voice, but it does make the signature pauses and nuances sound somewhat robotic, especially if you are a non-native English speaker.
Even so, it's impressive to have such a powerful feature baked right into your iPhone — especially one that's as easy to use as Personal Voice is.
Editors' Recommendations
- A big iPhone update is right around the corner
- How to fix iMessage activation errors on your iPhone
- How to find your phone number on iPhone or Android
- How to turn off call forwarding on iPhone and Android
- How to transfer photos from an iPhone to a computer