“This system offers a great solution because it takes all of the guesswork out of the equation. The downside is that it still requires a chunk of time and patience...”
- Clear, step-by-step guidance
- Solid results
- Settings can be archived
- Tedious process
- Potentially complicated, depending on TV menu design
- No technical data feedback
You don’t have to be a high-end home theater enthusiast to see the value in adjusting your new TV’s picture settings. We have a natural tendency to want to look at visually appealing things as we move through our lives, so we paint the walls in attractive colors, decorate our homes and grow beautiful flowers. It stands to reason, then, that we would also want the rectangular thingies that beam colorful lights at our eyeballs to look as pretty as possible. Aside from that, we seem to have this intrinsic need for our cool tech-gear to perform at its absolute best.
And so it is direly important that you don’t just uncrate your expensive, sleek new TV, hang it on the wall and call it good. There’s a whole menu of picture settings there just itching to be adjusted so that your new TV doesn’t just put out a great picture; it puts out a stunning picture.
To achieve this state of TV nirvana, you’ve got a few options:
1. You can wing it, armed only with your eyeballs and raw gut-instinct to guide you through a labyrinth of picture settings.
2. You can plop down $25 for a calibration disc and another $200-worth of your time as you decipher terms like “Chroma,” “Whiter-than-white,” and “Gamma.”
3. You can roll the dice on an ISF-certified calibrator whose service may cost half as much as the TV and hope for a positive return on your investment.
4. You can invest $100 and 25 minutes of your time into a device that will walk you through the calibration process step-by-step and take measurements to validate your results, thereby adding an element of objectivity to an otherwise subjective DIY project.
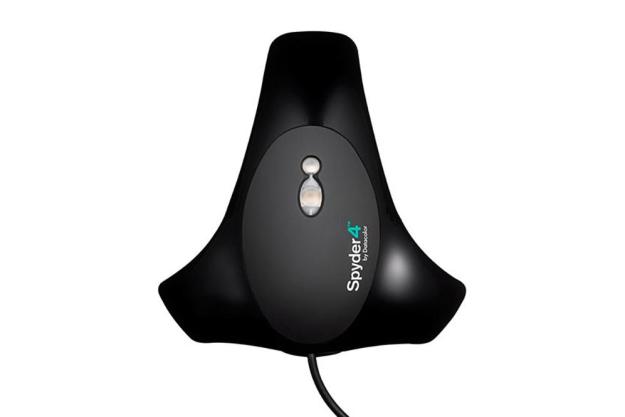
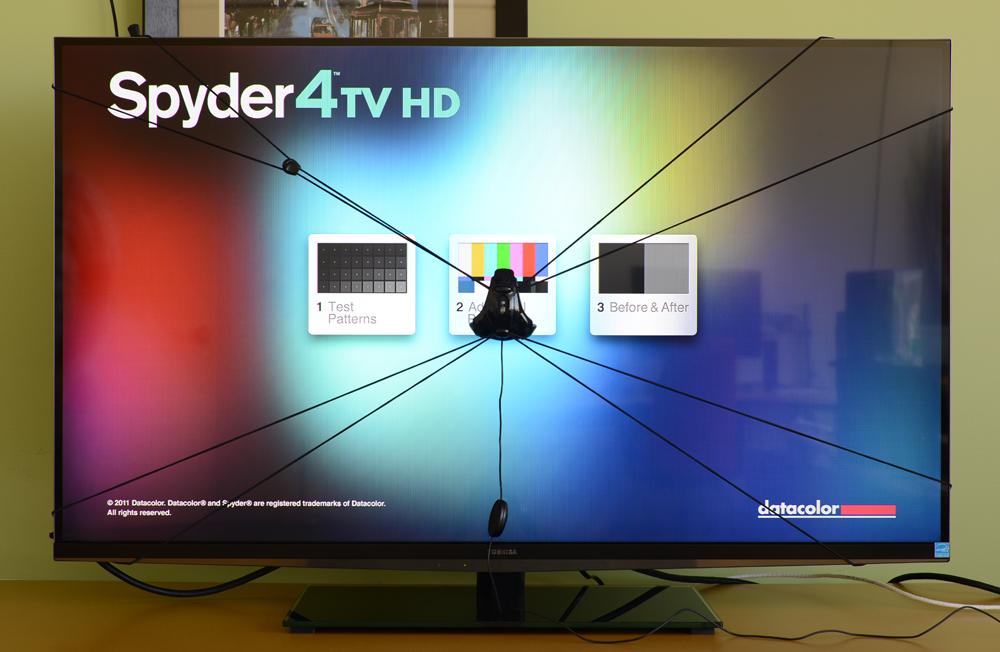
Datacolor’s Spyder4TV HD offers TV owners that last option. It uses a light and color sensor that you strap to your display using a spider web-like apparatus, a Blu-ray or DVD full of test patterns, and a computer program to direct you through the process, validate the results, and store them. But what is the user experience like and how do the end results stack up against those achieved by a pro? We put the Spyder4TV HD through several tests and we have the answers below.
Out of the box
The Spyder4TV HD package includes a tri-footed Spyder sensor (colorimeter), a “web” cradle for the sensor with long, adjustable elastic straps, and four discs featuring test patterns on Blu-ray and DVD (NTSC and PAL) and computer software (which is outdated and will direct you to Datacolor’s website for a download).
Setup
To get the best readings, the Spyder4 sensor needs to lie flat against the center of your TV screen. To do this, you place the sensor within the web’s plastic cradle and draw the elastic bands round each corner of your TV. After tightening the straps appropriately, the sensor should be suspended and held against the TV’s display panel at the center.
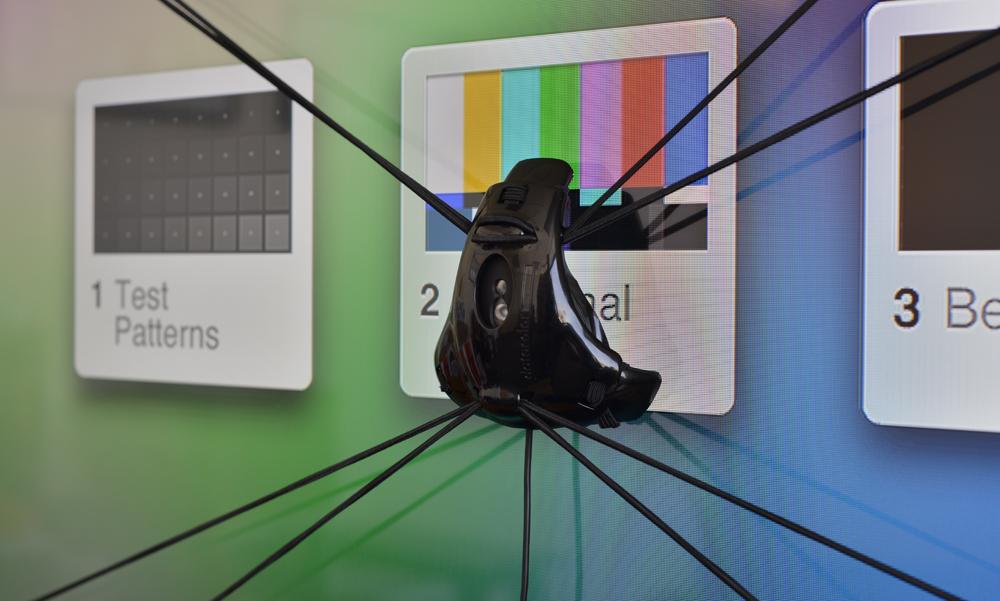
Besides proper positioning, the sensor requires complete darkness. Since that wasn’t always possible for us, we chose to cover the sensor and the screen surrounding it with a black-out cloth of some sort. (For us, this usually ended up being a black hooded sweatshirt.) The disadvantage to this approach is that the covering obscures the screen, thus making it difficult to navigate through the TV’s menus to the correct settings section.
Dangling from the sensor is a USB cable, which needs to be plugged into a computer (PC or Mac). This computer will need to have had the Spyder4TV software installed and ready to run.
Ideally, you’ll want to use a Blu-ray player for this process, but Datacolor does also provide a DVD. Once the disc loads, you’ll select “test patterns” from the menu and the adventure will begin.
How it works
The Spyder4TV software begins by getting a little information about what the TV’s picture settings menu looks like and how it works. For instance, it wants to know whether the brightness setting works on a 50-point or 100-point scale, along with which numbers represent the minimum and maximum settings. In some cases, you may have to do some translation since some TVs don’t follow the same guidelines as outlined in the software. Such was the case with our LG G2 display, which expresses color adjustments in terms of red and green numbers, rather than positive and negative numbers on a sliding scale.
The software then prompts you to set the TV to its “standard” preset, then adjust brightness to its mid-point — for many, this will be the number 50. Then the program takes a reading from the sensor and logs it.
Next, the software will have you adjust the TV’s brightness to its maximum setting, followed by another measurement. Then, you reduce the brightness to its minimum, and another measurement is taken — and so on and so forth. This process is repeated until the software narrows down the perfect brightness setting.
With brightness set, the software will turn its attention to the contrast — and the adjustment and measurement repetition continues. Eventually, it will go through color temperature, color settings, and tint settings. At the end, it verifies its work by measuring against each test pattern and ultimately spits out a PDF report to let you know what the final settings are and how long it took you to get through each testing segment.
User experience
By our description alone, it should be obvious that this procedure is tedious. What may not be apparent is that it can also be frustratingly confusing. We found ourselves having to juggle two remotes — requiring several button-presses at a time — a laptop keyboard and, sometimes, a hooded sweatshirt. But, as is often the case with things that require multi-tasking and coordination skills, we eventually got in the groove through repetition.
To give Datacolor credit where it’s due, we have to note that software does a great job of walking the user through each step, including helpful graphic representations of each task as it happens. Plus, should you accidentally measure the wrong test pattern or forget to make an adjustment (as we did, several times) the software allows you to go back, step-by-step, and re-do your work.

Unfortunately, the Spyder4TV isn’t solely responsible for its ease of use. Much rides on how easily the TV in question can be navigated and adjusted. We found that performing a calibration on our Toshiba 55L7200U was fairly simple, and relatively quick. Had that been our sole experience, we’d have been thrilled. But performing the same operation on our 55-inch LG G2 turned out to be a nightmare. This Google TV-enabled model from LG has a very unconventional menu system, forcing the user through five menu options before reaching the desired picture control. Since the software requires that you pull out of any on-screen menu display before taking a measurement, this meant we had to go through that five-menu marathon 52 times; and it was aggravating.
Performance
To evaluate the performance of the Spyder4TV HD, we first undertook a manual adjustment using our arsenal of test discs and our trained eyes to optimize settings that brought out the display’s best performance in several key areas. We then ran the Spyder4TV on a separate picture preset and saved its results, making sure that all picture-related controls not addressed by the Spyder4TV were mutually identical between the two picture options. Finally, we compared both on a purely numerical basis and through subjective picture comparisons.
What we found is that, while we are pretty good at judging optimal brightness and contrast settings with our naked eye, the Spyder4TV was able to manage color and color temperature much more accurately, which yielded visibly superior picture quality.
Here are the settings we made on our LG G2 manually:
- Backlight: 60
- Contrast: 90
- Brightness: 53
- Color: 54
- Tint: 0
And here are those made by the Spyder4TV HD:
- Backlight: 60
- Contrast: 94
- Brightness: 55
- Color: 55
- Tint: R1
We should note that the LG doesn’t provide color temperature presets, therefore the differences between the two results here are not as stark. With the Toshiba 55L7200U, however, the differences in Color and Tint settings were much more substantial.
As we compared the picture quality between the two settings, we generally — and totally subjectively — favored the work of the Spyder4TV HD. We’d love to have some data to help explain why, but Datacolor’s software doesn’t provide such detailed metrics, so we don’t know how far off the set was from its ideal before adjustment, nor do we have any numbers to define what “ideal” is in this case.
And yet, something about having that colorimeter take measurements that we mere humans could never hope to get gives us some sort of confidence that the job was carried out at least marginally better than we could do on our own — and almost certainly better than the average Joe would wind up with unassisted.
Conclusion
With plenty of practice and patience and a handful of the right test patterns, it is possible for the average user to teach themselves how to dial in their TV for enhanced performance. The Spyder4TV HD can streamline that process and add an element of objectivity to the results by using data from a special sensor. In either case, you won’t be getting professional quality results, but the results you do get are better by leaps and bounds than those provided by the factory picture presets.
As far as we’re concerned, the Spyder4TV HD is a totally worthwhile product. Some folks just don’t have the time or patience that it takes to learn how to adjust a TV properly. This system offers a great solution because it takes all of the guesswork out of the equation. The downside is that it still requires a chunk of time and patience and those requirements increase exponentially, depending on how easy the TV is to work with.
We think $100 ($80 street) is a fair price for a tool that will get your TV looking great and keep it looking its best as it ages. As such, we recommend the Spyer4TV HD to consumers with enthusiast demands and a DIY budget.
Highs:
- Clear, step-by-step guidance
- Solid results
- Settings can be archived
Lows:
- Tedious process
- Potentially complicated, depending on TV menu design
- No technical data feedback
Editors' Recommendations
- The best Samsung The Frame TV deals — from just $600
- Best 70-inch TV deals: Get a big screen for sports for $420
- Best Vizio TV deals: Cheap smart TVs starting at $90
- Best QLED TV deals: Samsung, TCL, LG and Vizio
- Sony debuts the Bravia 9, its brightest 4K TV ever, alongside new 2024 models