Whether you’re planning on upgrading your graphics card, or want to know what version of Windows your machine is running, it pays to know your PC’s specifications. Luckily, you have quick access to most of these details.
For your consideration, we’ve put together this guide to teach you how to locate, and understand, your PC’s specifications in no time at all.
How to check your specifications in Windows 11
Step 1: Click on the Windows logo in the bottom-left of your screen on the taskbar. Alternatively, press the Windows button on your keyboard — it should be located close to the space bar, on the bottom-left side.
Step 2: Click the Gear icon above the Power button, highlighted in red on the above screenshot, in order to enter Windows Settings. You can also type in “settings” with the Start menu open. The system will then suggest the right app to you.

Step 3: Click on the System section in the top-left corner. This will take you to a basic overview of your computer.
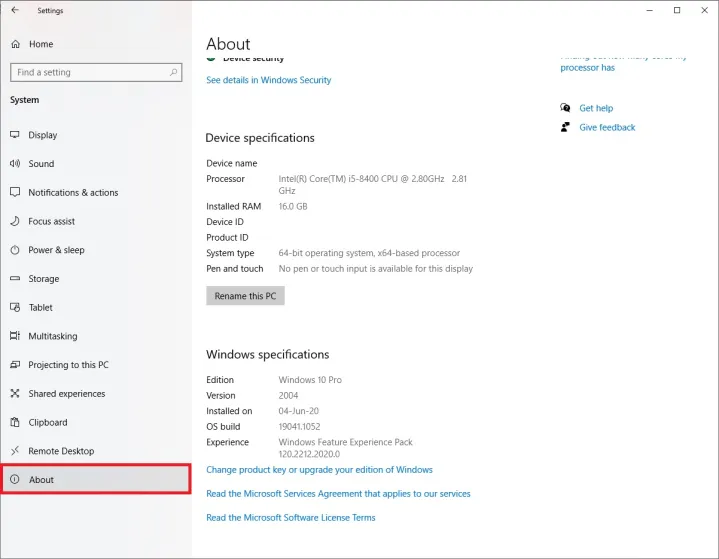
Step 4: Scroll down on the left side of the Windows Settings until you locate the About section at the very bottom. Clicking on it will tell you some basic things about your PC.
Entering the About section will tell you the kind of processor (CPU) you’re running, the amount of memory (RAM) you have installed, and the device ID. It also shows you the version of the operating system you’re using.
This kind of information will suffice in many cases, but if you want to know more about the hardware inside your desktop PC or laptop, keep following through the next few steps.
Check the Device Manager for more information
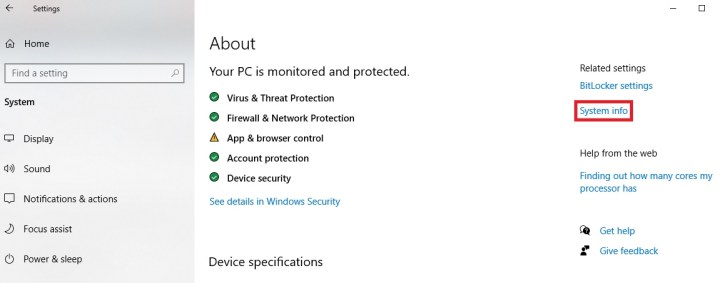
Step 1: The Device Manager in Windows 11 contains a full list of all the components that you own. There are two ways to access it, and the first one can be found without exiting the previous Settings window.
In the Related Settings menu in the top-right corner of the About section, click the link labeled System Info.
Step 2: Next, find the link labeled Device Manager in the top-left corner.
Alternatively, you can enter the Device Manager by using the Start menu. Simply repeat the first step of this guide. Open up the Start menu by clicking the Windows logo.
Step 3: With the menu open, type in “device manager.” Click the highlighted search result or simply press Enter on your keyboard to enter the Device Manager.
Step 4: The Device Manager contains information about all the components in your PC or laptop. It lets you see the exact model of most pieces of hardware, including the processor, the graphics card, disk drives, ports, peripherals, and more.
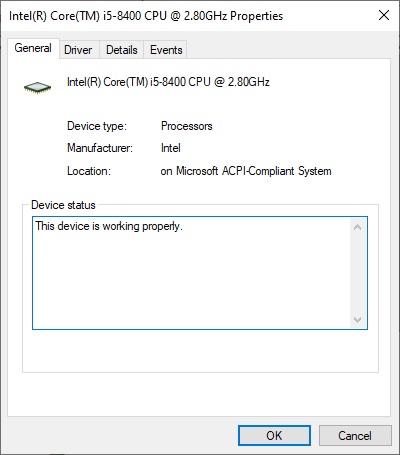
Expand the categories that interest you by clicking on them — this will show you more information about your hardware of choice. For example, clicking Display Adapters will show you the graphics card (GPU). Similarly, clicking on Processors tells you all about the processor (CPU) installed in your PC and shows you the number of cores that your CPU has.
You can double-click any component in the Device Manager in order to learn more about it, such as its status, installed drivers, and more.
Device Manager contains most of the information you need about your current PC. However, if you want to dig a little deeper, check the alternative option below.
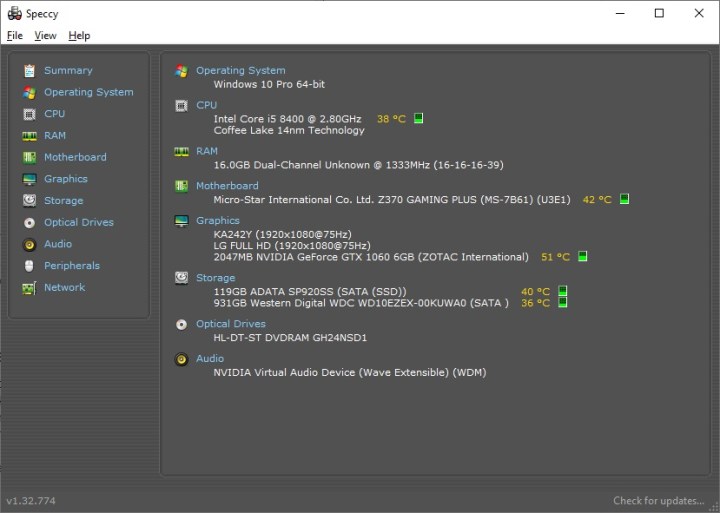
Use Speccy to quickly see the specs of your PC
Speccy is a program that will show you how to check PC specs easily. It’s a lightweight, quick-to-use tool that offers bite-sized information without delving into too much detail. You can download Speccy here and then choose between the free and premium versions. The free version is sufficient for most users.
Once you’ve installed Speccy, run the program. After a quick analysis, you will be presented with a summary of the components in your PC. Speccy also highlights temperatures and alerts you if your PC is too warm. If the temps are too high, you may be in need of a better cooler, but there can also be many other reasons behind the issue.
You can also click around the program on the left-hand side. Going into any of the sections will tell you more about that particular component.
If you find that you need even more information about your system and its status, a good alternative is HWiNFO. You can download it here.
Editors' Recommendations
- How to connect Bluetooth headphones to PC
- How to check the storage space on your Mac
- How to create a bibliography in Word on Windows and Mac
- Windows 11 might nag you about AI requirements soon
- How to delete or hide chats in Microsoft Teams


