Finding a font you like can be tough — especially if you work in marketing or graphic design and regularly need to locate the perfect font for your project.
Fortunately, MacOS (or on iOS, if you need help with that) has greatly improved the way you can quickly download, preview, and enable new fonts for popular Mac design apps.
Here’s how to install fonts on a Mac and quickly organize them.
Downloading the right fonts

Step 1: Look for the font that you need. There are many, many sources of fonts online, from casual lists to fonts specifically for designers (or you could just decide to design your own font). Most of the lists are free, although some designer fonts come with a charge.
Step 2: Make sure the font you choose is compatible with MacOS. You can tell by looking at the file name. Mac supports TrueType, or “.ttf” files and well as OpenType or “.otf” files. Fortunately, this covers the majority of downloaded fonts. However, you will not be able to use PC bitmap or “.fon” fonts, which are not compatible. Presumably, future open-source formats will work just fine.
Step 3: You may want to double-check the website reviews to make sure downloads can be trusted — always use a trusted website before you choose to download anything! If everything looks good, download the font file that you want. This will add a new file (potentially compressed) to your Mac download section.
Previewing and installing the font on MacOS
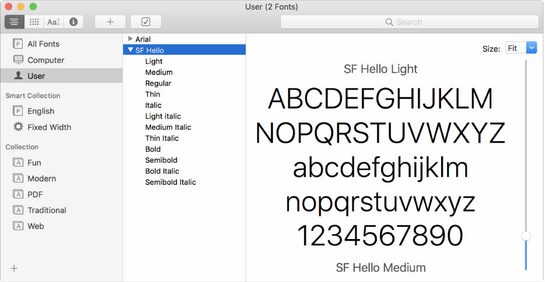
Step 1: Navigate to the file you just downloaded in Finder, then open it up (expand zip files as needed first). This should immediately open Font Book. This is an app that is included in MacOS to help make managing fonts easier, and it has several useful functions. When you click on a brand new font, Font Book will pop it up and show you a preview of that font.
Step 2: Take a look at Font Book’s preview. You can change the typeface with the drop-down menu at the top of the window to get a better look at the font’s different weights and styles. If it’s not what you expected or there’s something wrong with the appearance, you will probably want to download a new version of the font from a different site or try a new type of font.
Step 3: At the bottom of the Font Book preview window you will see the option to Install the font. Click the button and the font will be installed on your Mac. In theory, Font Book makes a font available for all apps on MacOS. In practice, however, you may encounter some trouble with things like older Microsoft Word apps, which may not be properly set up to accept new fonts.
Installing directly from Font Book
MacOS offers an additional method for installing fonts that suits users who would like to incorporate various fonts at the same time. It is also a good option for updating, improving, and personalizing your specific collection of fonts to make them easier for you to find and manage. If you’re in an industry where font usage is prevalent and particular- web engineers or other big tech industry jobs, for example,- then this will serve you well.
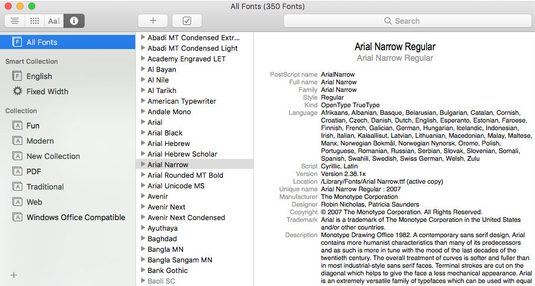
Step 1: Click Go in your Mac’s menu bar, then click Applications. In the Applications window, select Font Book — its icon is a book with a big F on it.
Step 2: Once the Font Book window opens, you can explore all your current fonts. You will find an alphabetical list of all your fonts, but you can explore the Smart Collection section to find other ways of organizing and displaying your fonts. If you are carefully searching for a font, it may be a good idea to check your current fonts to see what your options are before downloading new files online.
Step 3: You’re now able to install your fonts. Navigate to the toolbar and click the plus sign (+), which will bring up a new window. Then, navigate to the Downloads folder and browse the fonts you’ve installed. Choose the Icons option from your toolbar to view each font. To install multiple fonts at once, press and hold the Cmd key on your keyboard. When you’re ready to install, click Open.
Step 4: The Collections option in Font Book keeps all your fonts in order, making projects easier. Choose the plus sign (+) at the sidebar’s bottom to organize your fonts any way you’d like.
The File and Edit tabs within the top toolbar offer you the ability to eliminate unused or unwanted fonts or groupings of fonts. You can also use Font Book to validate fonts that give you problems. Click the File menu to access font validation.