Creating zip files on a Mac might seem daunting at first, but you have a few options -- and plenty of tools -- at your disposal. While you may have experience creating a zip file on a Windows-based computer, the process is slightly different on a Mac.
With this guide, you’ll become a pro at zipping and unzipping files between your Mac, iPad, and iPhone in no time. If you want to secure your zip files with a password, we have a guide for that too.
How to zip a single file on a Mac
Creating a zip file on a Mac is quick and easy, as macOS includes a built-in tool called Archive Utility for compressing and unzipping files. You don't need a third-party app to get started.
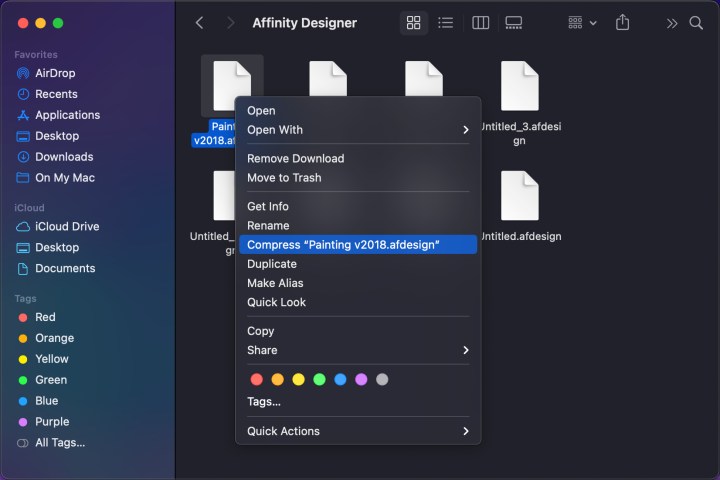
Step 1: Right-click or control-click on a file you want to compress and select Compress [File Name] from the pop-up menu.
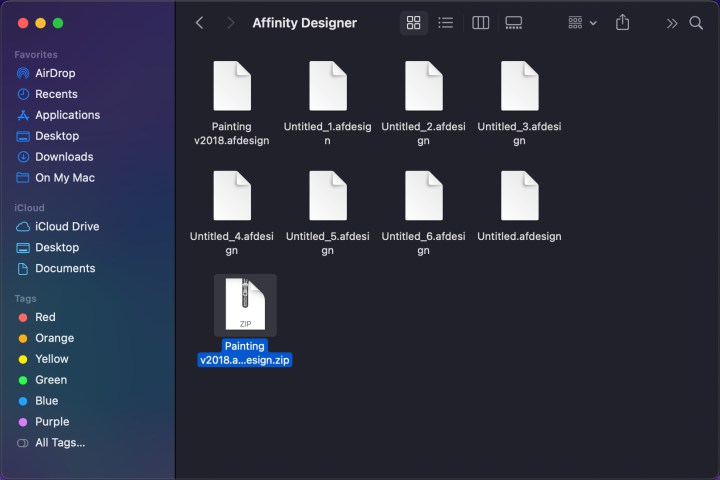
Step 2: As shown below, a new zip file appears in the same folder, while the original file remains.
How to zip multiple files
The process is very similar for compressing multiple files into a zip archive, albeit with a couple of small differences.
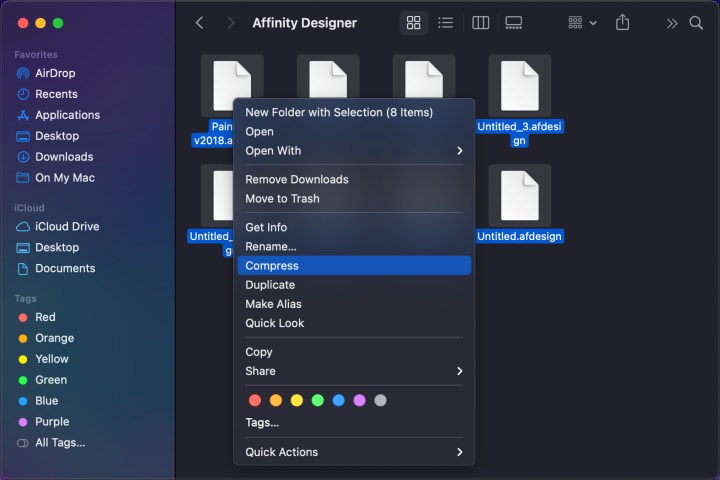
Step 1: Using your mouse or trackpad, draw a box around all the files you want to compress. Alternatively, hold the Command key while selecting your desired files.
Step 2: Right-click or control-click and select Compress from the pop-up menu. A new archive will appear in the folder. As before, the original files remain intact.
Step 3: To rename the default Archive.zip file, simply right-click or control-click on the archive and select Rename. Or you can select the file, select Return and type a new name. This is useful if you need to create multiple zip files or to make it easier for the recipient to know what's in the archive.

How to unzip a file
There’s nothing complicated about unzipping a zip file, and it's easy to do in a few different ways.
Step 1: Double-click on your zip file and it will unzip its contents automatically. The files it contains will be put into a new folder that takes the name of the zip file. The zip file will remain intact and in place.
Step 2: Alternatively, right-click or control-click on a zip file and choose Open from the pop-up menu.
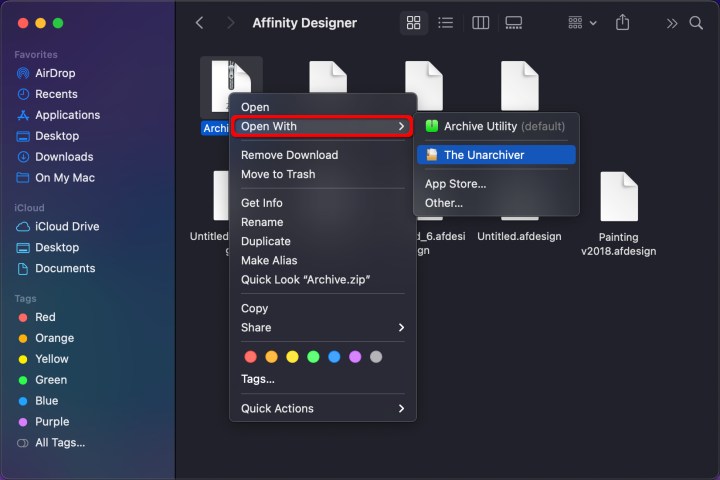
Step 3: You can also hover over Open With in the right-click menu, then choose Archive Utility. You can download unzipping software like The Unarchiver if you prefer.
Is compression not working?
Perhaps you cannot compress files because file permissions aren’t letting you. Fortunately, you can fix that by changing the zip file's permissions.
Step 1: Right-click or control-click on the file you want and choose Get Info from the resulting menu.
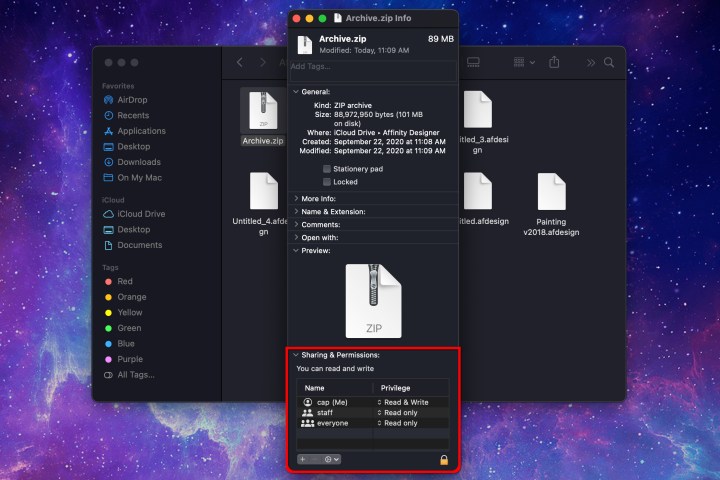
Step 2: Click the arrow beside Sharing & Permissions to open this choice, as displayed above.
Step 3: Check that your specific account is set as an administrator and that your permissions are Read & Write. If they are set to Read Only, change them to Read & Write in order to give yourself the proper permissions.
Step 4: You might need to click the Lock button in the bottom-right corner of the Get Info window in order to make changes. Once that's done, switch your permissions to Read & Write and try compressing the file once more.
Sending compressed files to iOS/iPadOS
There are times when you might want to send a zip file from macOS to an iOS or iPadOS device. In that case, you’ll need to complete a few more steps to uncompress the files on your phone or tablet.
Step 1: First, you'll need to save the zip file to the Files app on your iPhone or iPad. For example, if you've sent the zip file in an email, open your email app, tap the Share button on the attachment, then select Save to Files.
Step 2: Now open the Files app and locate the file in question.
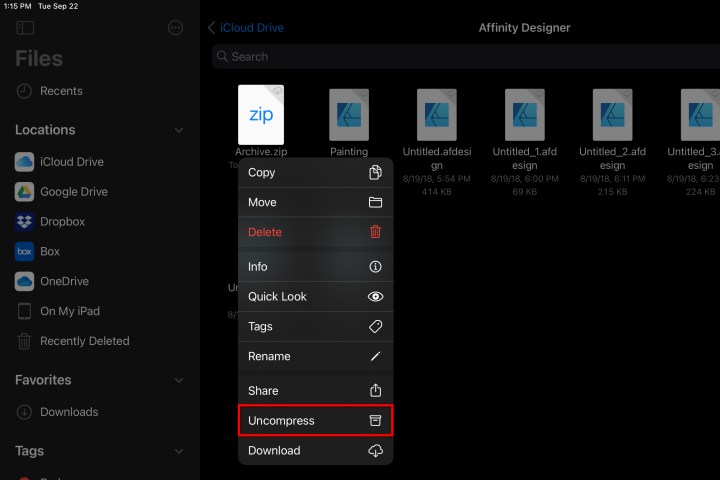
Step 3: Tap and hold the file and choose Uncompress. As on macOS, this will create a new folder containing the unzipped files, while leaving the zip file itself intact. That's all there is to it.
Editors' Recommendations
- How to delete messages on your Mac
- How to check your CPU temperature
- How to choose an external hard drive
- How to convert WMA to MP3 on Mac, Windows, and Web
- How to convert FLAC to MP3 on Mac, Windows, and web