How to sign a PDF on Mac

how to sign a pdf on mac macbook preview signed
Image used with permission by copyright holder

As a Mac user, you’re likely familiar with Preview as the default app for viewing images. But this handy application gives you an easy way to sign documents, too. You can create and save a signature using your trackpad, camera, or mobile device. Then, pop that signature into the document in just a few steps.

Here’s how to sign a PDF on Mac using Preview by inserting a saved signature or creating a new one.

Difficulty

Easy

Duration

5 minutes

What You Need

  • Mac computer

  • Preview app

Sign a PDF on Mac using Preview

If you already have a saved signature, signing the PDF in Preview on Mac is a simple process.

Step 1: Open the PDF file in Preview. You can do this by right-clicking the file in a folder or on your desktop, moving to Open with, and choosing Preview from the shortcut menu.

Alternatively, if you already have Preview open, select File > Open and browse for the file. Choose the PDF and pick Open.
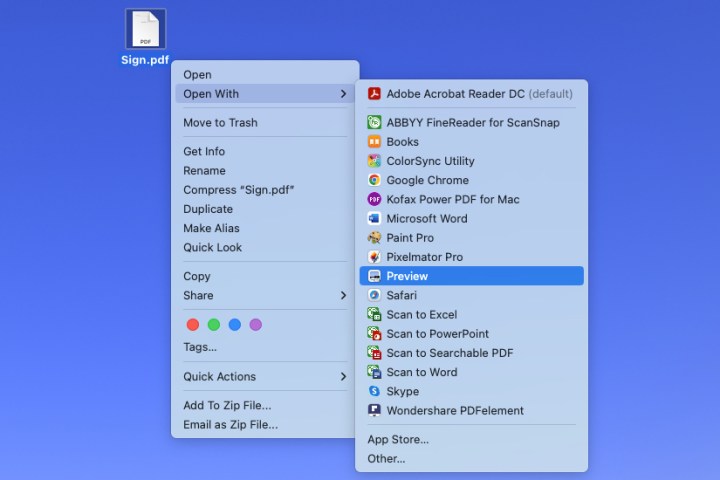
Open With Preview in the Mac right-click menu.
Image used with permission by copyright holder

Step 2: Select Markup in the Preview toolbar at the top. This displays a bar for the Markup tools.
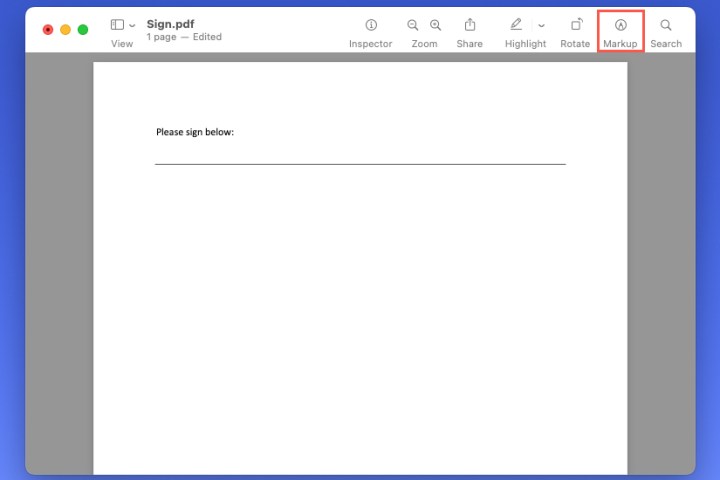
Markup button in the Preview toolbar.
Image used with permission by copyright holder

Step 3: Use the drop-down arrow next to the Sign button to choose your signature.

Sign button drop-down menu in Preview.
screenshot / Digital Trends

Step 4: When your signature displays, drag it to the spot where you want it in the document. You can also drag a corner to resize the signature to fit the document if needed.

You can then save the PDF, export it, or share it using File in the menu bar.

Signature added to a PDF in Preview.
Image used with permission by copyright holder

Create a signature and sign your PDF in Preview

If you don’t yet have a signature, you can create one to sign your document easily in Preview. Your new signature will automatically save so that you can reuse it in Preview later.

Step 1: Open your PDF in Preview, and select Markup in the toolbar.

Step 2: Use the drop-down arrow next to the Sign button to choose Create signature.

Create Signature in the Sign drop-down menu in Preview.
Image used with permission by copyright holder

Step 3: You can then create your signature using your trackpad, camera, iPhone, or iPad. Here are the instructions for each option:

Tackpad: Select Trackpad to sign your name using your Mac’s trackpad, and choose Click here to begin. Use your finger to sign your name on the trackpad.

Camera: Select Camera to capture an image of your signature from a physical paper. Use a white piece of paper and sign your name. Then, hold the paper up to your camera so that your signature is even with the blue line on the screen.

iPhone or iPad: Select iPhone or iPad > Select device in the Preview window, and pick your iPhone or iPad from the list. You’ll then see a screen appear on your mobile device ready for your signature. Create the signature, and tap Done.
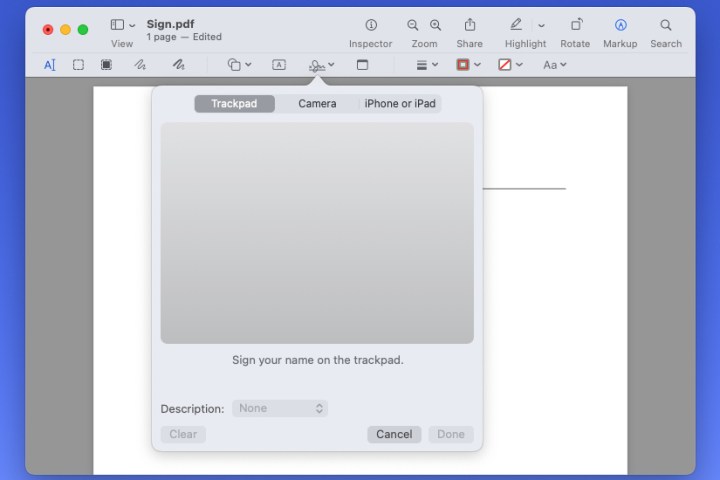
Trackpad, Camera, and iPhone or iPad options for creating a signature in Preview.
Image used with permission by copyright holder

Step 4: With each of the above methods, you can use the Description box to describe the signature. You can also select Clear if you want to redo the signature.

Select Done when you finish.
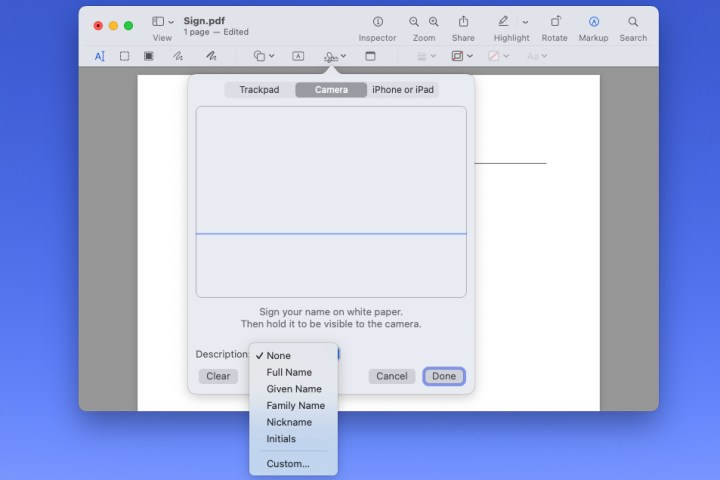
Signature Description drop-down list options.
Image used with permission by copyright holder

Step 5: When you see the signature display in Preview using one of the above options, you can then drag to move it where needed in the document. Again, you can drag a corner to resize your signature.

Next, you can save, export, or share the signed PDF using File in the menu bar.
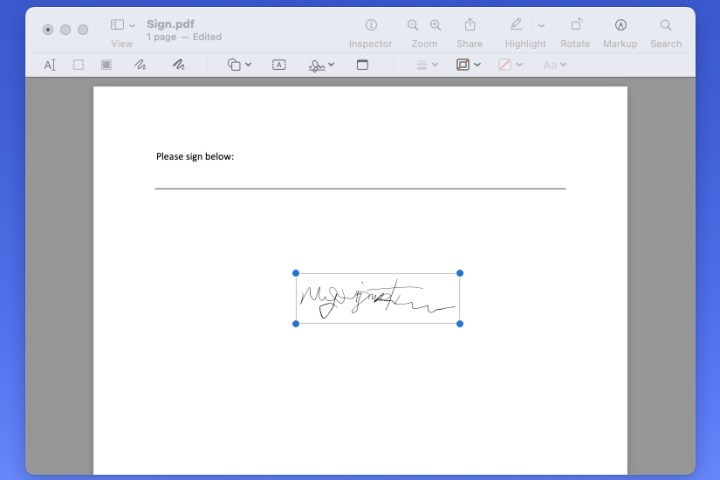
Signature inserted into a document in Preview.
Image used with permission by copyright holder

When you need to sign a PDF document for work, school, or business, it takes only a few minutes in Preview on Mac. For more, look at how to print a PDF on Mac as well.

Sandy Writtenhouse
Sandy has been writing about technology since 2012. Her work has appeared on How-To Geek, Lifewire, MakeUseOf, iDownloadBlog…
This MacBook Air M2 deal was super popular on Labor Day, and it’s still live
The screen of the MacBook Air on a table.

The price of the 13.6-inch Apple MacBook Air M2 was slashed by Best Buy to $799 from $999 for its Labor Day MacBook deals. The holiday is over but the $200 discount is still active, so you still have the chance to take advantage of what was the top trending deal on Best Buy's website. We're not sure for how much longer the offer will remain online though, so we highly recommend proceeding with your purchase for this laptop as soon as possible.

Why you should buy the 13.6-inch Apple MacBook Air M2
Even with the release of the Apple MacBook Air M3 series, the Apple MacBook Air M2 remains on our list of the best MacBooks as "the MacBook for everyone." Its lowered price, which is even cheaper with this offer from Best Buy, places it within reach for more people, with performance that will prove to be enough for most. This model has the excellent M2 chip combined with an eight-core CPU, a 10-core GPU, and 8GB of RAM. It also has a 256GB SSD, for ample storage space for all of your apps and files.

Read more
How to convert a PDF to a Word document
Young Adult Laptop Lifestyle

PDFs are a great way to share documents because the format can be read by mostly anyone. It's generally used with digital manuals, sales receipts, manuscripts, and so on — documents that aren't meant for editing. Think of PDFs as digital printouts with pretty designs.

However, there may be times when you need that document in another format other than a PDF. For instance, you might use Microsoft Word and wish to edit the PDF. Or a potential employer may want to read your resume. Originally saved as a PDF, they may prefer to view it in Word rather than Adobe's software. Here, we'll walk you through a few of the ways you can convert PDFs to Word documents.

Read more
How to create a bibliography in Word on Windows and Mac
A family using the computer to browse Fios internet together.

A bibliography is an important part of any well-structured college essay, dissertation, article, or other researched writing sample. It lets your readers know what sources you used as building blocks for your work, and isn’t too difficult to make without a template tool. Still, if you’d like to skip a few steps, there’s a terrific bibliography generator built right into Microsoft Word.

If you already know how to use Microsoft Word, it's useful to also know how to build a quick and easy bibliography for your next assignment or presentation.

Read more