How to read the Necromancy of Thay in Baldur’s Gate 3 and what it does

Baldur’s Gate 3 is filled to the brim with mysterious and magical objects to find. Some, like scrolls, are obviously beneficial to you, while others are a little more obscure. If you’ve gotten far enough into the game to get the Necromancy of Thay, then you should already understand that Baldur’s Gate 3 isn’t afraid to give you choices that have serious and lasting consequences. At the same time, you went through a lot of trouble just to get this clearly evil-looking tome so you may have attempted to give it a little peak already, only to see that it is locked shut and requires a special item to open. We’ll show you where to find the special item you need to open the Necromancy of Thay, but more importantly, what should happen if you choose to indulge your curiosity and read it?

How to open the Necromancy of Thay

A map of the whispering depths in Baldur's Gate 3.
Larian Studios

The item you’re after to crack this book open is called a Dark Amythyst. This gemstone is located not terribly far from where you pick up the book itself. First, go into the middle of the Blighted Village and investigate the well. Make sure you either use Investigation or toss a coin in to get the option to climb down yourself. This will bring you into the Whispering Depths. Choose to fight or bypass the Phase Spiders here by sneaking or turning invisible if that’s an option for you and make your way to the northwest end. You’ll know you’re in the right spot if you see the Phase Spider Matriarch. Unless you’re a high level, we advise avoiding this boss and finding a pile of bones on the western edge of the area. Next to them, you will see the purple Dark Amythyst.

With the Dark Amythyst in your inventory, you are able to crack open the book and read it if you dare.

What happens if you read the Necromancy of Thay?

Reading the necromancy of thay in Baldur's Gate 3.
Larian Studios

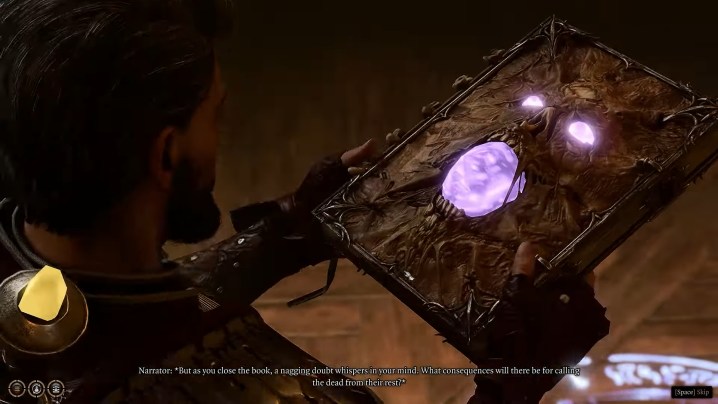
If you attempt to open the Necromancy of Thay at this point, you will first have three choices. First is to read it yourself, second to have Astarion read it, and finally, you can attempt to destroy it. Here’s how each one plays out.

Choosing to read the book as your main character will force you into several skill checks based on your Wisdom stat, each increasingly difficult. The first requires a roll of 10, followed by 15, and the last a 20 to succeed. Managing to pass any check will grant you a new trait called Forbidden Knowledge. This gives you +1 to all future Wisdom saving throws and skill checks. Pass all three checks and you will get the Speak with the Dead spell that lets you talk to corpses. Failing to pass these checks will give you a curse that debuffs all future Wisdom checks until you cure it.

If you have Astarion read the book, which will improve your relationship with him, he will read it and then stash it away with no immediate consequences.

Finally, if you’d rather not risk the implications of learning Speak with the Dead, or simply have too low a Wisdom stat to even want to attempt it, you can destroy the book. This evil book can’t be destroyed in normal ways, though, and only takes damage from Radiant attacks. If you don’t have any, Shadowheart’s Guiding Bolt will do the trick. Drop the book on the ground, take control of Shadowheart, and blast the book to oblivion. Be warned! Destroying the book will spawn three Shadow enemies that can be very tough to deal with.

How to finish reading the Necromancy of Thay
A book with an evil face in Baldur's Gate 3.
Larian Studios

If you took the risk to read the Necromancy of Thay and it paid off, you’re not quite done. There’s one last part of the book you can’t quite read yet, and won’t get a chance to until Act 3. To do this, you’re first going to have to get another book called The Tharciate Codex from the Sorcerous Vault. This is where Lorroakan stores his most valuable magical relics beneath Ramazith’s Tower. Once in the vault, keep going through the first set of doors and beyond a portal until you find the door with Ramazith on it. Past this door, you will be presented with three more doors: Elminster, Silverhand, and Karsus. To get where you need to be you need to first go through the Silverhand door, then the Abjuration door, turn back through the Wish door, then pull the lever to unlock, and go through the Elminster door.

Grab The Tharciate Codex and read this book to gain the knowledge needed to finally read the final part of the Necromancy of Thay, but also a curse that gives you -5 Constitution until you cure it. The final part of the book will require one last Wisdom check of 20, for which you will get the Danse Macabre spell that you can use to summon six ghouls to fight for you once per long rest.

Editors' Recommendations

Topics
Jesse Lennox
Jesse Lennox loves writing, games, and complaining about not having time to write and play games. He knows the names of more…
Mortal Kombat 1 Fatalities: how to do every character’s Fatality
Shang Tsung stealing someone's soul in Mortal Kombat 1.

What set the Mortal Kombat franchise apart when it first hit arcades was just how brutally violent the games were. It looks tame now, but the Fatalities of the original game were some of the most shocking things anyone had seen in a game up to that point, pixelated graphics and all. With Mortal Kombat 1, NetherRealm continues to churn our stomachs with some of the most disgustingly detailed ways to dismantle your opponent. Everyone loves seeing these creative ways your favorite fighter can definitively end a fight, but if you want to show off to your friends and humiliate your enemy, you have to know the specific button input to pull it off for each character. There are more that you can unlock, but here is how to perform every character's basic Fatality in Mortal Kombat 1.
How to perform all basic Fatalities
Here are all the default inputs for every character's Fatality on PlayStation and Xbox controls in alphabetical order, as well as what range you need to be at to trigger the Fatality. Once you have reduced your opponent's health to 0 and they are susceptible to a Fatality, which you will know from the announcer calling out "Finish him" or "Finish her," you will have five seconds to input the correct sequence.
Ashrah - Mid range
Down, Forward, Down, Triangle/Y
Baraka - Close range
Back, Forward, Down, Square/X
General Shao - Mid range
Back, Forward, Down, Square/X
Geras - Mid range
Forward, Down, Down, Circle/B
Havik - Close range
Down, Forward, Down, Circle/B
Johnny Cage - Close range
Forward, Back, Down, Triangle/Y
Kenshi - Close range
Forward, Down, Down, Triangle/Y
Kitana - Mid range
Down, Forward, Down, Circle/B
Kung Lao - Mid range
Down, Down, Back, Circle/B
Li Mei - Close range
Forward, Back, Forward, Cross/A
Lui Kang - Close range
Back, Forward, Down, Circle/B
Mileena - Close range
Back, Forward, Back, Square/X
Nitara - Mid range
Down, Down, Back, Square/X
Raiden - Close range
Back, Forward, Back, Triangle/Y
Rain - Close range
Down, Down, Back, Circe/B
Reiko - Mid range
Down, Down, Back, Triangle/Y
Reptile - Mid range
Forward, Back, Down, Circle/B
Scorpion - Mid range
Down, Forward, Back, RT
Shang Tsung - Close range
Back, Down, Down, Circle/B
Sindel - Mid range
Down, Back, Down, Square/X
Smoke - Any range
Back, Forward, Down, Square/X
Sub Zero - Any range
Forward, Down, Down, Triangle/Y
Tanya - Close range
Down, Back, Down, Cross/A
All Kameo Fighter Fatalities
Cyrax - Mid range
Forward, Back, Forward, RB
Darrius - Mid range
Down, Back, Forward, RB
Frost - Mid range
Back, Down, Back, RB
Goro - Close range
Back, Forward, Down, RB
Jax - Far range
Down, Forward, Down, RB
Kano Mid range
Back, Down, Forward, RB
Kung Lao - Mid range
Forward, Back, Forward, RB
Sareena - Mid range
Back, Down, Down, RB
Scorpion - Mid range
Down, Forward, Down, RB
Sektor - Mid range
Back, Forward, Back, RB
Shunjiko - Mid range
Down, Back, Down, RB
Sonya - Mid range
Back, Forward, Down, RB
Stryker - Mid range
Forward, Down, Forward, RB
Sub-Zero - Mid range
Forward, Down, Forward, RB

Read more
How to get Structural Materials in Starfield
Starfield planet.

Starfield has a massive expanded the amount of things you can build and craft. From entire Outposts to weapon mods and research projects, everything you want to craft will require specific materials to create. These materials will be found all over the various planets, either as lootable objects, ores you need to mine, or even as items you can purchase from various vendors, but some will always be harder to find than others. Structural Materials, while not the rarest resource, are used in nearly every aspect of Outpost building and upgrades. If you're running low on this crucial building block, here's how to get more Structural Materials in Starfield.
Ways to get Structural Materials

Like any resource in Starfield, there's more than one way to get your hands on Structural Materials. The easiest, but most expensive, will be to simply buy them from one of the many shops around the galaxy. Vendors' stock is slightly variable from day to day, but you can typically rely on any of your more "general" stores to carry this common material, such as the Jemison Mercantile in New Atlantis or Shepard's General Store on Akila. Each vendor will only hold a specific amount, so if you need a lot, you will need to do a little legwork. After buying out everything a vendor has, if you wait for 24 hours at a chair or bed, you can go back and their stock will be replenished.

Read more
How to unlock the Pilgrim’s room in Starfield
Cockpit in spaceship from Starfield.

For the most part, the main questline in Starfield won't challenge you too much in terms of puzzle-solving. Missions tend to boil down to getting an objective, fast traveling to a location, and following your marker until you collect an Artifact. Since you can only unlock all the powers by going through the main quests, you will at least want to complete most of them before going off and doing all the faction missions, outpost building, or general space exploration. There's one mission, though, that can be a roadblock if you're not extra observant and invested in reading all the lore. If you don't know the answers to opening the Pilgrim's Computer in Starfield, here is all the information you need.
Pilgrim Computer's answers

After you arrive at Pilgrim's Rest and explore, you will be led to the small base that's full of notes, among dozens of other items. Your objective is behind a locked door that asks you a few questions that you're supposed to learn the answers to by hunting down and reading all the notes. This isn't a door you can lockpick no matter how high your skill level is, so selecting the right answers is the only way forward. Here are all the questions you will be asked, and the correct responses:

Read more