How to customize the control center icons on PS5

Your control center on the PlayStation 5 is there to give you easy and quick access to your most-used functions. With a simple tap of the PlayStation button, a row of icons appears at the bottom of your screen to let you do things such as return to your home screen, view notifications, adjust sound, and other handy options. However, there isn't enough space for every option on this bar, and you may prefer to have them in a different order. Thankfully there's a simple and quick way to customize the icons in your control center on PS5.

Difficulty

Easy

Duration

5 minutes

What You Need

  • Current PS5 firmware

A black screen where you can customize your icons on ps5.
Sony

How to customize your control center icons

All you need to customize your icons is your PS5 and the most current firmware update.

Step 1: Log in to your PSN account.

Step 2: From any screen, tap the PlayStation button to bring up your control center.

Step 3: Press the Options button on your controller.

Step 4: Choose which icon you want to move, press X, and place it in the new location.

Step 5: If you want to take an icon off the center entirely, move it to the bottom row.

Step 6: When your control center is set up the way you like, press the Options button one last time to set them and return to where you left off.

The control center can let you access the home screen, switcher, notifications, game base, music, sound, mic, accessories, profile, and power by default. Options hidden by default include accessibility, voice, and broadcast.

Editors' Recommendations

Jesse Lennox
Jesse Lennox loves writing, games, and complaining about not having time to write and play games. He knows the names of more…
How to start The Forgotten Kingdom DLC in Remnant 2
Invoker

Remnant 2 is a massive game that already boasts nearly endless replayability, but that isn't stopping developer Gunfire Games from adding even more to do in the popular looter shooter. The game's new DLC, The Forgotten Kingdom, provides players with a substantial amount of extra stuff to check out, such as new biomes to explore, an additional archetype known as The Invoker, and plenty of fresh enemies to take down. If you're ready to see all of what The Forgotten Kingdom DLC has to offer, read on to learn how to access it from within the game.
How to start The Forgotten Kingdom DLC
The first step in accessing The Forgotten Kingdom DLC is to ensure you've purchased and downloaded it. You can buy the standalone version from your respective storefront for $10, or you can opt to snag the $25 bundle, which includes The Awakened King, The Forgotten Kingdom, and another future DLC that has yet to be announced. If you intend to play the full trilogy of DLCs, the former is your best option, as you'll save five bucks off the total cost of all three.

Once you've purchased and downloaded the DLC, you'll be ready to access The Forgotten Kingdom by visiting a World Stone and opening Adventure Mode. You'll need to have completed the Yaesha biome at least one time. At that point, you can select "Reroll Adventure Mode" and choose The Forgotten Kingdom: One Shot on the right, which will notably give you exclusive DLC content your first time through. Keep in mind that while this initial run won't feature any older content, your subsequent playthroughs of Yaesha will weave DLC areas in with main campaign content.

Read more
The most common PSVR 2 problems and how to fix them
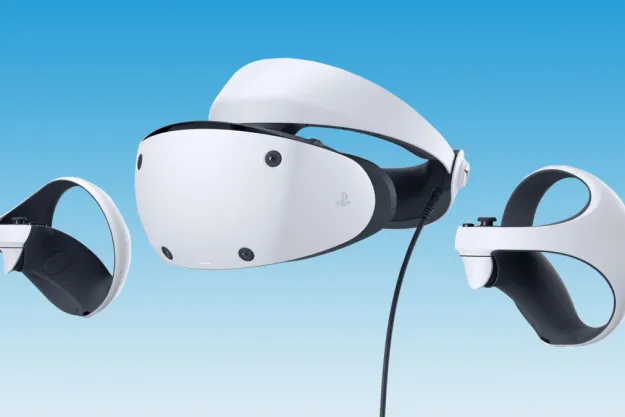
A PSVR2 headset on a sky-blue background.

The hype around PSVR 2 has largely died off just a year after its launch, though there's no denying it’s a cool piece of tech. Making big strides from the original PSVR, the latest headset from Sony offers better graphics, improved tracking capabilities, and introduced the world to the sleek new Sense controllers, which make it easier than ever to interact with your virtual world.

But, like all new pieces of tech, PSVR 2 isn't without its issues. From faulty Sense controllers to blurry images, here's a look at the most common PSVR 2 issues and how to fix them. Many of these steps will also work with PSVR, though note the menu navigation might be slightly different.
Your Sense controller isn't working properly

Read more
How to start the Rising Tide DLC in Final Fantasy 16
Rising Tide DLC

Final Fantasy 16's base adventure is already a long and winding tale full of intrigue, but that doesn't mean there isn't more story to be told in its world. Like the Echoes of the Fallen DLC before it, The Rising Tide DLC serves as an additional journey for Clive and company to undertake, providing players the opportunity to discover various all-new enemies, locations, and characters. This fresh content even includes Leviathan as a new Eikon for Clive to encounter, making it a must-play for completionists hoping to experience everything in the game. If you're wondering how to start The Rising Tide DLC, look no further — we'll tell you how to do so below.
How to start The Rising Tide DLC in Final Fantasy 16
To access The Rising Tide DLC in Final Fantasy 16, you'll first need to be sure you've purchased and downloaded the content. You can buy The Rising Tide as a standalone DLC for $15 or as part of the Expansion Pass, which also includes the Echoes of the Fallen DLC, for $25.

Once you've purchased and downloaded the DLC, however, there's more you'll need to do before you can start tackling the new content in The Rising Tide. For starters, you'll need to have unlocked Origin as a destination on the world map, which requires you to be at the end of the main campaign. You'll also have to complete the two sidequests, "Where There's a Will" and "Priceless," for Joshua and Jill, respectively. After clearing those quests, you can finally head to Clive's quarters at the Hideaway and check the missives table. There, you'll find an unmarked letter that lets you begin a new quest called “The Rising Tide."

Read more