Best Bubble Gems in Foamstars

The major focus of Foamstars is on its characters and their abilities. Once you find one you like, it isn’t obvious that there’s a bit more you can do to tweak them outside of unlocking new cosmetics. Bubble Gems are hard to come by, but offer passive bonuses to whichever character you equip them to. However, you don’t get them for free, and each character can only hold three at a time. If the process all seems a little muddled to you, we’re here to wipe away any confusion and explain the best Bubble Gems to use in Foamstars.

How Bubble Gems work

A Foamstars match with green and pink foam.
Square Enix

We need to begin with a quick rundown of how Bubble Gems actually work in Foamstars. Bubble Gems are basically random rolls you can make by spending Energy Stones, which you can only get either by hitting certain level milestones (5 and 10) or by going through the battle pass. The current pass only rewards Energy Stones at tier 41, so reaching that point will be quite a grind.

While each character has three slots for Bubble Gems, they have different Energy Stone costs. The first one you get only costs one, but the second costs two and three for the third. You also cannot have duplicates of a Bubble Gem in more than one slot.

Note that once you use your Energy Shards to give a character a Bubble Gem, they cannot be applied to any other character.

Best Bubble Gems

There are a total of 14 different Bubble Gems in Foamstars, and they all can be ranked E through S. You will hope to get all S ranks, but you’re better off with these gems at a lower rank than some others at a higher rank.

Movement speed Up

Even the more nimble characters in Foamstars aren’t as quick as you might want. Aside from surfing on your own foam, there’s no way to go any faster than your default run speed without this gem, and even when you can surf, you won’t be able to shoot. This will let you move around at a decent pace, dodge, and chase, plus always be ready for a fight.

Skill cooldown time Down

Skills can range in how useful they are in any situation based on your character, but you never want to hit that button in a critical moment only for nothing to happen. Slap this gem in your kit to let you access your most powerful tools way more often.

Foam damage recovery speed Up

Think of this as buffing your passive health regeneration. When you inevitably get coated in the enemy team’s foam, so long as you survive, you will be stuck waiting for it to wash off before you’re healthy enough to get back into the fray. This gem cuts that downtime so you can stay alive and fighting.

Push back distance Up

Don’t sleep on any knockback abilities in Foamstars. Foaming up your opponents is the most obvious way to “chill” them, but bumping them off the stage is faster and easier when you can pull it off. Stages are on the small side in Foamstars, so this gem can really pull its weight.

Editors' Recommendations

Jesse Lennox
Jesse Lennox loves writing, games, and complaining about not having time to write and play games. He knows the names of more…
The best accessories in Rise of the Ronin
A ronin near a cat on a roof in Rise of the Ronin.

Following in the footsteps of the Nioh games, Team Ninja's Rise of the Ronin is absolutely bursting at the seams with loot. Between mission rewards, materials in the open world, drops from enemies, and loot from treasure chests, you will be managing your gear very often to keep your character as strong as possible. Aside from your two weapons and armor slots, you begin with a single Accessory item to equip. These are more unique items that fall into certain categories that focus on buffing specific stats or aspects of your character. Picking the right one, or multiple once you unlock additional slots, really ties your build together. Here are a few of the best Accessories to keep an eye out for while exploring Japan.
Best Accessories
While each Accessory is unique, there are only a few "types" that have variations in terms of their main effect's potency and what secondary bonuses they offer. The examples we list mainly focus on that primary stat, so even after you find one, you may encounter one of the same type later with a better version of that effect. Also, all stats stack. If you have multiple slots and want to really buff one specific thing, slot in multiple of the same Accessory type.
Talismanic Arrow

The Talismanic Arrow's main buff is related to how much Karma you gain for everything you do in Rise of the Ronin. Because Karma is cashed in for skill points, it goes without saying that you will want to build up as much as possible. Early versions will give you low percentage increases, but when you consider how much Karam you get all the time, it adds up fast. The extra perks that come with it are less important but may end up helping your build as well.
Calabash Gourd

Read more
The best skills in Rise of the Ronin
Rise of the Ronin protagonist using a pistol.

While you do pick a starting class of sorts in Rise of the Ronin, that doesn't lock you out of using any of the game's numerous weapons or abilities. That initial choice simply determines your starting stats and skills, and you can still freely mold your ronin's proficiencies with as much detail as you can their appearance. Previous Team Ninja games have had some less-than-friendly UIs for their leveling system, and while it is much better here, it is still quite overwhelming. You have multiple branches of skills spread across the four main categories, plus most skills can be leveled up more than once. If you're ready to learn the ways of the samurai, enter our dojo to learn which skills are the best.
The best skills in Rise of the Ronin
Skills are broken down into the Strength, Dexterity, Charm, and Intellect branches. Some skills just require normal skill points, while others must be unlocked using that section's specific skill points.
Best Intellect skills

A major part of the time period of Rise of the Ronin involves the introduction of outside influences on Japan, with firearms being one of the biggest disruptors. Along with your katanas and bows, handguns and rifles can be equipped and used in fights. The Handgun Critical Hit gives you a second option when you deplete an enemy's ki 9basically a stamina and stagger bar). Instead of doing a powerful melee attack with whatever weapon you have, you can pull the left trigger to deal an even stronger finishing move with your pistol. It's flashy and deadly.

Read more
The best vocations in Dragon’s Dogma 2
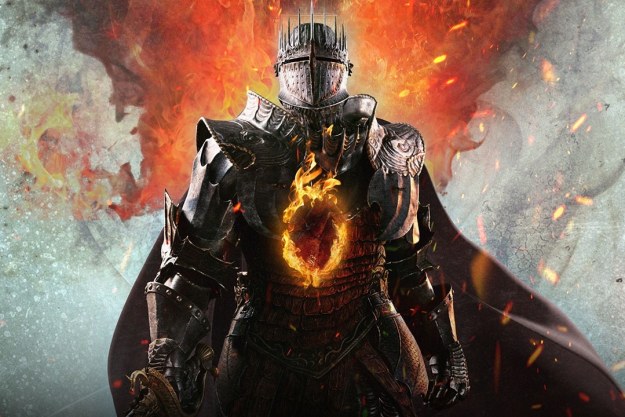
Dragon's Dogma 2 key art featuring a knight with a fiery hole in their chest.

Your Vocation defines your role in combat in Dragon's Dogma 2. Everything from your skills to what weapons and armor you can use is tied to this class. You will pick from just a handful at the beginning of the game, but can easily change Vocations later on, as well as unlock more than twice as many new options than what you start with. It can take a while to really get a feel for a Vocation and how it performs in combat, as well as to look through all of its skills and augments, before knowing if it's worth sticking with to level up. Personal preference will play a part to some degree, but these Vocations have the most potential to make you the strongest Arisen in history.
The best vocations in Dragon's Dogma 2

You can pick from 4 Vocations at the start of Dragon's Dogma 2, but will end up with a total of 10 by the end of the game if you unlock them all. New Vocations are unlocked by completing quests, but they are almost unmissable. Four Vocations -- the Magick Archer, Mystic Spearhand, Trickster, and Warfarer -- can only be used by your character and not any Pawns.
Warfarer
There's very little downside to being a jack-of-all-trades in Dragon's Dogma 2, which is exactly what the Warfarer is. This is the only Vocation that can use any weapon in the game AND learn any skill from other Vocations. This is the only Vocation that really lets you build whatever class you want and gives you the ability to adapt to any situation you find yourself in. The main downside to this class is it has the lowest base stats, but that is a small price to pay for how versatile you can be.
Mystic Spearhand
Hybrid Vocations are all quite powerful, but we put the Mystic Spearhand at the top of the heap. This class turns you into a fighter that can take advantage of magic to output crazy damage. The two almost overpowered abilities you get here are the ability to slow enemies for a short time and to create a magical mimic that doubles all your actions. It is great for both crowd control and large single targets, but takes a while to unlock and lacks some range.
Warrior
If you're going to be a straight-up melee fighter, you might as well hit with the biggest weapon you can, right? The Warrior swings swords large enough to make Guts blush and is a full-on tank. You won't be doing anything fancy with this vocation beyond charging up and swinging as hard as possible. The obvious drawback is any flying or ranged enemy will counter you, so bring some Pawns in those classes to cover your bases.
Sorcerer
For those who fancy themselves a pure mage, stick to the Sorcerer over the actual Mage vocation. While the Mage is more focused on healing, it is the Sorcerer who gets the best offensive spells you will want to be casting. If you have a second Sorcerer with you, you can even sync up and decrease your casting time. If not, you will need some tanks to take aggro while you deal with some slightly long casting times and low total health.
Thief
As far as the starting Vocations go, the Thief is the one we find the most fun and viable for the entire game. This is a light and speedy build focused on critical hits and being able to climb and hang on to large beasts. Once on, you have a number of great skills to stagger and knock down an enemy so the rest of your squad to gang up on it. Just don't get hit because you're one of the squishier Vocations.

Read more