
Fortnite Peter Griffin guide: how to unlock the skin and beat the boss

If there’s one thing you can count on in each season of Fortnite, it’s that there will be an exciting new crossover or two to keep various fandoms on their toes. We’ve seen everything from Star Wars to Attack on Titan to Futurama, and chapter 5, season 1 is here to surprise us yet again with the shocking addition of Family Guy‘s Peter Griffin. The beloved cartoon character makes an appearance in multiple capacities, serving both as a boss that can be defeated and a skin that you can unlock in the battle pass. In this guide, we’ll tell you how to get the skin for yourself, as well as how to tackle the boss battle against everyone’s favorite lovable oaf.

How to get the Peter Griffin skin

Peter Griffin’s skins can be unlocked in the chapter 5, season 1 battle pass, which can be purchased for 950 V-Bucks.

You’ll find Peter Griffin’s first skin on Page 11 of the battle pass, so you’ll need to reach level 70 to unlock it. However, you can also score two alternate skins for the character by completing all 100 levels of the battle pass and proceeding to Page 2 of the Bonus Rewards section. It’s also possible that additional Peter Griffin alternate skins will be added to these Bonus Rewards in the coming weeks as new skins are revealed for this extra layer of the battle pass.

Peter Griffin in the Chapter 5 Season 1 Battle Pass
Epic Games

How to beat the Peter Griffin boss

Peter Griffin enemy in Fortnite.
Epic Games

Peter Griffin can be found at Snooty Steppes. He’s encountered in the large villa on the highest steppe on the far left side of the point of interest.

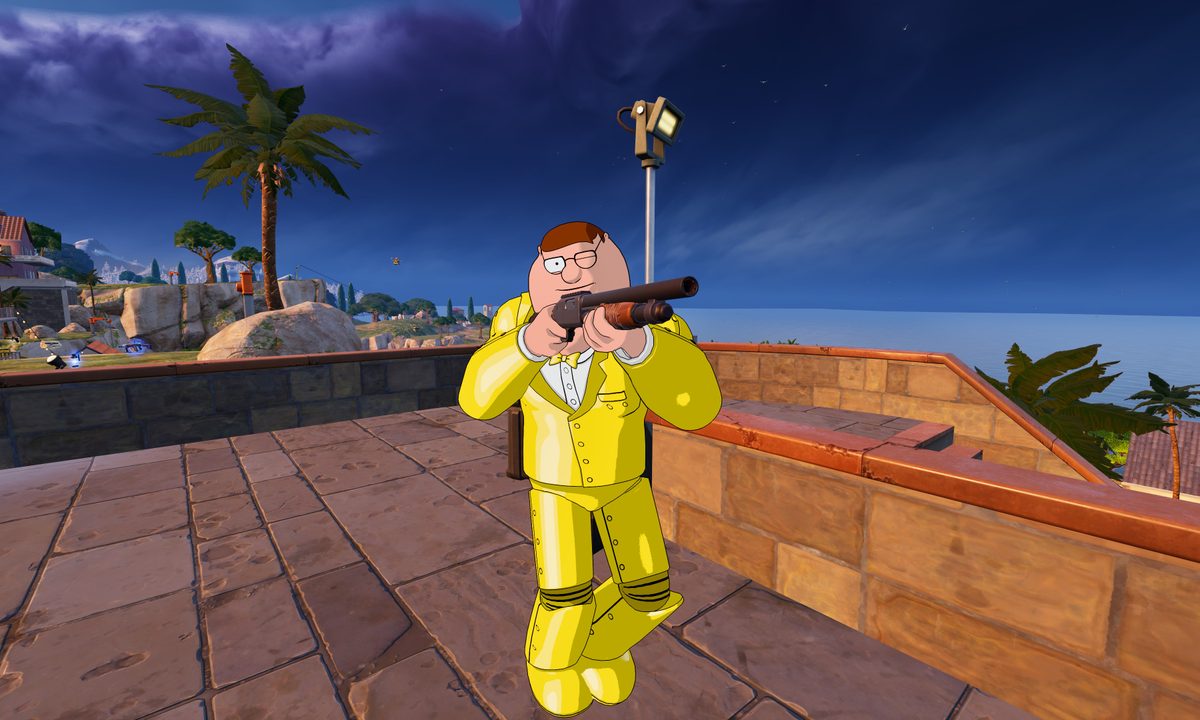
Seeing as he’s a boss, it’s best that you come into the battle well-prepared, so loot the surrounding area for at least a gun or two, plenty of ammo, and full shields. When you’re ready to face him, head inside to find him walking around wearing his golden suit, at which point he’s likely to notice you, too, and begin firing.

Start the fight off by aiming for his rather large head and dealing out as much damage as possible while staying close to a pillar or wall you can use to hide behind if needed. He’ll charge at you, so make use of this cover to reload and then pop back out for more damage opportunities when he’s doing the same. Beware that he may throw some explosives at you, so don’t hesitate and end up blown to smithereens. If you need to recoup, find a safe spot and heal up quickly, then resume your assault.

When Peter Griffin goes down, you can loot him for his Mythic Hammer Pump Shotgun and a boss medallion you can pick up to constantly regain shields throughout the remainder of the match. You can also use the medallion to open the vault nearby to find some chests and a Weapon Mod Bench.

Editors' Recommendations

Billy Givens
Billy Givens is a freelance writer with over a decade of experience writing gaming, film, and tech content. His work can be…
How to start The Forgotten Kingdom DLC in Remnant 2
Invoker

Remnant 2 is a massive game that already boasts nearly endless replayability, but that isn't stopping developer Gunfire Games from adding even more to do in the popular looter shooter. The game's new DLC, The Forgotten Kingdom, provides players with a substantial amount of extra stuff to check out, such as new biomes to explore, an additional archetype known as The Invoker, and plenty of fresh enemies to take down. If you're ready to see all of what The Forgotten Kingdom DLC has to offer, read on to learn how to access it from within the game.
How to start The Forgotten Kingdom DLC
The first step in accessing The Forgotten Kingdom DLC is to ensure you've purchased and downloaded it. You can buy the standalone version from your respective storefront for $10, or you can opt to snag the $25 bundle, which includes The Awakened King, The Forgotten Kingdom, and another future DLC that has yet to be announced. If you intend to play the full trilogy of DLCs, the former is your best option, as you'll save five bucks off the total cost of all three.

Once you've purchased and downloaded the DLC, you'll be ready to access The Forgotten Kingdom by visiting a World Stone and opening Adventure Mode. You'll need to have completed the Yaesha biome at least one time. At that point, you can select "Reroll Adventure Mode" and choose The Forgotten Kingdom: One Shot on the right, which will notably give you exclusive DLC content your first time through. Keep in mind that while this initial run won't feature any older content, your subsequent playthroughs of Yaesha will weave DLC areas in with main campaign content.

Read more
The best cozy games
Riding in a boat with Kapp'n in Animal Crossing: New Horizons.

In a world where so many games send you on missions with tense action and high stakes, sometimes it's nice to just sit back and relax a bit. That's where the cozy genre comes in with calming exploration, crafting, and decorating that give you a sense of purpose without all of the stress that comes from more action-oriented games. If that's what you're after, look no further, as we've compiled a list of what we consider to be the best cozy games you can play right now.

Animal Crossing: New Horizons

Read more
All cross-platform games (PS5, Xbox Series X, PS4, Xbox One, Switch, PC)
Two squads of heroes clash in an Overwatch 2 trailer.

Cross-platform support is becoming more important in the world of video games. Multiplayer hits like Call of Duty: Warzone 2.0 and Fortnite have pushed crossplay into the limelight, and now most AAA multiplayer games release with at least partial cross-platform support. Finding every cross-platform game is no easy feat, though, so we did the hard work to bring you a comprehensive list of games that support crossplay.

Unfortunately, there aren't any rules when it comes to crossplay, so each game handles the feature a little differently. To make matters more confusing, certain backward-compatible games on the PlayStation 5 and Xbox Series X still support crossplay on the most recent hardware, even if there isn't an official release for that hardware.

Read more