
Fortnite season 8, week 10 challenge guide: Kakashi

Fortnite is known for its crossovers and this week, players can participate in a Questline given by Kakashi from the Naruto series. The challenges are in line with many of the others from this season in terms of difficulty, but some of them might cause some trouble, especially if you don’t play often.

In this guide, we’ll show you where to find Kakashi and how to complete all of the challenges associated with this NPC in Fortnite.

Recommended reading:

Kakashi challenge list

Map of Kakashi in Fortnite.
Fortnite.gg

Fort Jutsu Questline

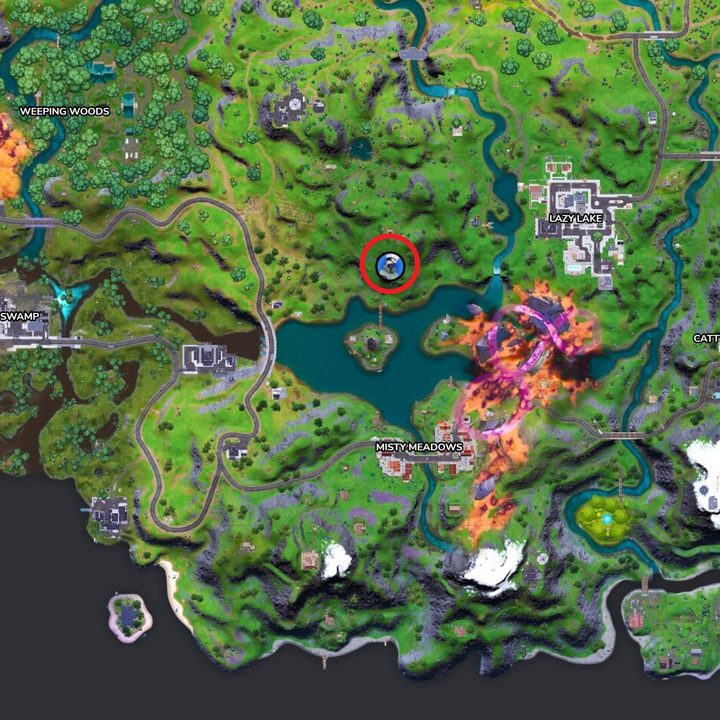
To begin the Fort Jutsu Questline, make sure to visit Kakashi to the north of Misty Meadows across the lake with the little island in the middle. He’s located by the large rocks on the hill.

  • Scout UFO Crash Site (1)
  • Hit players with a Paper Bomb Kunai (3)
  • Build a structure after taking damage (1)
  • Place or destroy trap (1)
  • Tame wildlife with the Hunter’s Cloak (1)

Kakashi challenge guide

Scout UFO crash site (1)

Map of UFO crash sites in Fortnite.
Fortnite.gg

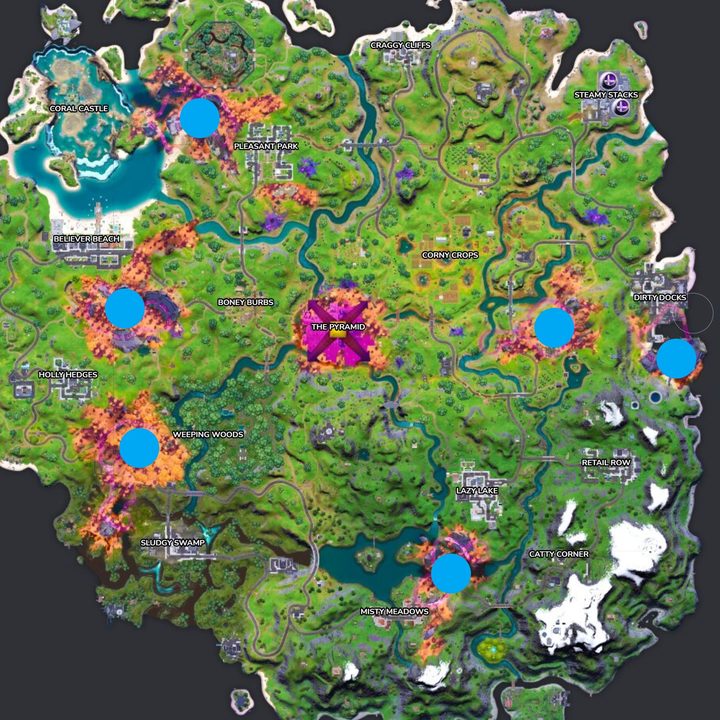
There are six UFO crash sites in Fortnite during season 8. They appear on the map as orange and purple sections of land and — as the name suggests — have UFO parts scattered around. You’ll find one to the northeast of Holly Hedges, to the west of Weeping Woods, to the northeast of Misty Meadows, in between Corny Crops and Retail Row, south of Dirty Docks, and west of Pleasant Park for a total of six crash sites. Simply visit one to complete this challenge.

Hit players with a Paper Bomb Kunai (3)

Standing in front of Kakashi in Fortnite.

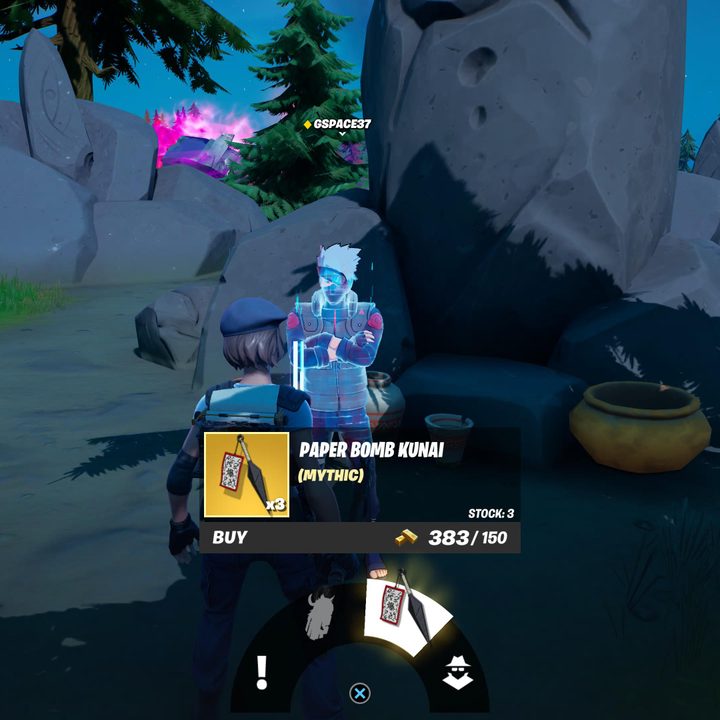
You can actually buy Paper Bomb Kunai from Kakashi for 150 gold bars, in addition to being able to find them around the world. For this challenge, you need to throw three Kunai at enemies. It can be an NPC and you can throw multiple Kunai at the same opponent. As long as three Kunai connect, you’ll earn credit for this one.

Build a structure after taking damage (1)

A wooden ramp in Fortnite.

For this one, build a ramp a couple of stories high and drop off to take fall damage. Then build another structure to complete this challenge.

Place or destroy trap (1)

Trap in Fortnite.

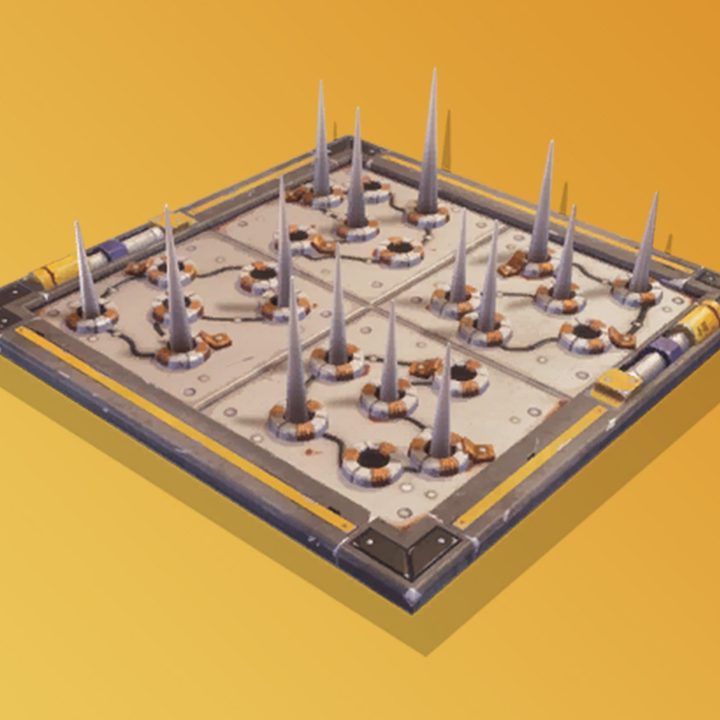
Traps are found in chests around the world, so be on the lookout for one and place it down as soon as you find one. Alternatively, you can simply destroy an enemy’s trap, which you’re likely to encounter towards the end of a match.

Tame wildlife with the Hunter’s Cloak (1)

Chasing a boar in Fortnite.

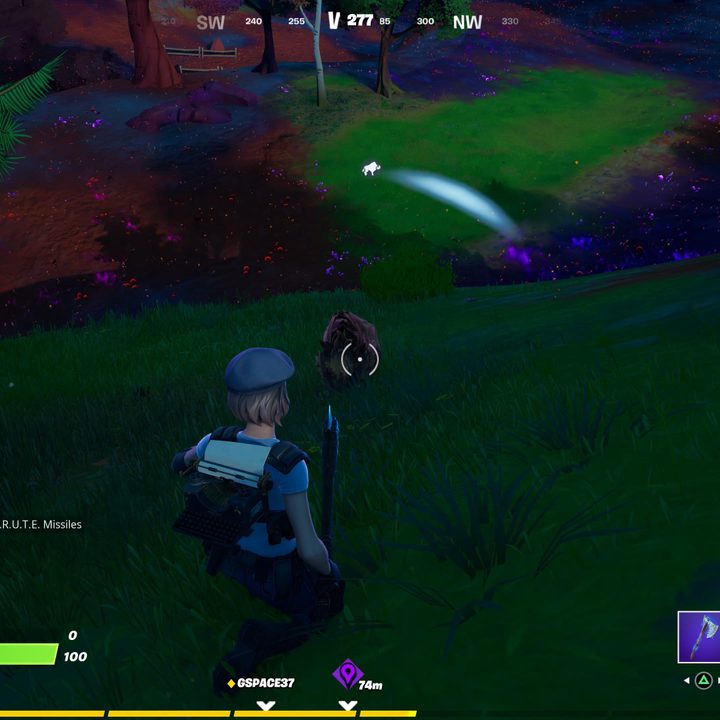
Finally, you should make a Hunter’s Cloak by combining two meat, or by purchasing it for 400 gold bars from Kakashi. Activate the Cloak and then approach a creature such as a wolf or boar, and you’ll be able to tame it and complete the challenge.

Editors' Recommendations

Joseph Yaden
Joseph Yaden is a freelance journalist who covers loves Nintendo, shooters, and horror games. He mostly covers game guides…
How to give specialist a command in Fortnite
Character interacting with NPC in Fortnite.

As part of Fortnite's Spring Breakout Daily Quests, players are tasked with giving a hired specialist character a command. Of course, the game doesn't specify how to do this exactly, leading to some confusion amongst the community. Thankfully, we've got everything you need to know about completing this new quest with ease in Fortnite.
How to hire a specialist

Specialist Characters are specific NPCs all around the map. If you pull up the quest itself, you'll actually see a map of all the Specialist Characters. Keep in mind that not all NPCs fall into this category, so be sure to look at the map. We like the one to the very north of Breakwater Bay as it's usually out of the way. Once you find them, you'll need to pay 200 Gold Bars to hire them. If you don't have the funds, be sure to play more and complete bounties as needed.
How to give a character a command
After you've hired the Specialist Character, they'll be on your side for the duration of the match. If you look at the top left side of the screen, you'll see an icon that represents the Follower Communications wheel. Press and hold left on the D-pad on console or the middle mouse button on PC to get this menu to appear. Once it does, you can pick from a list of commands such as wait or follow. To complete the quest, you simply need to issue one command and after the NPC does what you ask, you'll earn credit for completing it.

Read more
A list of all the Fortnite augments, and how to use them
Fortnite

Every new chapter of Fortnite is a massive event. While seasonal changes bring plenty of minor tweaks and additions, it's almost always when a new chapter rolls around that major overhauls or new mechanics are introduced. Fortnite Chapter 4 was no exception, and aside from the extreme changes the island underwent, it brought one very important change to gameplay that wmakes a huge difference when going for that illusive victory royal (it isn't easy to win Fortnite, after all).

Augments, well, augment the game. There are a few challenges that somewhat introduce what these are, but they leave out almost all the important details for you to find out on your own. Augments need to be considered, and deeply understood, not only for when you get them yourself but to know what new tricks your opponents could have up their sleeves. Before you get taken by surprise, here's a complete breakdown of how to unlock augments and how they work in Fortnite.
What are augments in Fortnite?
Augments, or Reality Augments, are essentially a new perk system introduced into Fortnite. There are currently 22 augments in the game, but with more to come in future updates. You can get access to multiple augments during a single match, but augments do not carry over after a match is finished, whether you win or lose. These perks can range from modifying certain weapon types to granting buffs for performing actions, and much more. There are no bad augments, so you will want to get as many as possible. Augments also have their own tab in your menu where you can see which ones you've had so far to track your progress using them all.
How use Fortnite augments

Read more
Resident Evil 4 Shooting Gallery guide: locations, rewards, and tips
Leon holding a gun in Resident Evil 4.

The fact that Resident Evil 4 remake retains the original's ability to mix horror with campy fun is one of its greatest aspects. One moment you will be gripping your controller for dear life as a swarm of bloodthirsty villagers relentlessly pursue you, and the next Leon's making quips and performing suplexes. There was one small fun diversion in the original game that has been expanded and improved for the remake, which is the optional Shooting Gallery. This time there are multiple of these safe spaces to hone your aim, but also a fully developed system of challenges, scores, and, best of all, rewards. If you want to take a breather from all the horrors that await you in Resident Evil 4 remake, here's where you can find all the Shooting Galleries, what you can win, and some helpful tips.
Shooting Gallery locations

There are a total of five locations across all 16 Chapters of Resident Evil 4 remake, and they all are within the safety of a Merchant zone. Each one, except the last, will introduce a new set of three challenges, but all previous challenges from past Shooting Galleries will be present in the later ones. That means you could technically wait and only visit the final one to take on all the challenges there. Here's where you can find each individual Shooting Gallery in order of appearance:

Read more